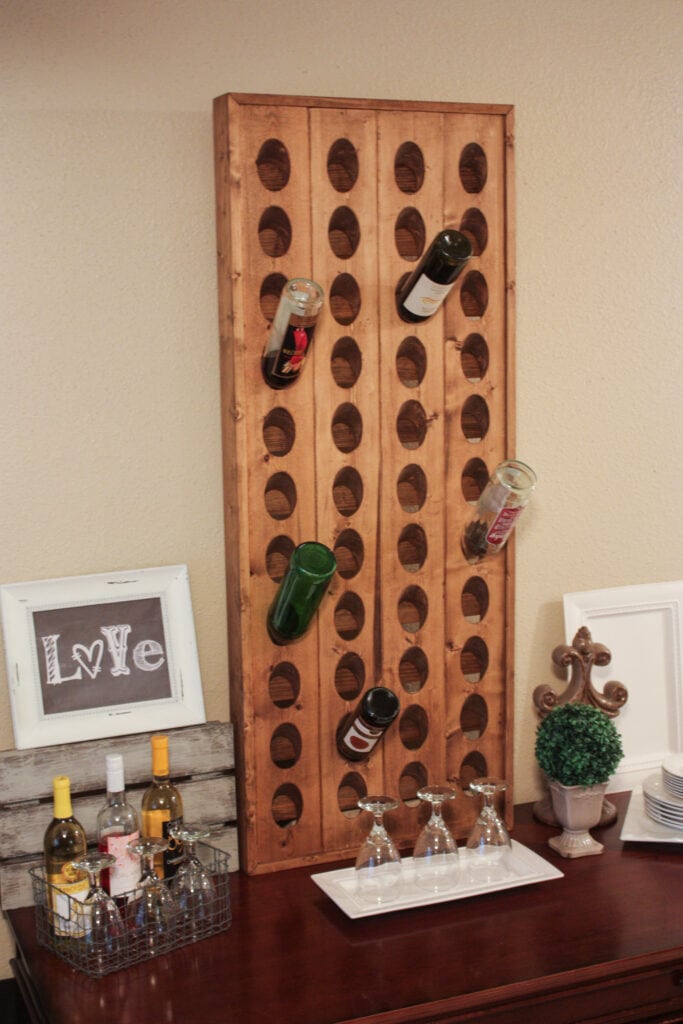
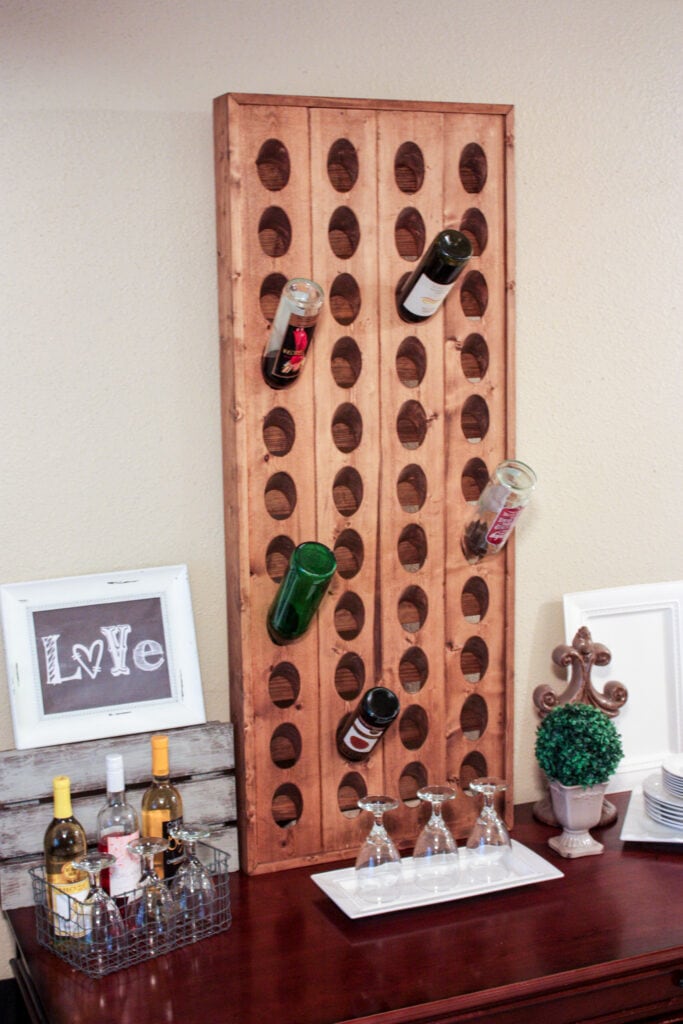
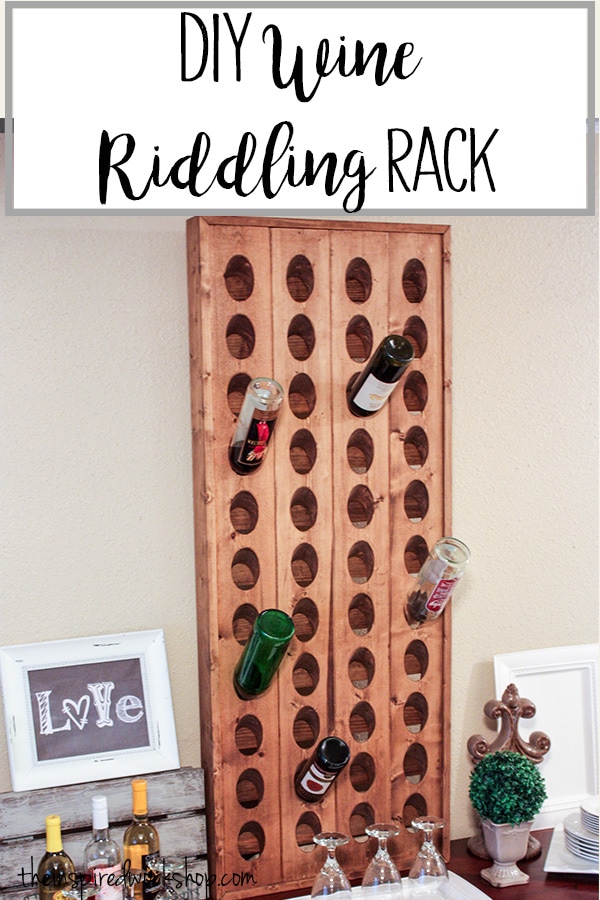
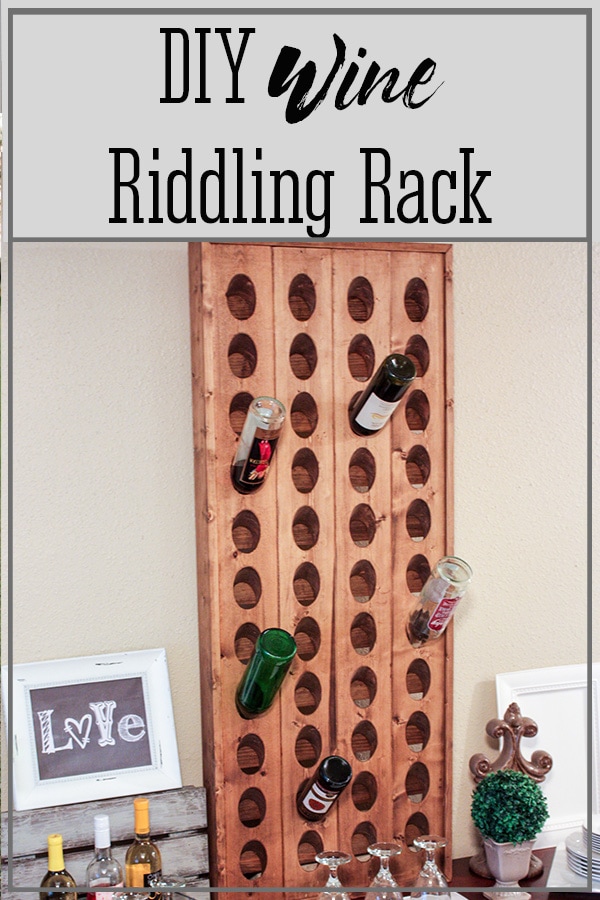
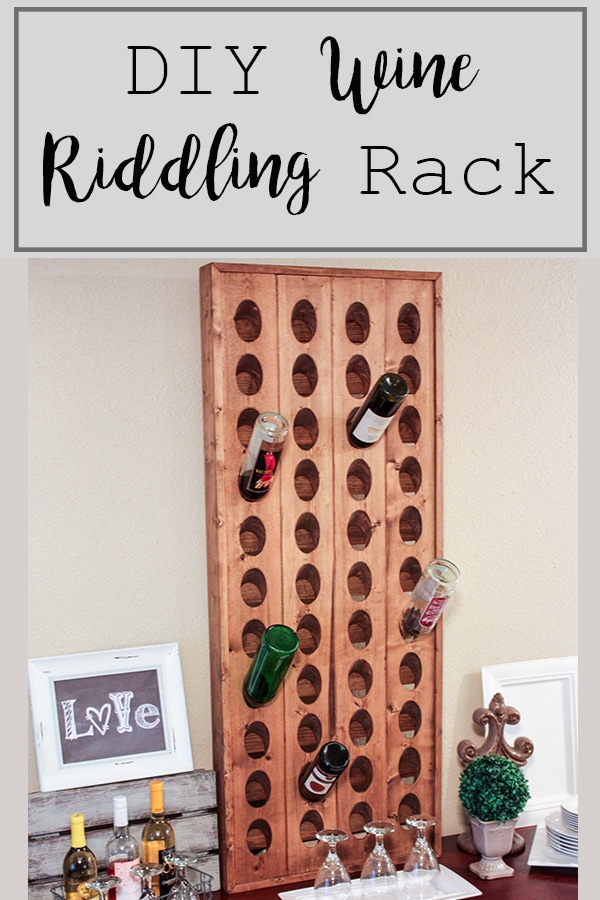
DIY Wine Riddling Rack
Wine is a dinner staple and storing wine can be a hassle if you don’t have a wine cellar or large pantry to store it in. This wall-mounted DIY wine riddling rack is the perfect solution to store all of your wine on the wall! Build two or more and just keep adding to the storage amount! Not only does this riddling rack store all your wine, it is a work of art!
*This post is sponsored by Kreg Tool!
So, I have LOVED a riddling rack like this from Pottery Barn for the longest time, but since I am not a wine drinker I really hadn’t thought too much about building it…that is until Kreg came to me and asked me to build something and give it away for Mother’s Day!! I was so excited and thought…here is my chance I can build this amazing wine riddling rack!! And now that I have built it, wine drinker, or not, I want one! Lol! So even if you aren’t a wine drinker, it holds empty wine bottles as well and so anyone can enjoy this piece!
If you enjoy wine with dinner or when you have friends and family over, you may also enjoy these DIY wine projects! This DIY wine caddy helps you easily carry a bottle of wine and glasses to serve to your guests! And my favorite DIY wine dispenser to make your boxed wine look good while serving it to your guests!
I wish I would have taken more finished pictures, but I was in a hurry to get it posted, and then gave it away! The photos do not do this beautiful wine rack justice!
Gathering Supplies to Build a Wine Riddling Rack
This was by far my most challenging project to date even though it looked like it would be so easy to build…I was wrong! I will admit…if I didn’t have my Dad’s expertise I probably would have given up for now and put this project on the back burner! I thought…oh yea…I will use my Dad’s drill press…drill these holes really quick and plank it together…an afternoon of work for an amazing diy wine riddling rack that I can give away for Mother’s Day! Yea! Nope, no way…it DID NOT go like that at all! LOL!
Lucky for you though, we figured out a way to get it done…my Dad really to be honest…and it is a little time-consuming but WELL worth it!! I just LOVE this riddling rack!!! And yes I am building one for myself as well!! Lol!!
Material List for Wine Riddling Rack:
**NOTE: Amazon links below are affiliate links! Affiliate links are links that pay me a small commission (at no extra cost to you) should you make a purchase after clicking a link! Thank you in advance for supporting my website and helping me continue to bring free plans to you all!
- 4 – 2x6x8
- 2- 1x4x8
- 3 – 1x3x8
- 2 1/2″ Hole Saw
- drill press (this can be done without one…possibly using one of these drill guides)
- long 1/4″ drill bit
- Kreg Jig
- 2 1/2″ Pocket hole screws
- drill
- brad nailer or finishing nails and hammer
- 1 1/2″ brad nails
- 1 1/4″ wood screws
- wood glue
- heavy duty hanging hardware (this sucker is HEAVY)
Cut List for Wine Riddling Rack:
- 4 – 2×6 @ 56″
- 1x4s will be beveled so they will need to be cut after it is assembled and measured because miters have to be precise measurements
- 11 – 1×3 @ 21″
Alright…let’s build this wine rack!!
Building the DIY Wine Riddling Rack
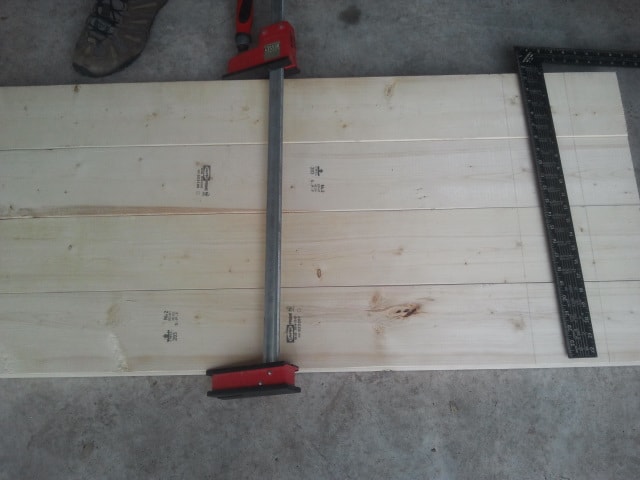
To get started building the wine riddling rack, of course, you must cut your 2×6 boards down to the 56″ length. Then clamp the boards all together…the way they are going to be planked, to line up our marks of where we were going to drill holes!
We determined that we were going to drill the top and bottom holes 4 3/4″ from the ends of the board and then the other holes were measured every 4 1/4″, and then we used a square to draw lines across all the boards at one time… you can sort of see this in the picture below…
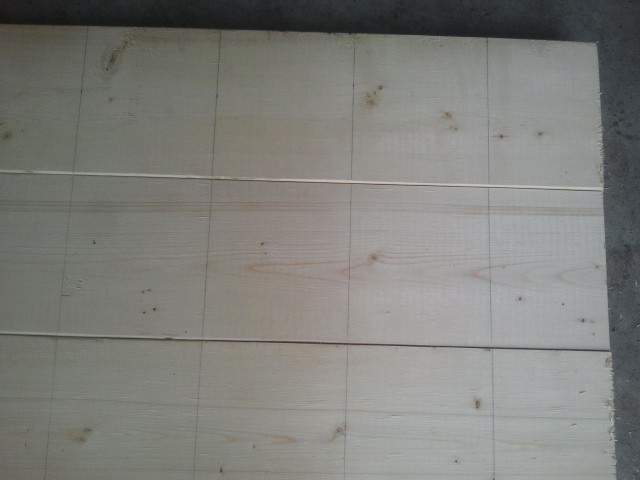
Once you have the lines marked all the way down the board, you then have to find the exact center of each board and mark it on each line going down the board…this will be where you will line up the drill bit to drill the holes!
Now you will have to set your drill press up to bevel the holes at a 45-degree angle, this is easily adjusted if your drill press is able to do it, you just turn the plate that holds the board to 45 degrees. If your drill press does not bevel, there is a drill guide (affiliate link) you can buy, they are inexpensive but I am not sure how well they work…I was looking at buying one but haven’t yet, but the reviews are pretty dang good on the one I linked!
Next, clamp a scrap piece of plywood to the plate so you can drill as deep as possible without damaging the drill bit and hole saw. And last, clamp a board to the outside edge so that you will not have to readjust your board every time, you move it or change boards out.
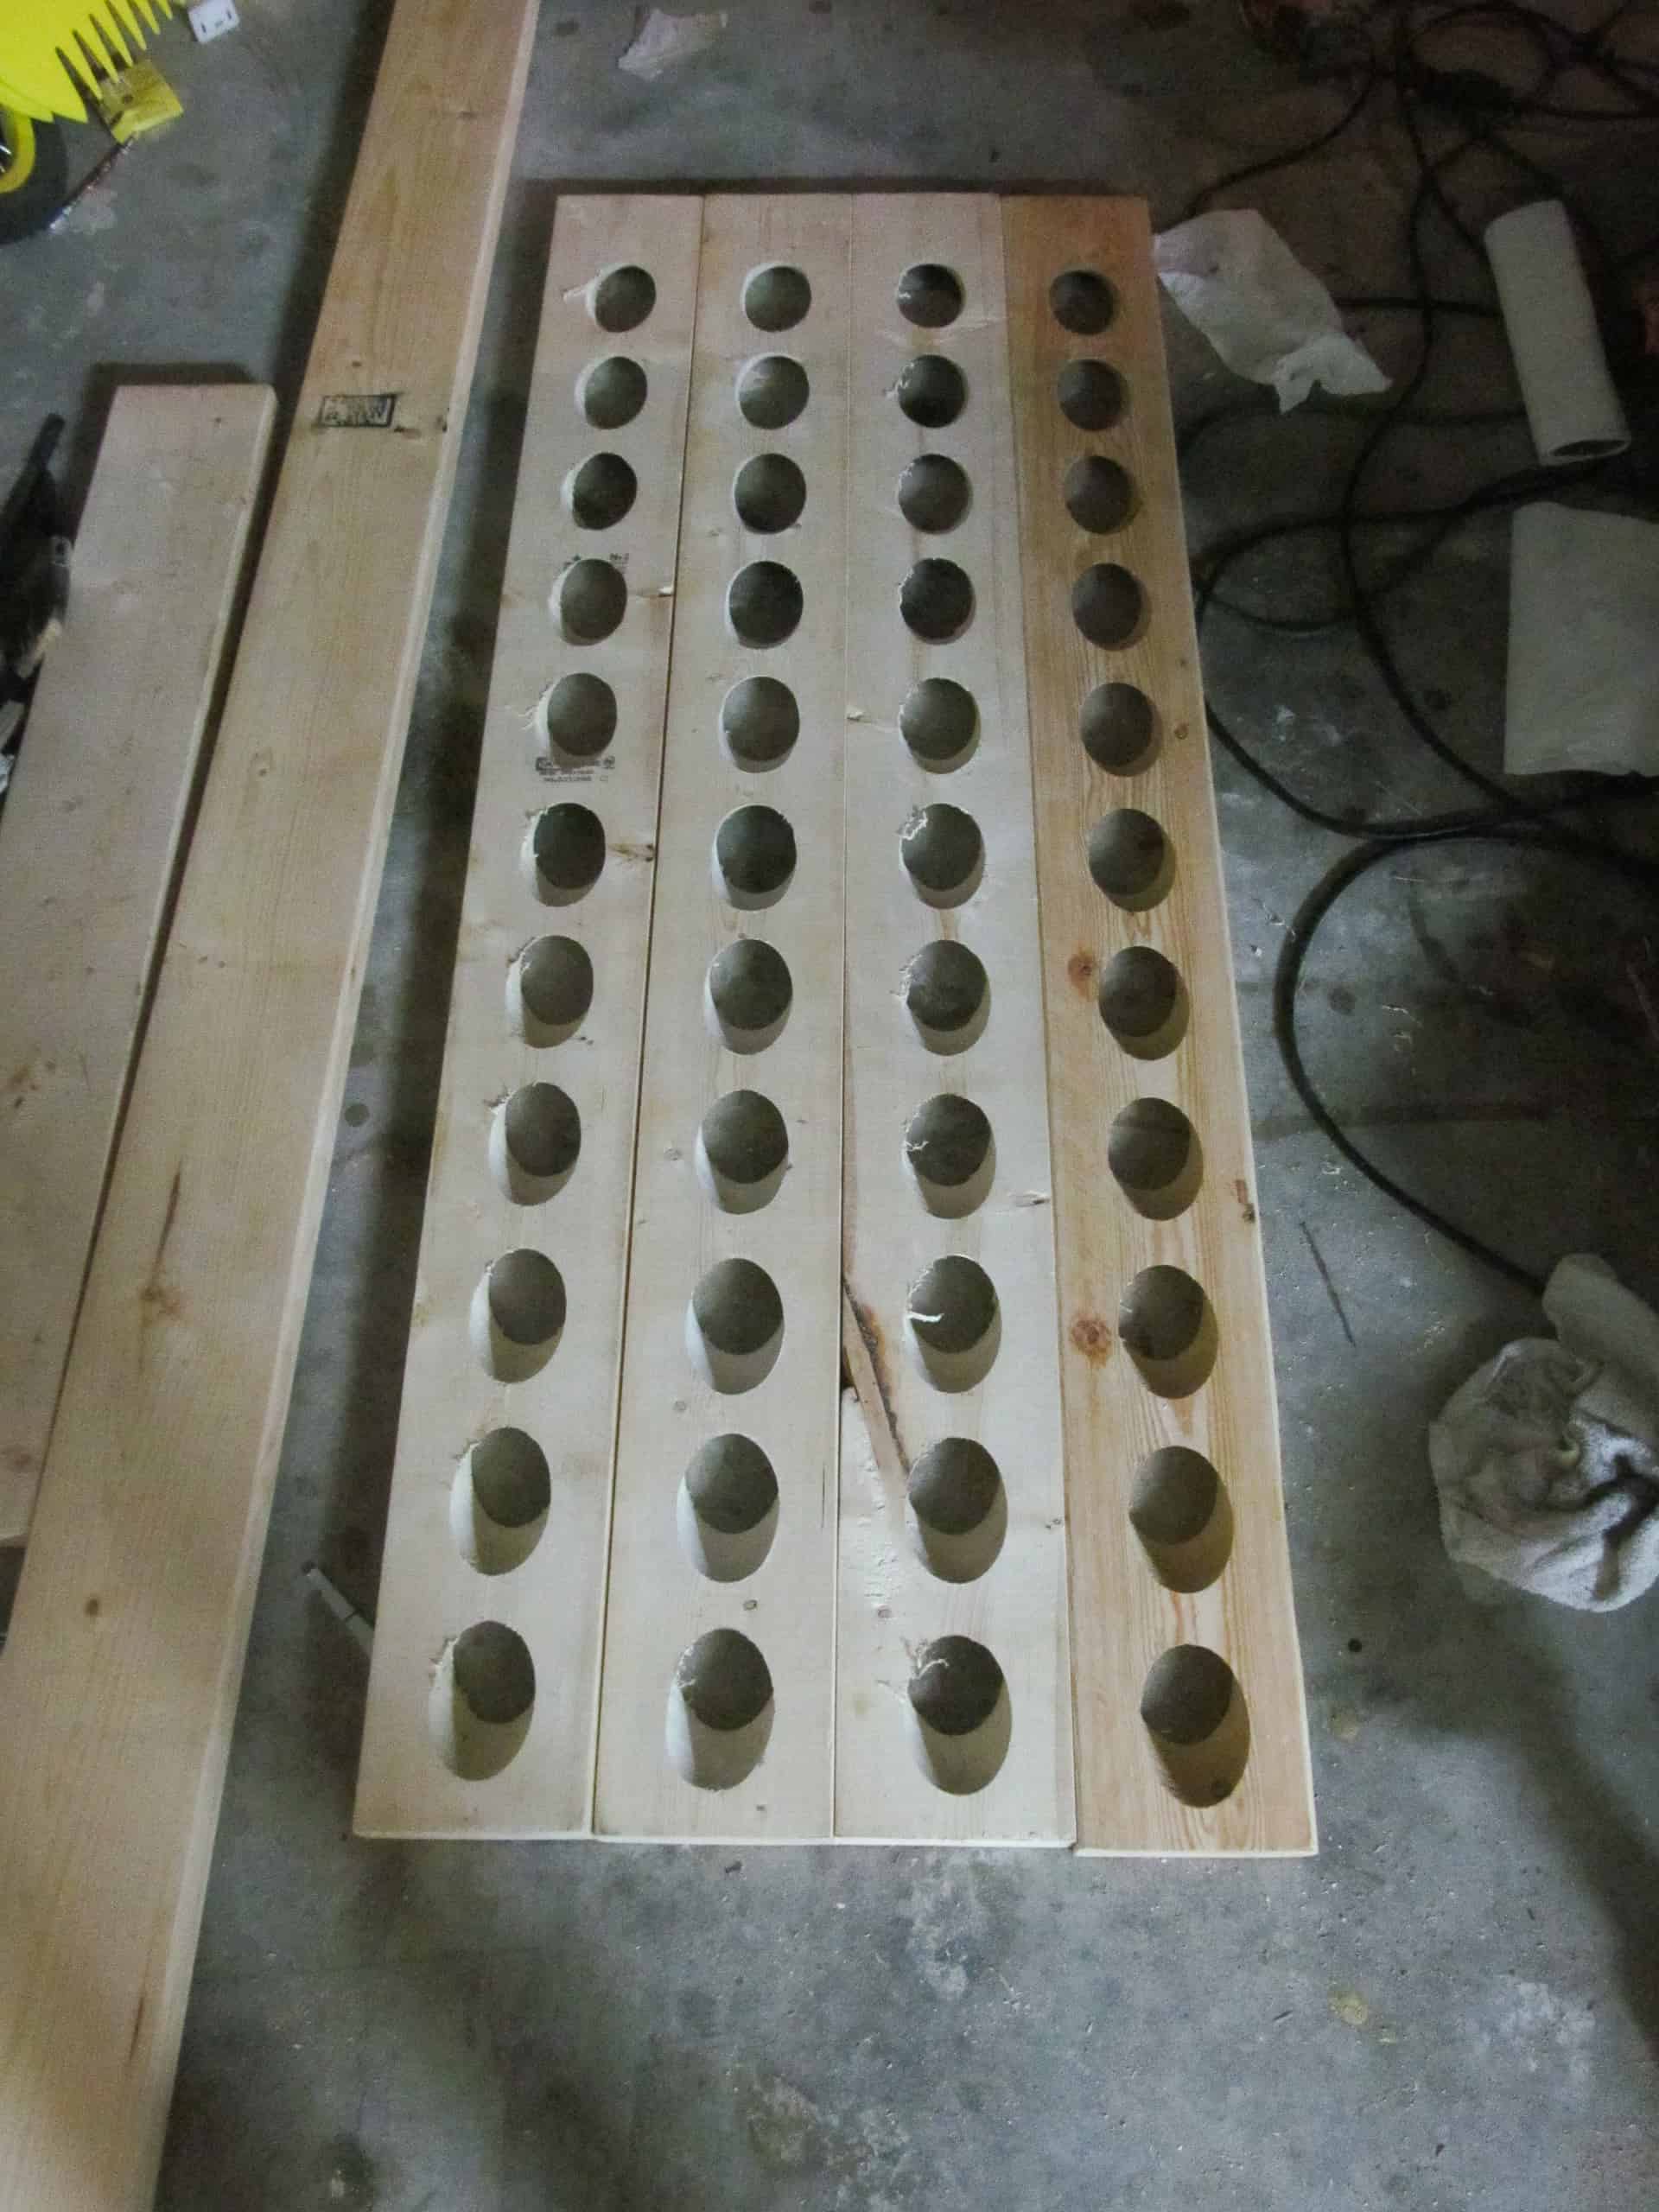
Here the drill press is ready to drill the first round of holes!!

Here is the progress after drilling the first round!
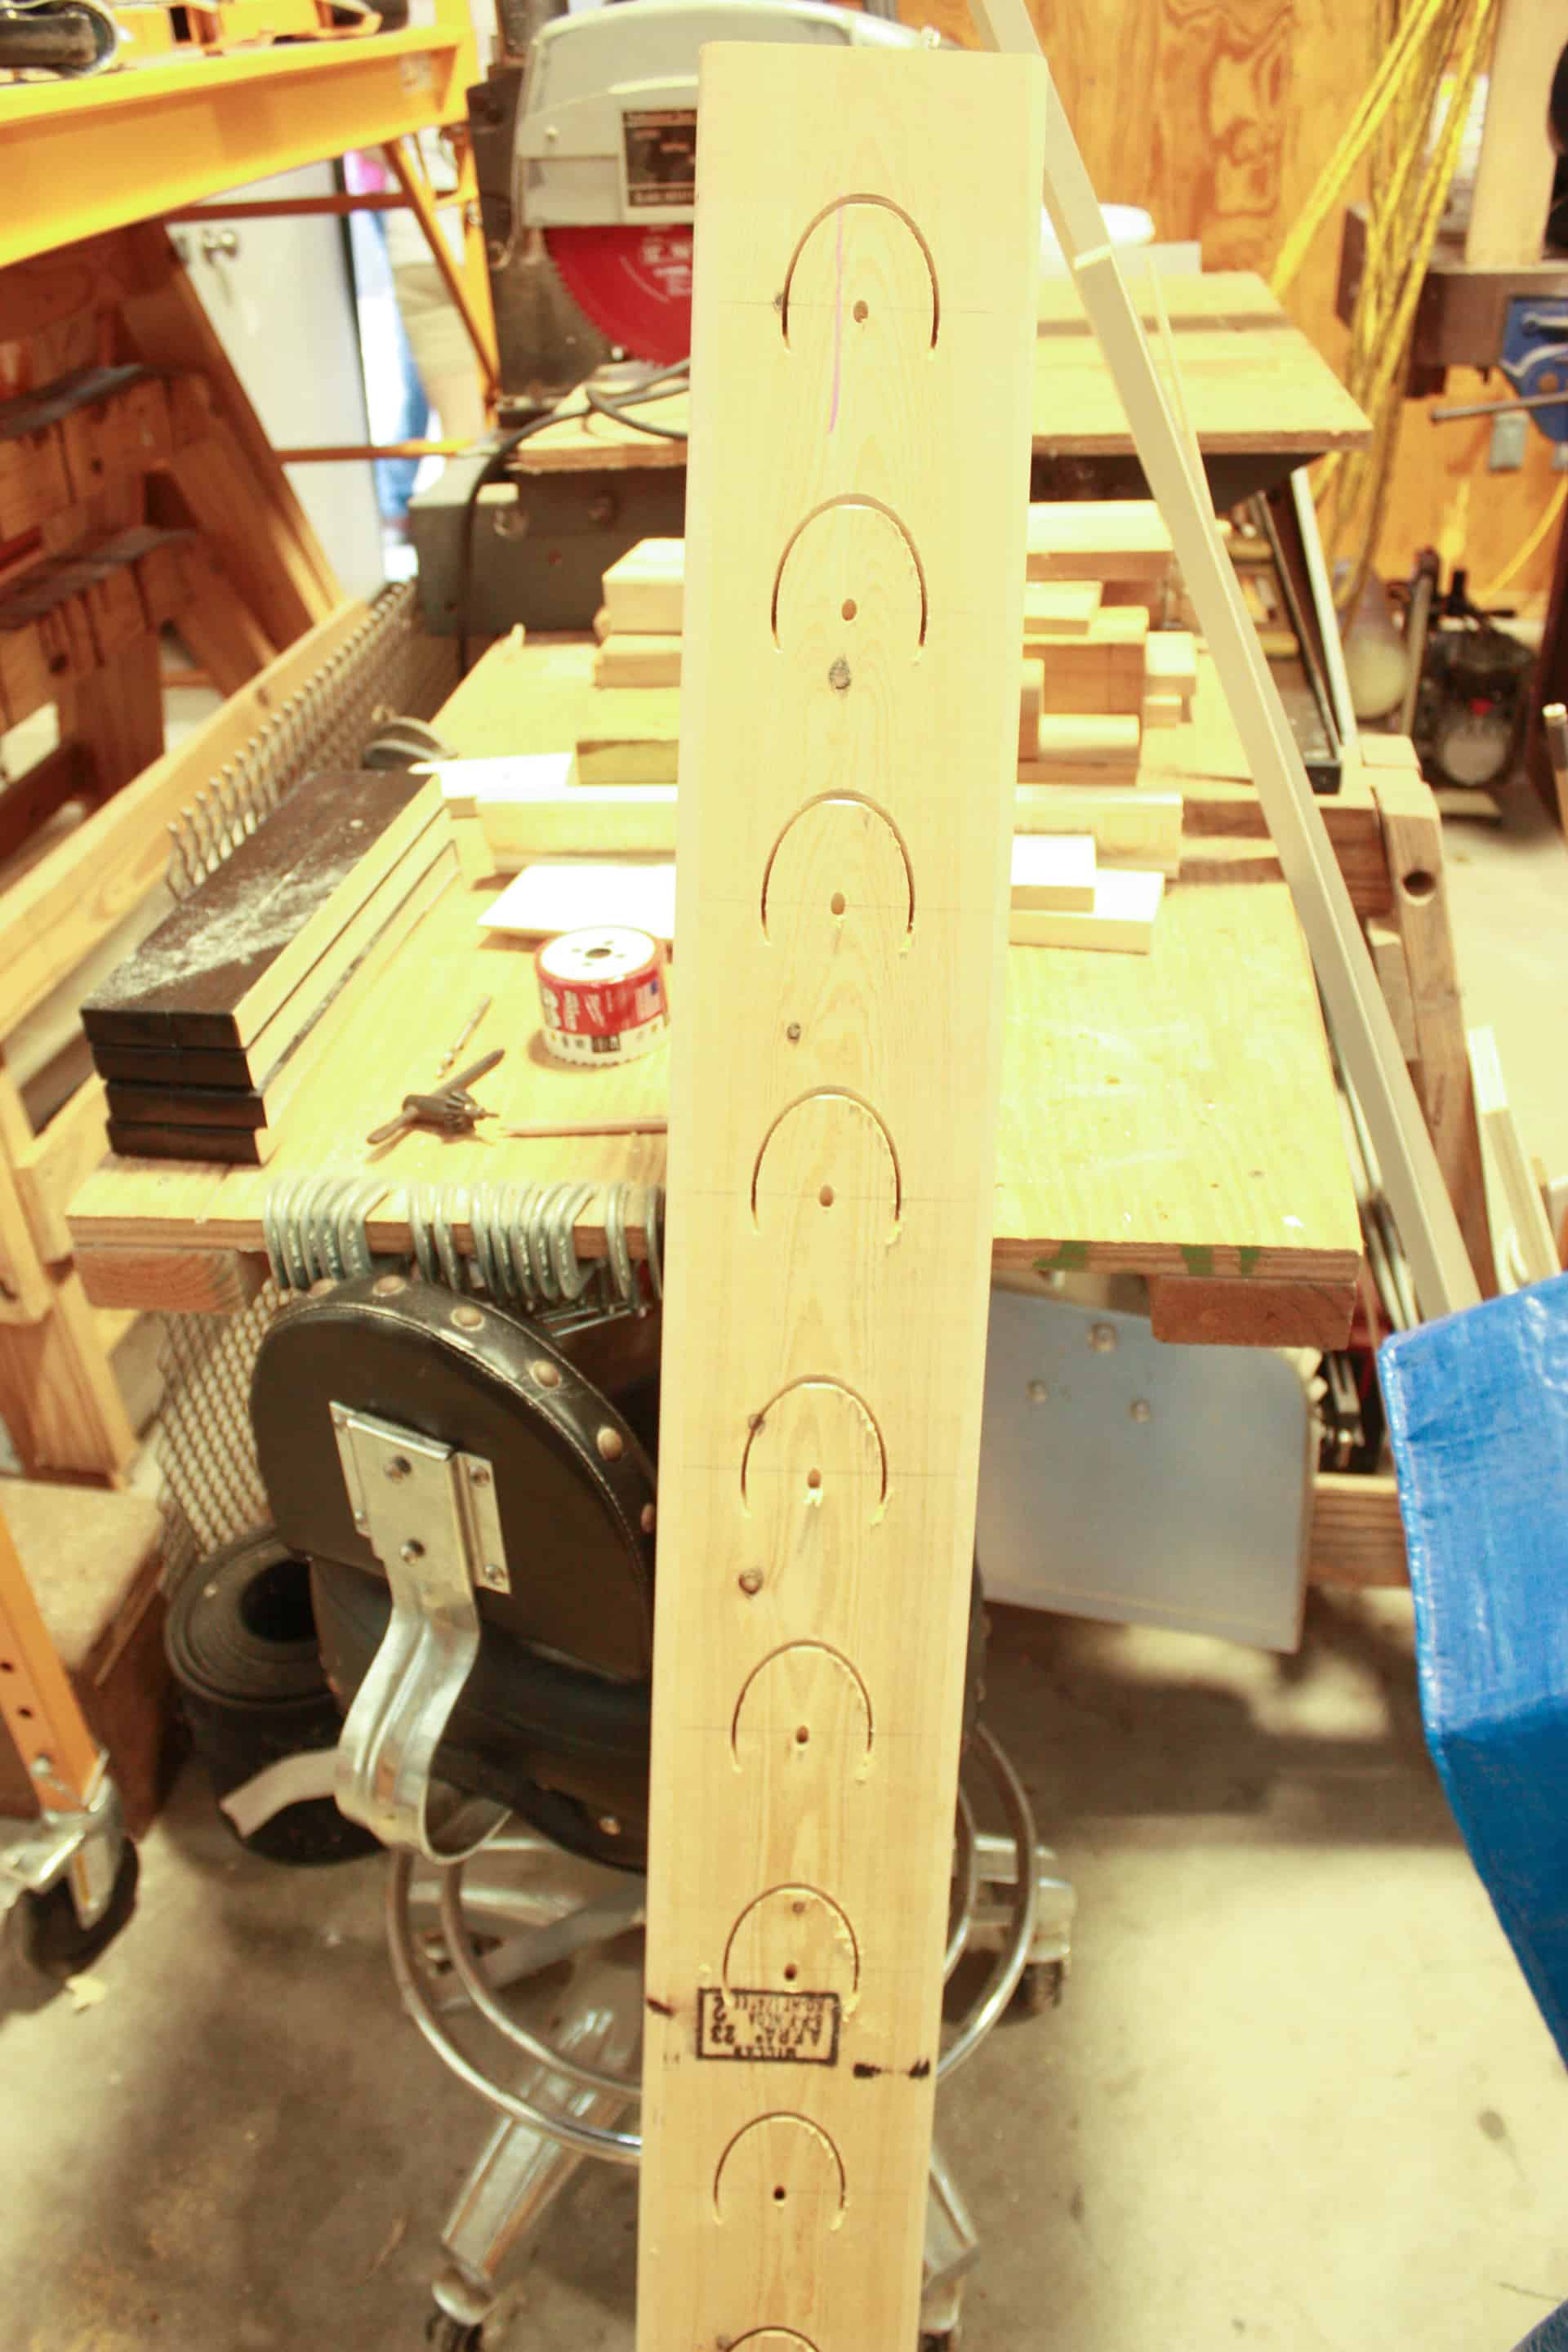
After clamping this board to the drill press and drilling the holes as deep as you can, it will look like this above picture…it reminds me of horseshoes…so just know later when you hear me referring to horseshoes, I have not lost my mind! LOL!
Now I know this is not exactly what we need them to look like right?! This is where we ran into our problem…without spending $350 on a hole saw that is 4 or 6 inches deep, this is as far as a standard hole saw can drill into 2x wood at a 45-degree angle! How in the world is that?
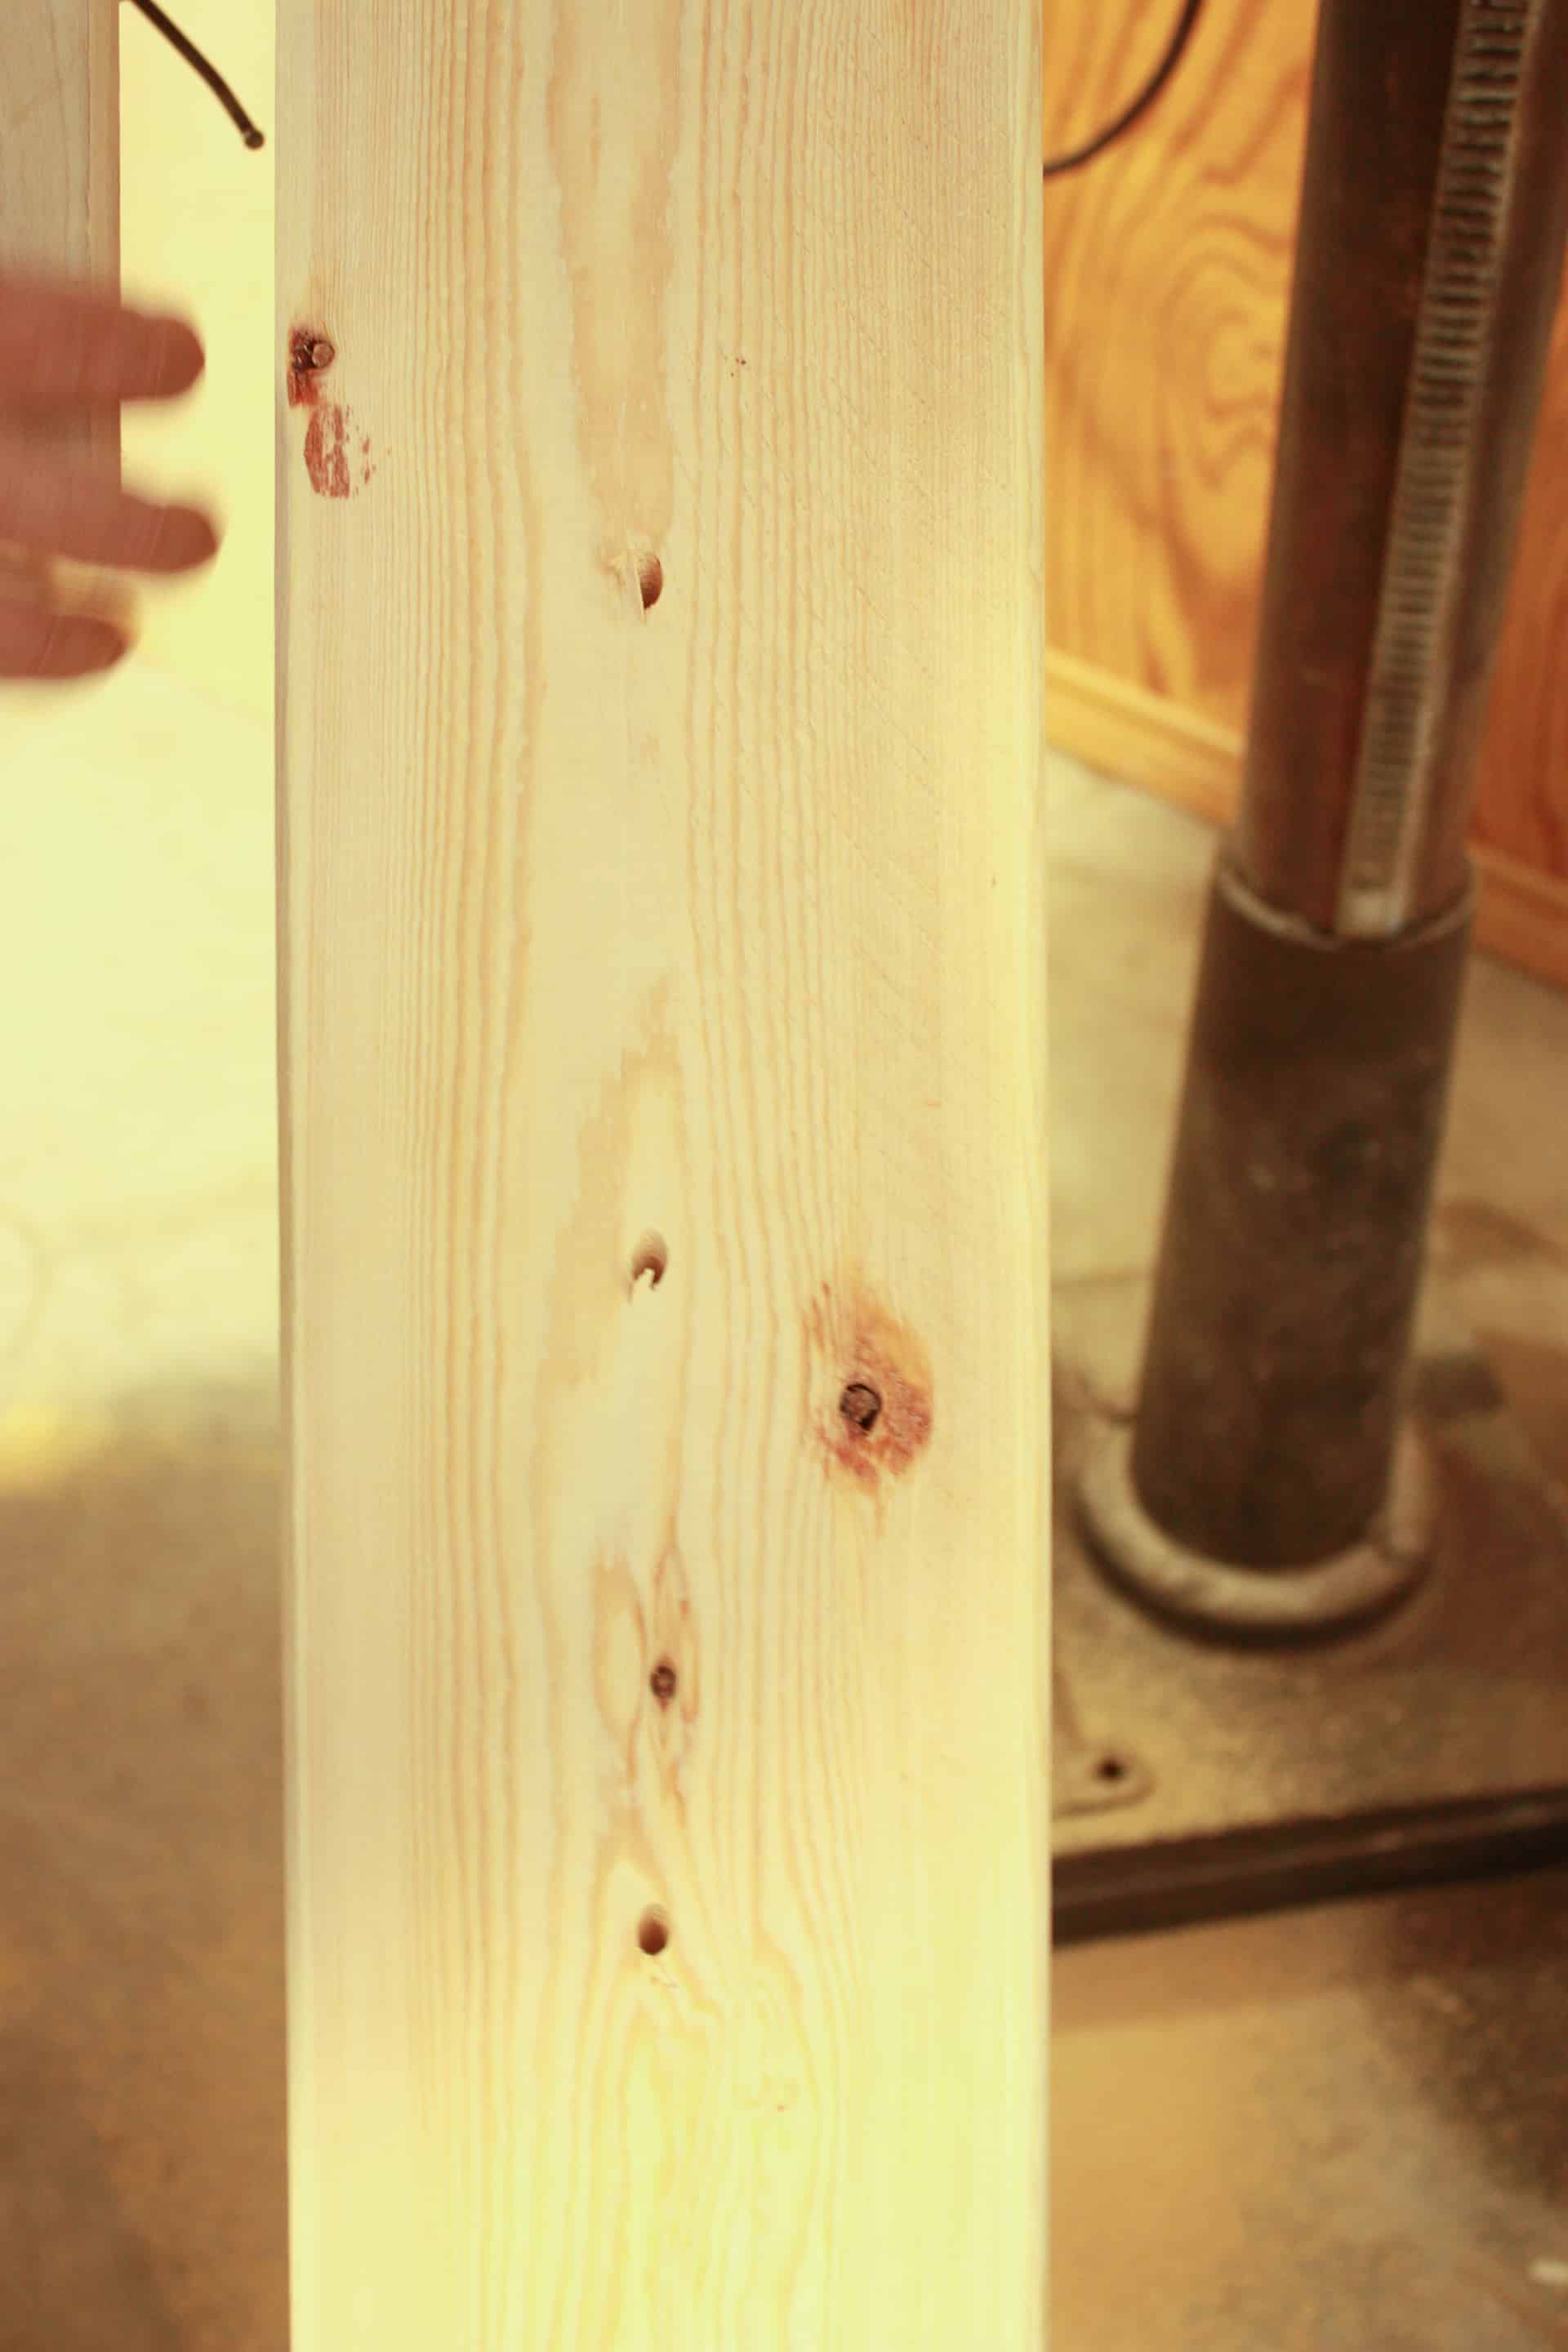
That’s exactly what we were thinking…there has to be a way!! Well, this was the best way we (my Dad) came up with!! After drilling the holes as deep as you can…you then take an 18″ long drill bit (1/4″) and drill all the way through the board using the holes started for you by the drill press at the 45-degree angle.

So, you can see how the hole that you started with the drill press keeps the 18″ drill bit at the 45-degree angle and you can then drill all the way through the board. After drilling this pilot hole all the way through, turn the board around and it looks like this!
Now you will turn it upside down using this side that only has the holes visible (make sure that the holes are being cut in the opposite direction as the front side which is why I say turn it upside down) you will place it back on your drill press and use the pilot holes to line it up and cut through the other side, it will then look just like the first side we did with the horseshoes.
After that comes the really fun part!! Lol! Not really!! Okay, well it is kind of because it finally will feel like you are making progress which always makes me want to keep going…you have to start chiseling out the horseshoes…you don’t have to chisel a lot, it just has to be chiseled a small amount near the top of the horseshoes so that the hole saw can cut deeper when the hole saw hits the wood, it keeps it from being able to drill any deeper and that is why we only have horseshoes after drilling the first couple of times!
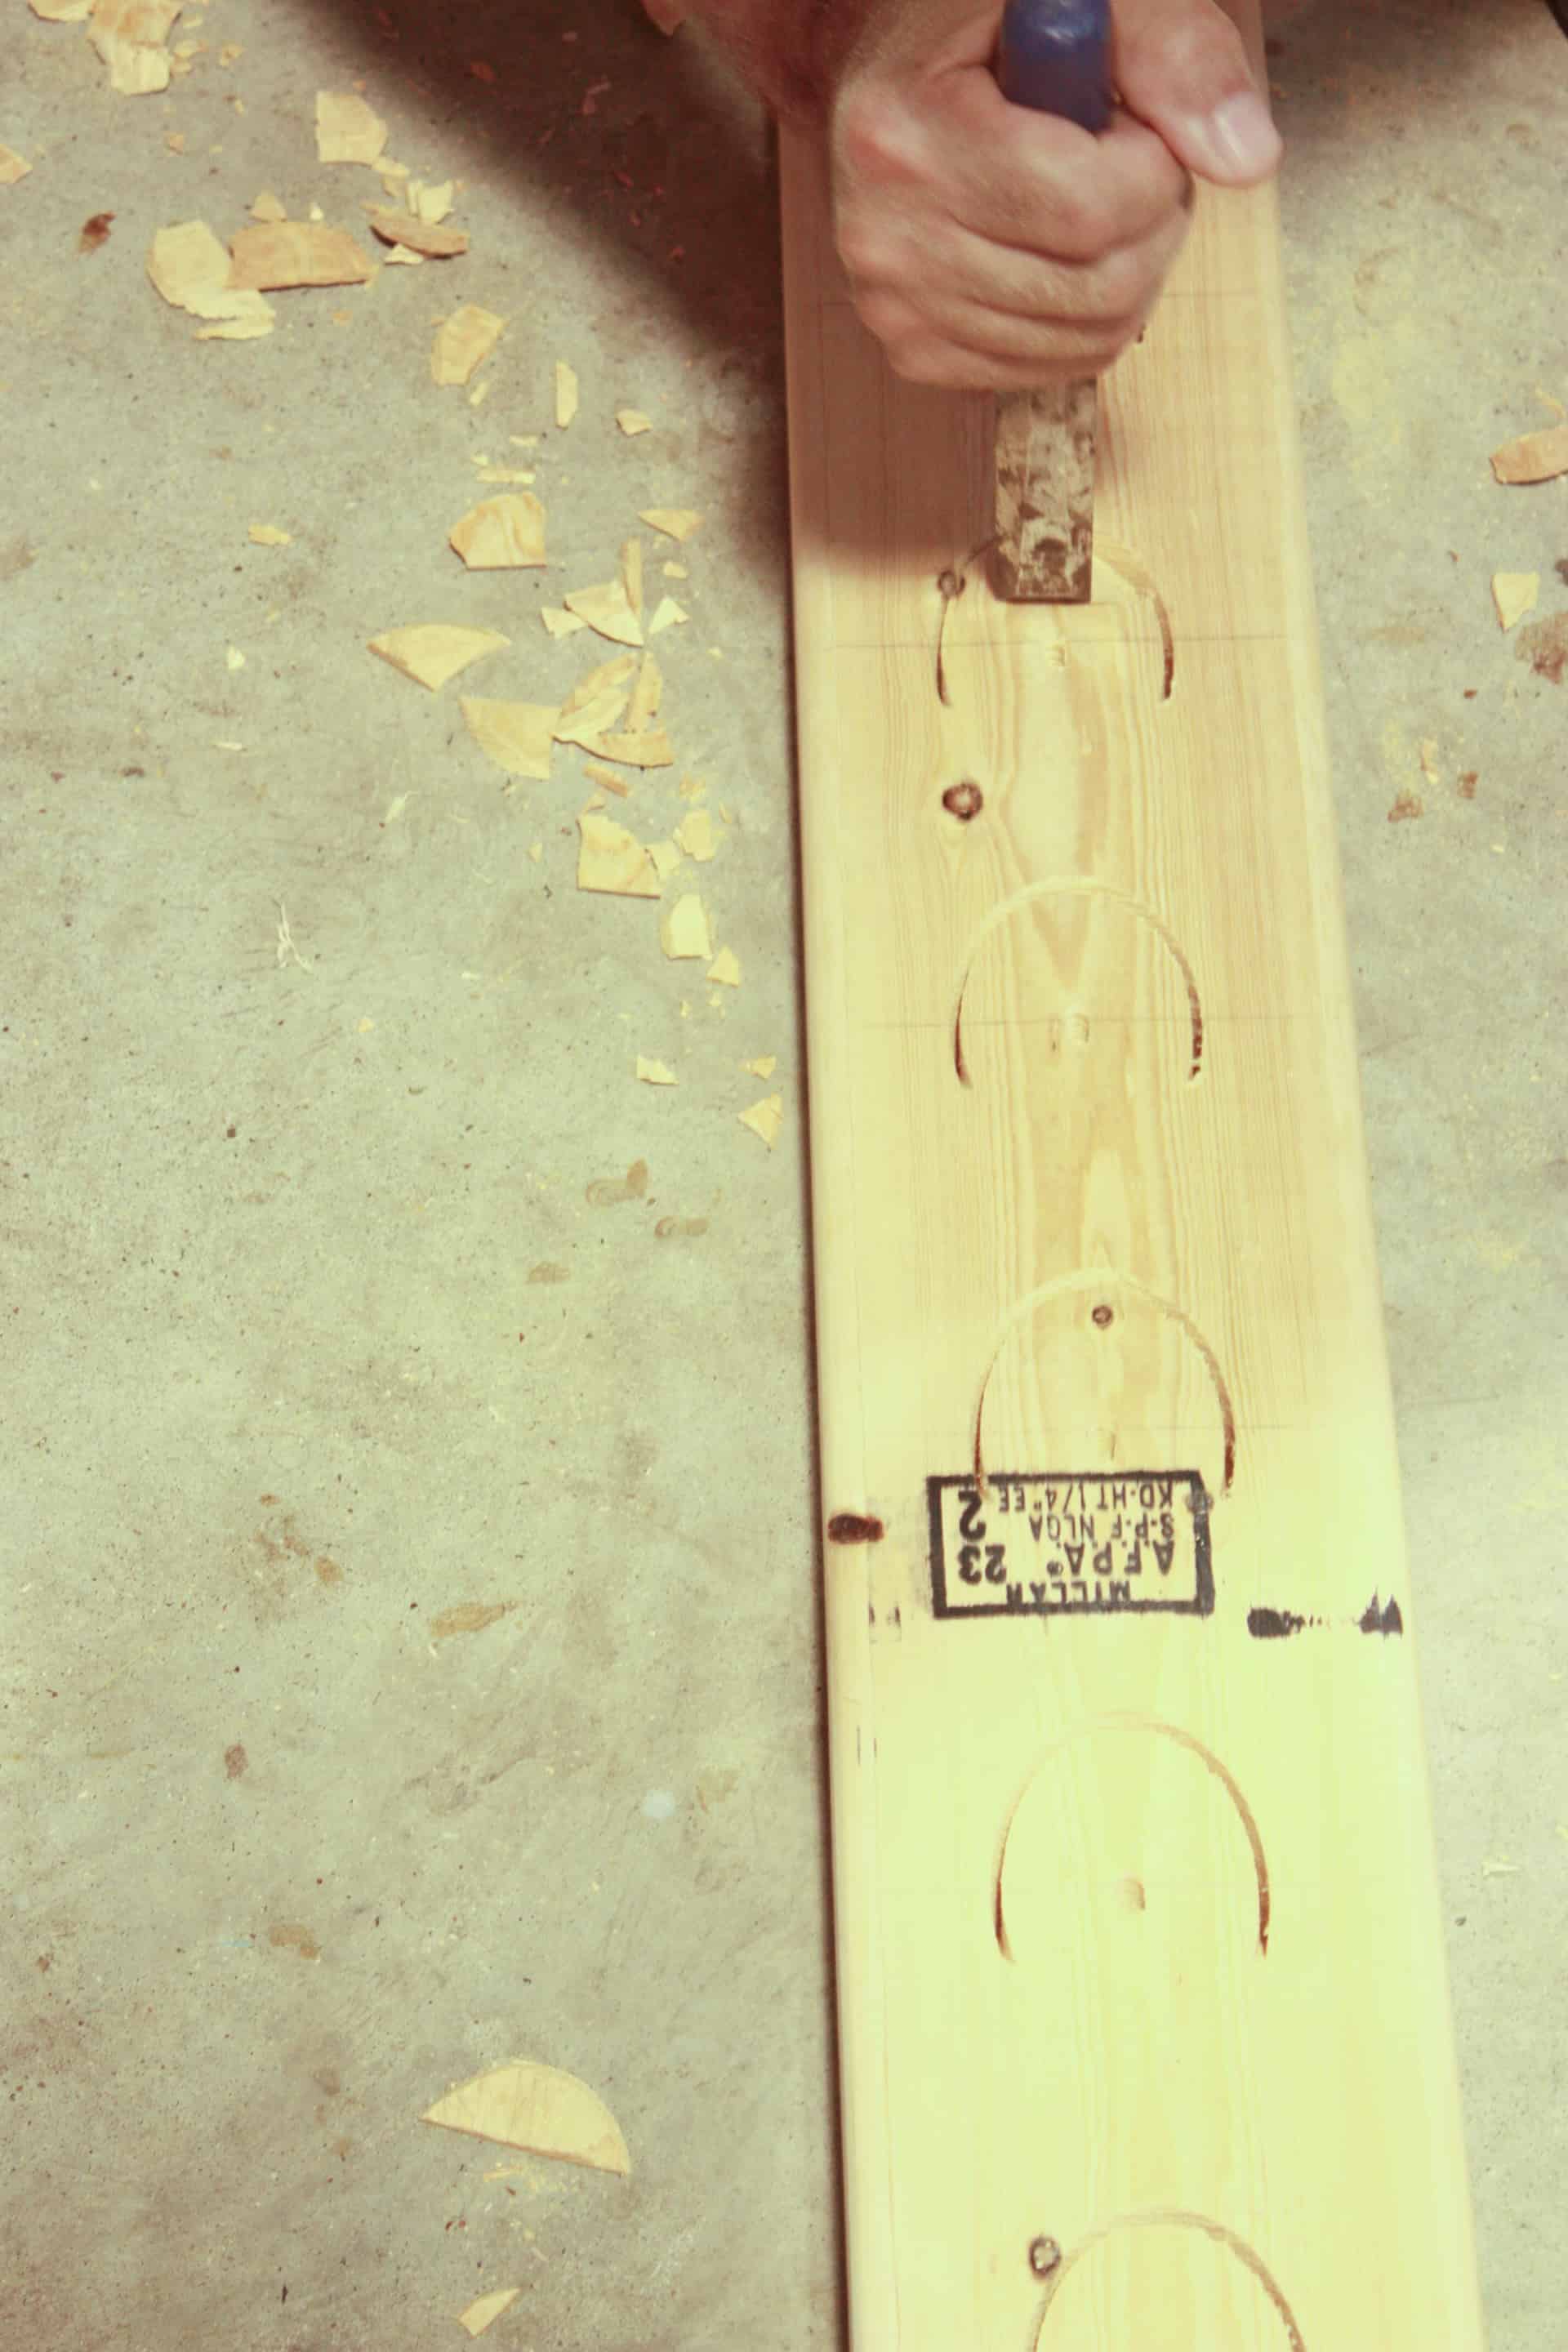
That’s my Dad’s hand you see in this picture…mine are not that big!🤭 See where he has the chisel…this is right where you want to place it and hit all the way across the inside of the horseshoe to chip it out…see what I mean when I say it doesn’t have to be a lot?! After chiseling it will look like this.
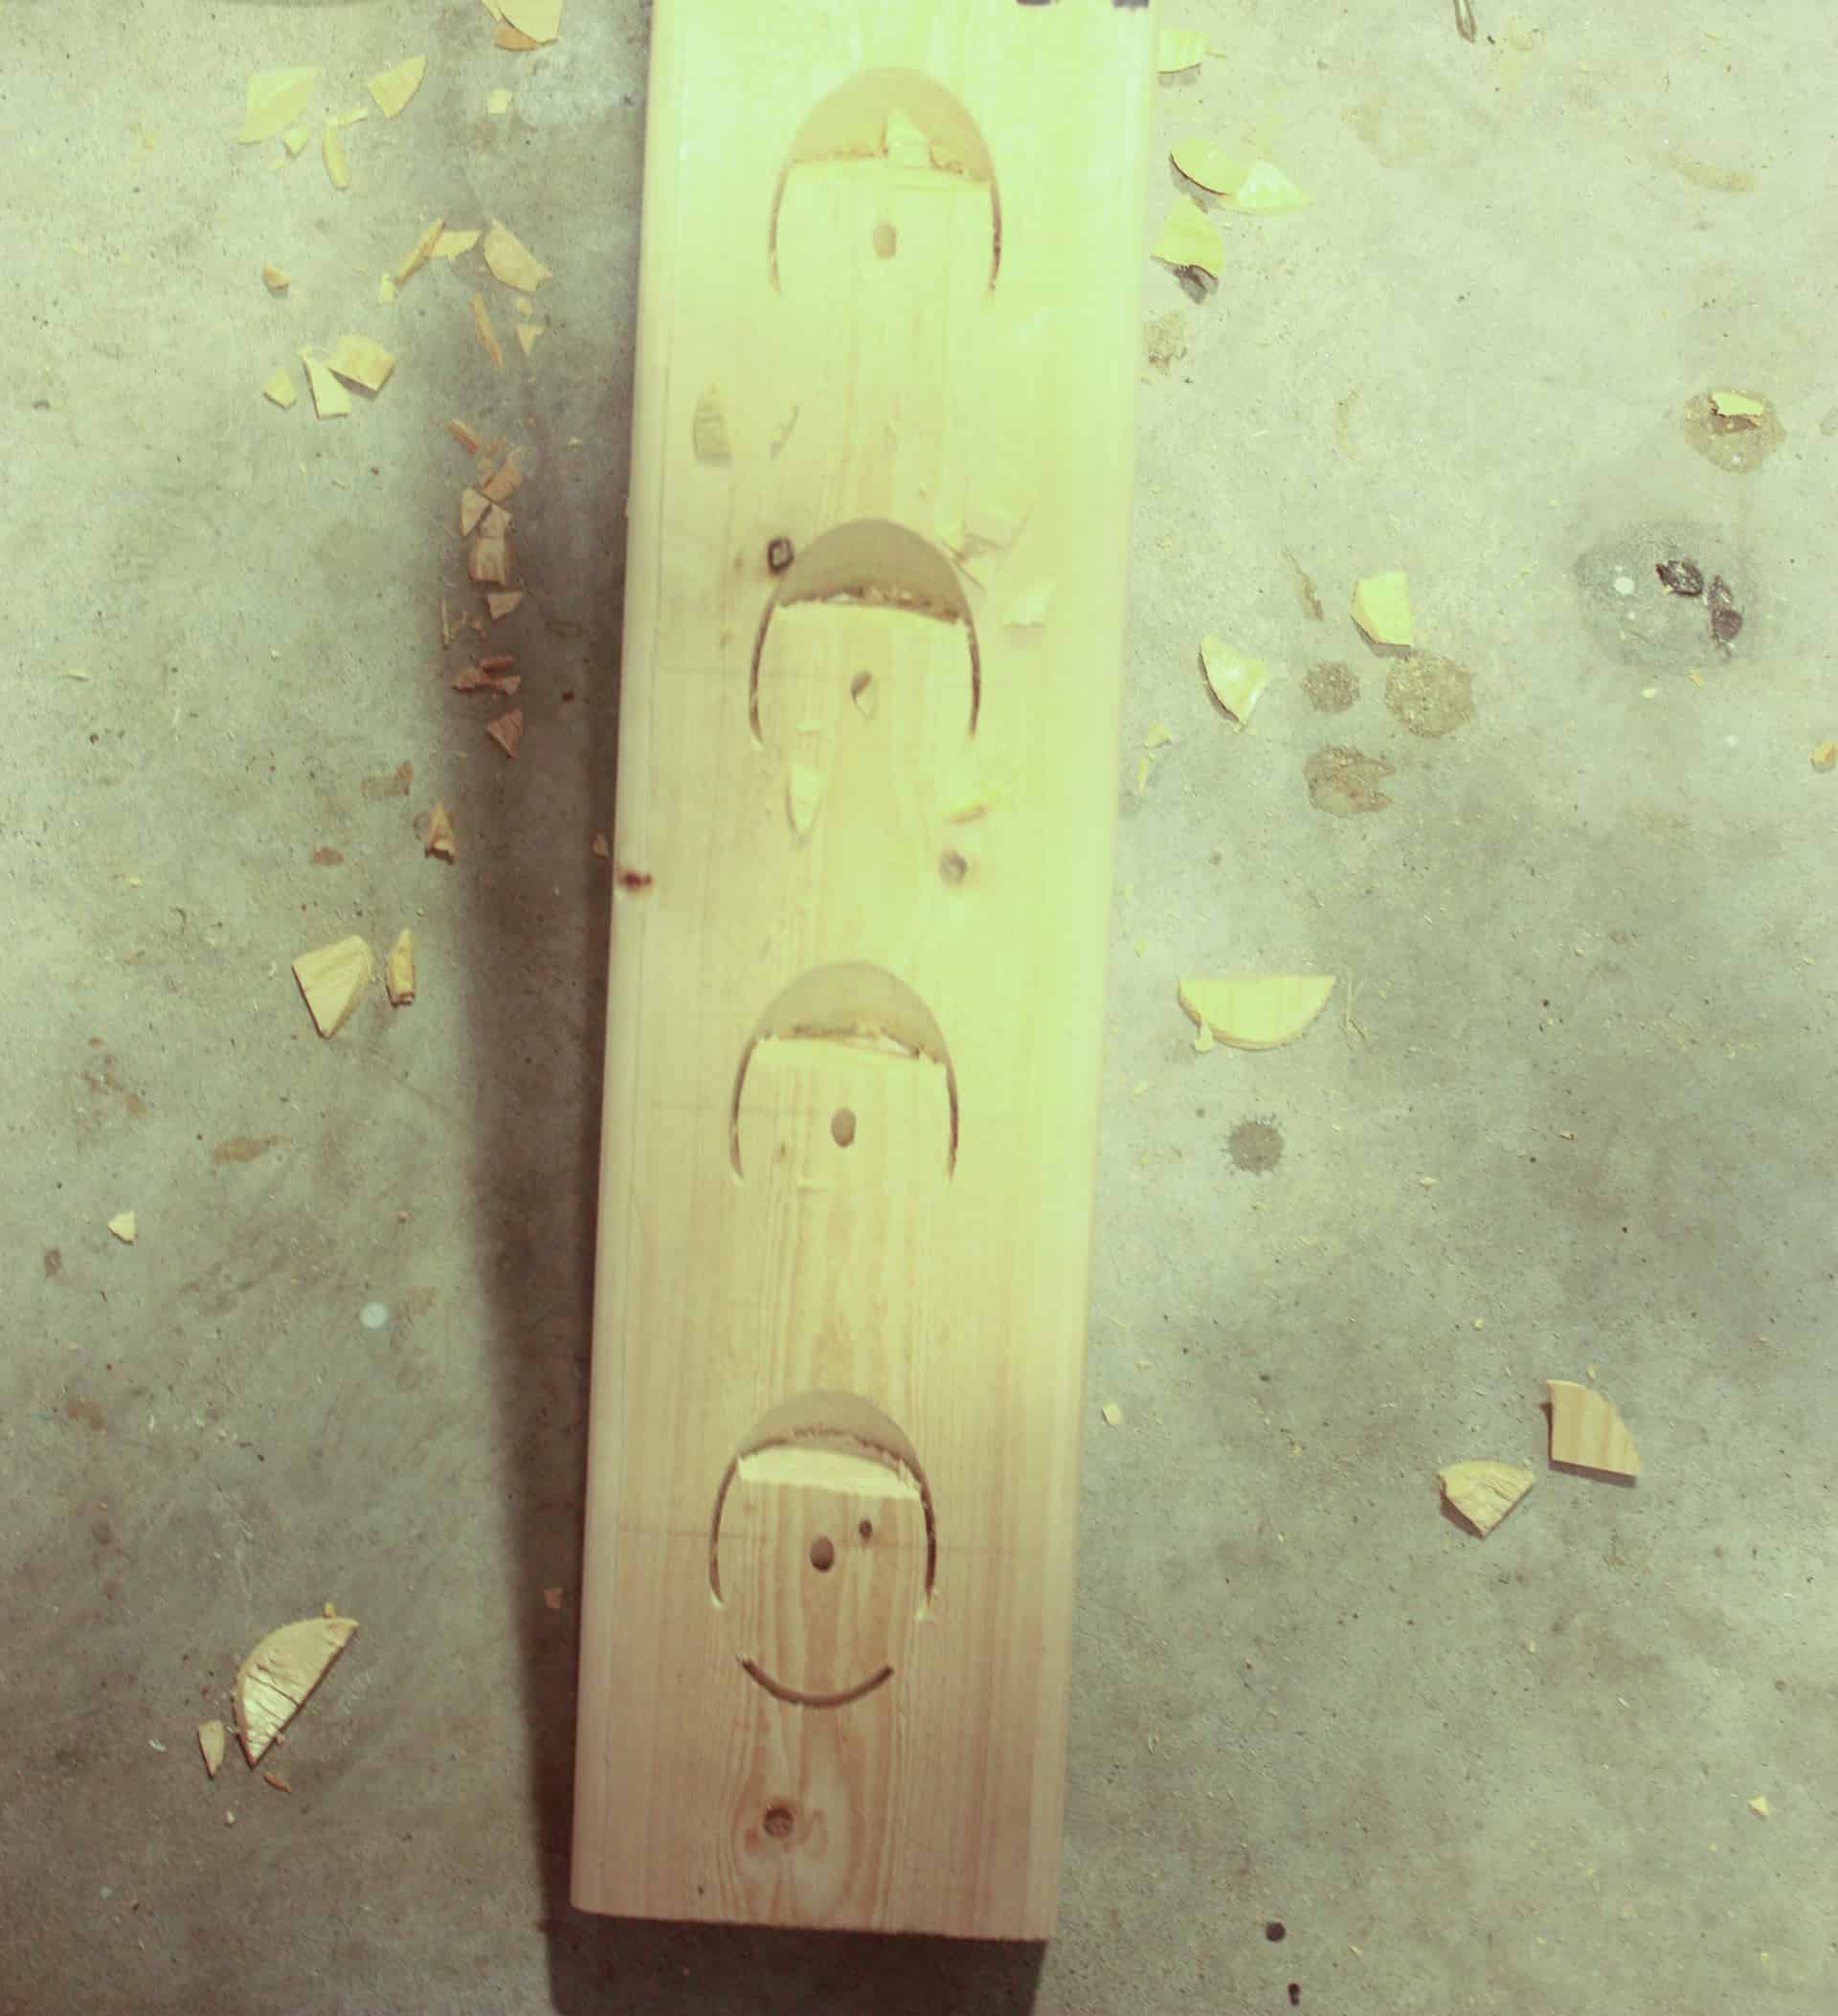
The bottom hole has gone one step further, your holes will be like the top three at this point.
Now, this is REALLY time-consuming, it has to be done on EVERY hole on the front and BACK! Yeah, I know…that is 88 times to be exact!!! Wowza!!
After all that chiseling is finally done…it’s back to the drill press, drilling the same holes again on the front and back but this time they will cut all the way through…you will be able to see the solid ring all the way around on both sides…and oh the excitement you will feel!! Pat yourself on the back if you have made it this far…you deserve it!!! Now you will just use your chisel and mallet and tap the big chunks all the way out of your board and OMGEEEE!!! The boards look AMAZING!!!
So now we need to take them from individual boards to a planked panel of boards…so we are going to use our HANDY – DANDY Kreg Jig!!! Woohoo!!! My favorite tool!! So much easier than that darn drill press!!🤣 So in case you aren’t aware of what a Kreg Jig is or how to use it, I will explain quickly!
Using a Kreg Jig on the DIY Wine Riddling Rack
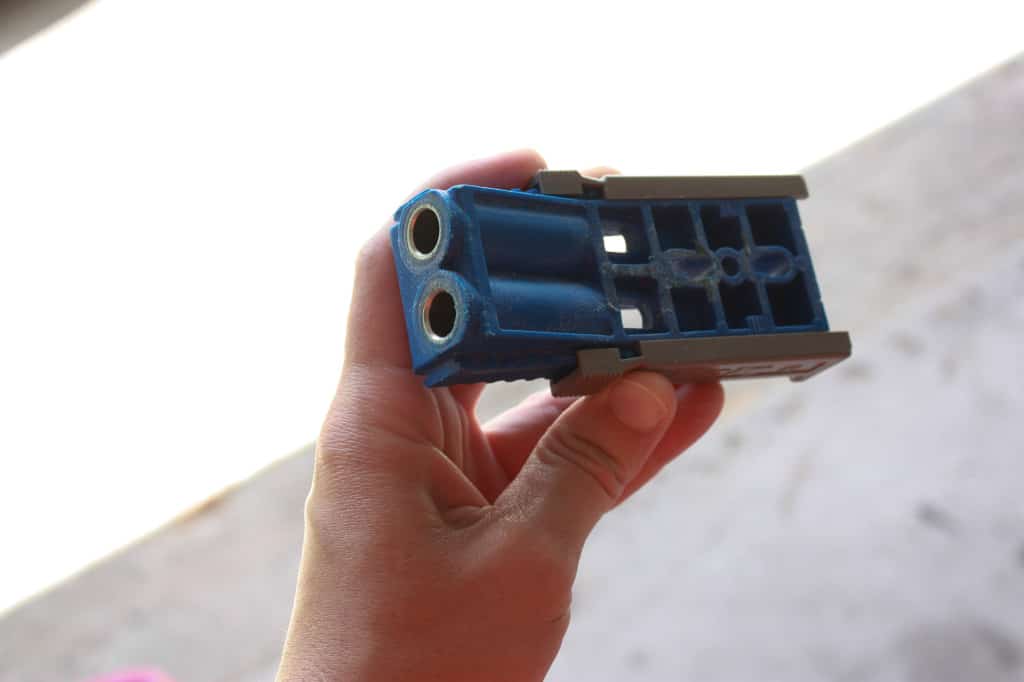
I have the small Kreg Jig R3 (affiliate link) and I have to say…as much as I use this and have thought about upgrading, I haven’t found anything this little jig can’t do…so I really can’t justify upgrading! So don’t be discouraged, if you can’t afford to buy the $150.00 model, this little $40.00 one will tackle everything you could ever need! Now, if you do have a little more to spend…by all means just start with the bigger one and you will never have to deliberate buying the upgrade!! Lol!! You can find Kreg Jigs at Lowe’s, Home Depot, or Amazon! (affiliate link)
So here is my little R3!
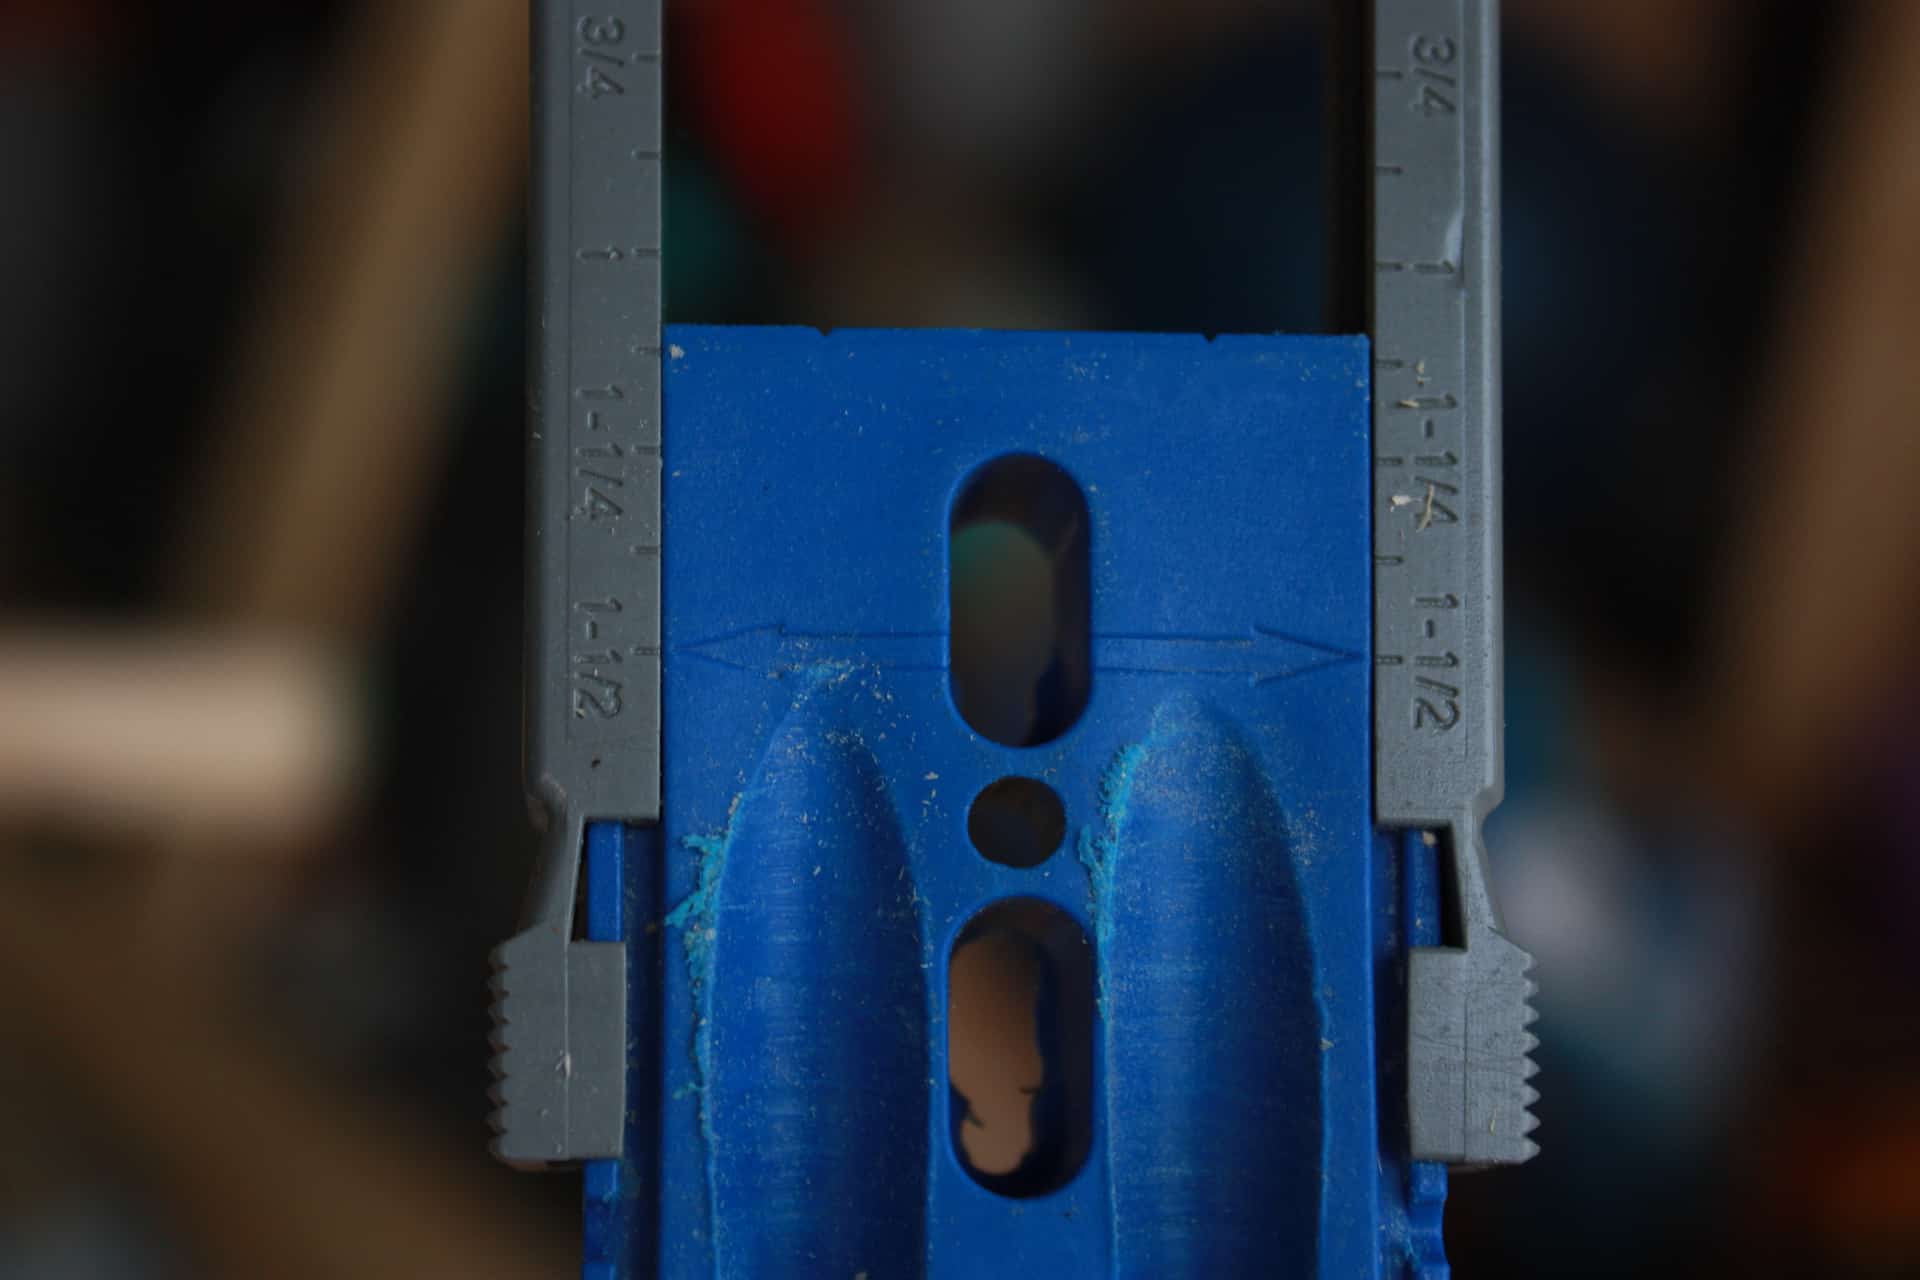
So simple and easy to use…all you have to do is set your jig to the thickness of wood you are drilling into…since this is 2x wood, its actual measurement is 1 1/2 inches thick, so we set our jig to 1 1/2.
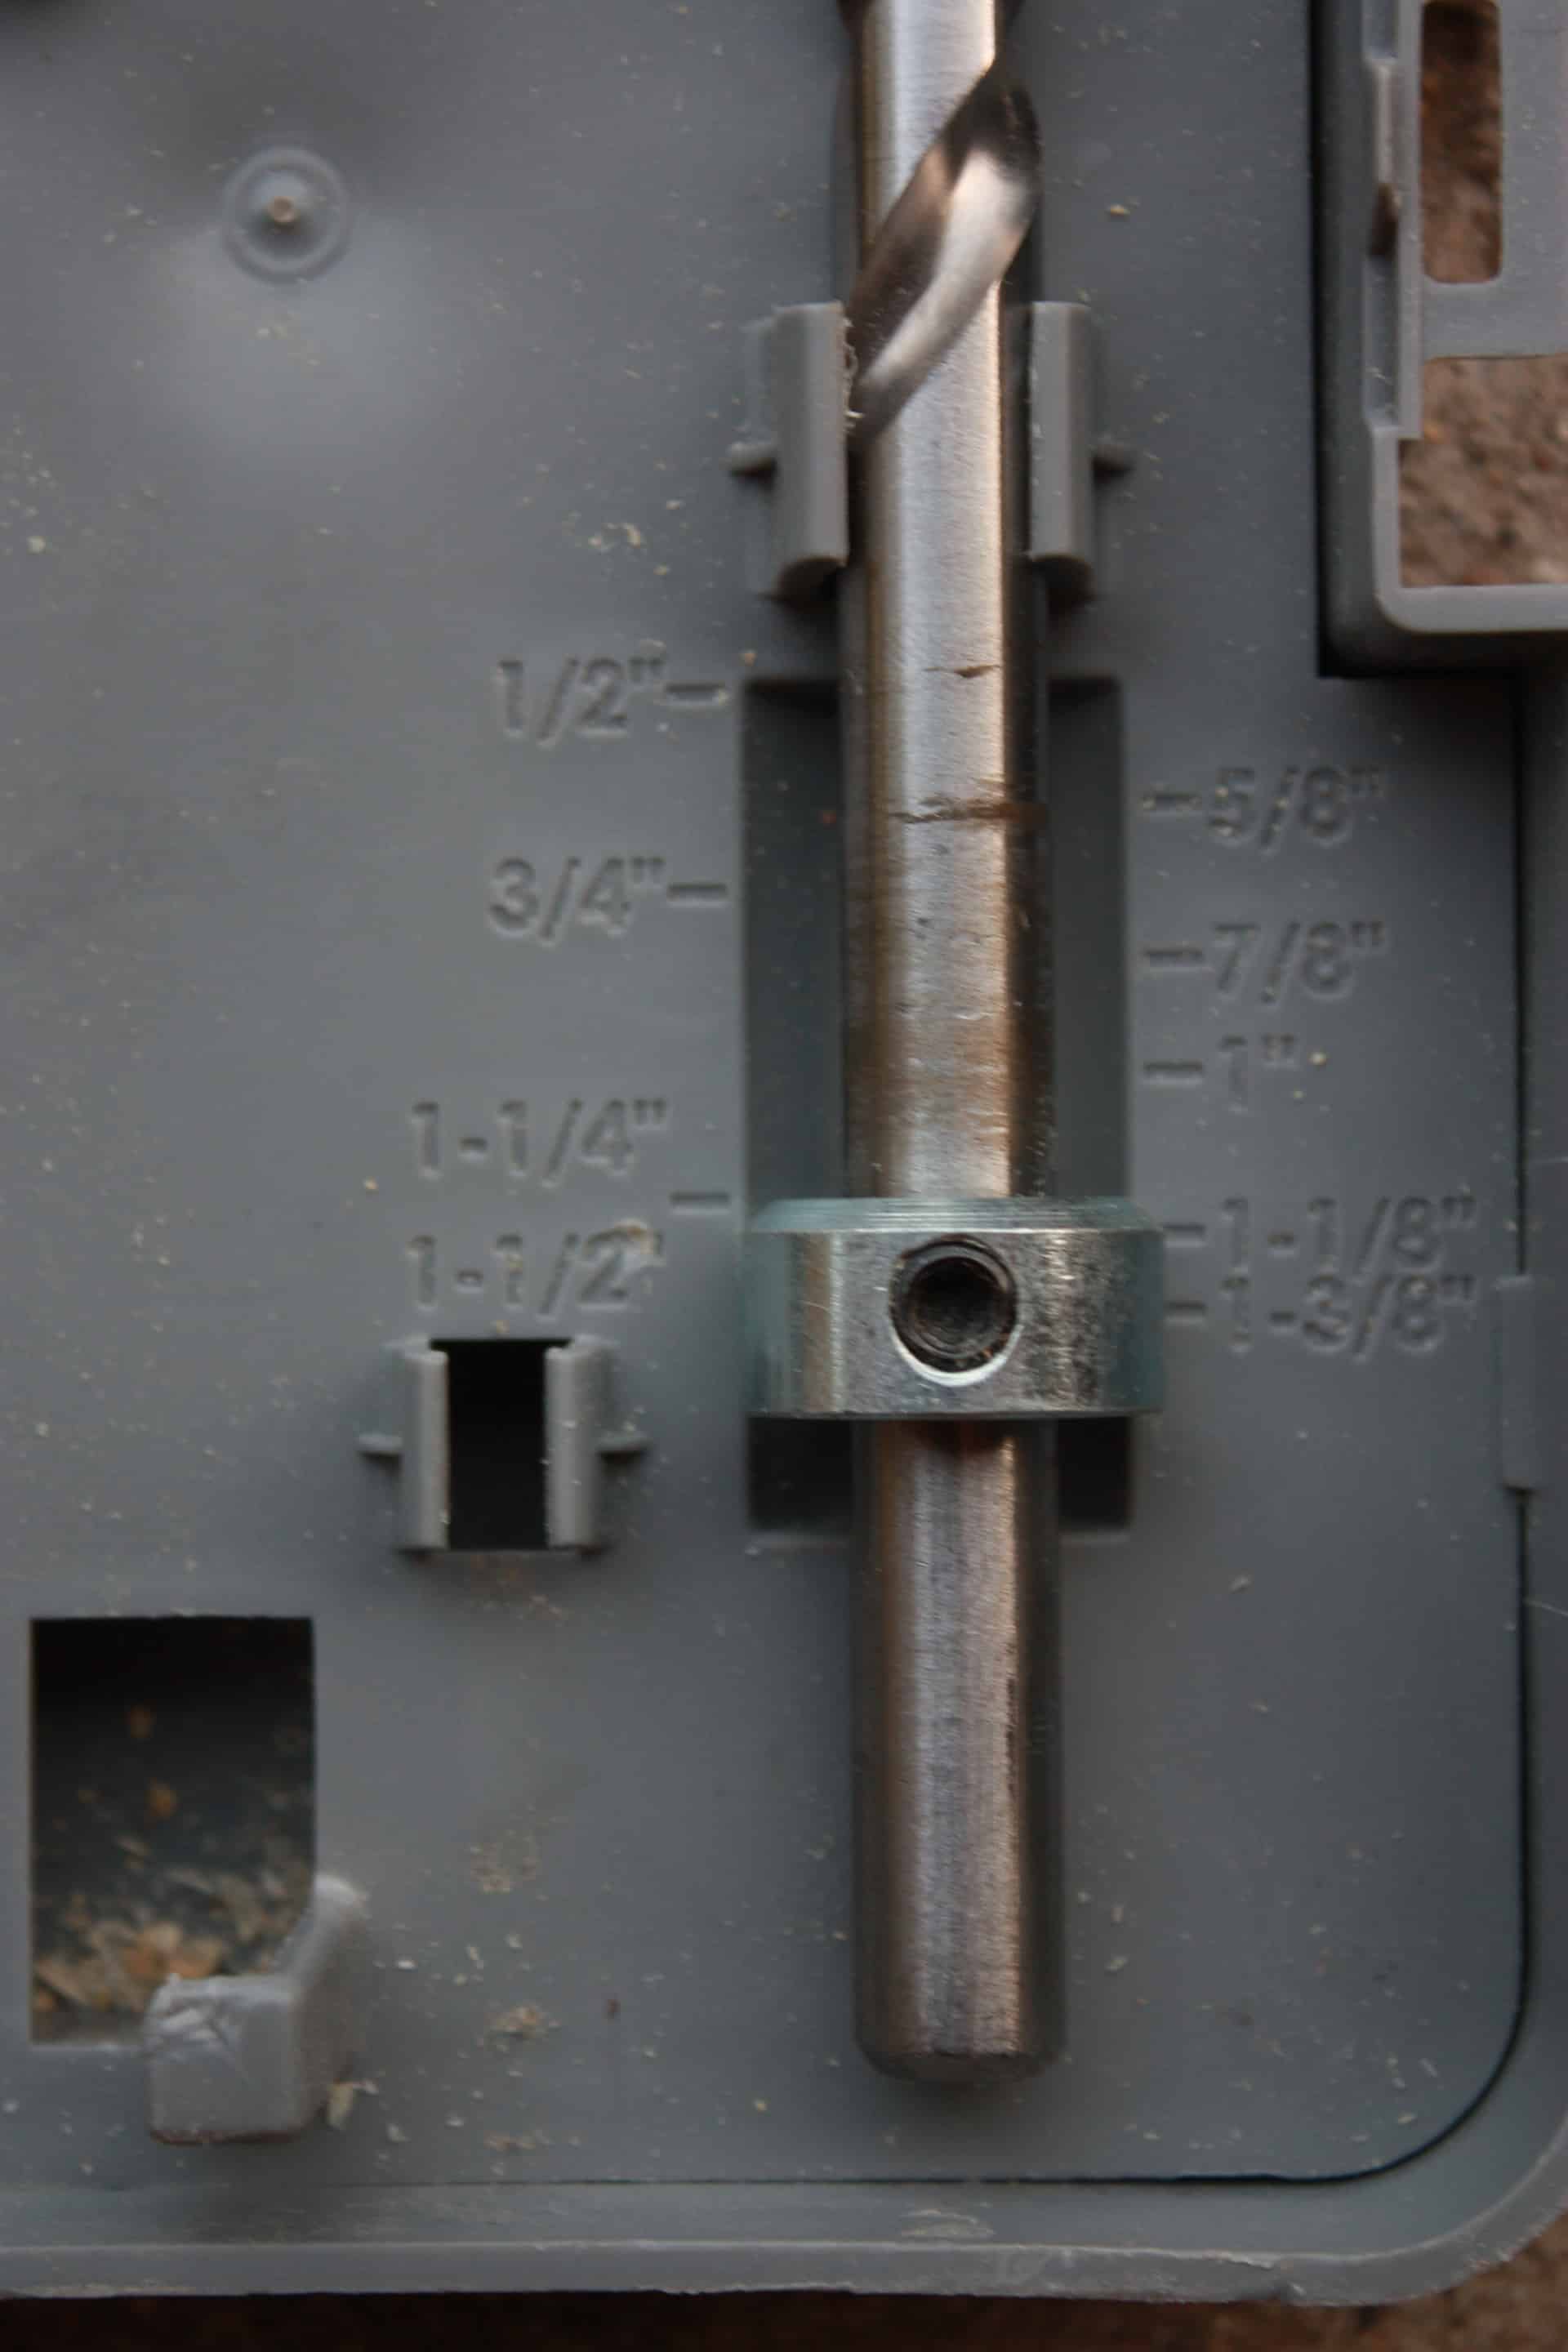
Next, we need to set the drill bit that is included in your set to the same depth as the jig which is 1 1/2″ since that is the width of our wood. This set comes with an allen wrench/hex key that tightens and loosens the ring around the drill bit to change the measurement.
Now you just clamp the jig onto your wood so you can start drilling! Since we are planking our wood together, we are drilling sideways into the wood like this.
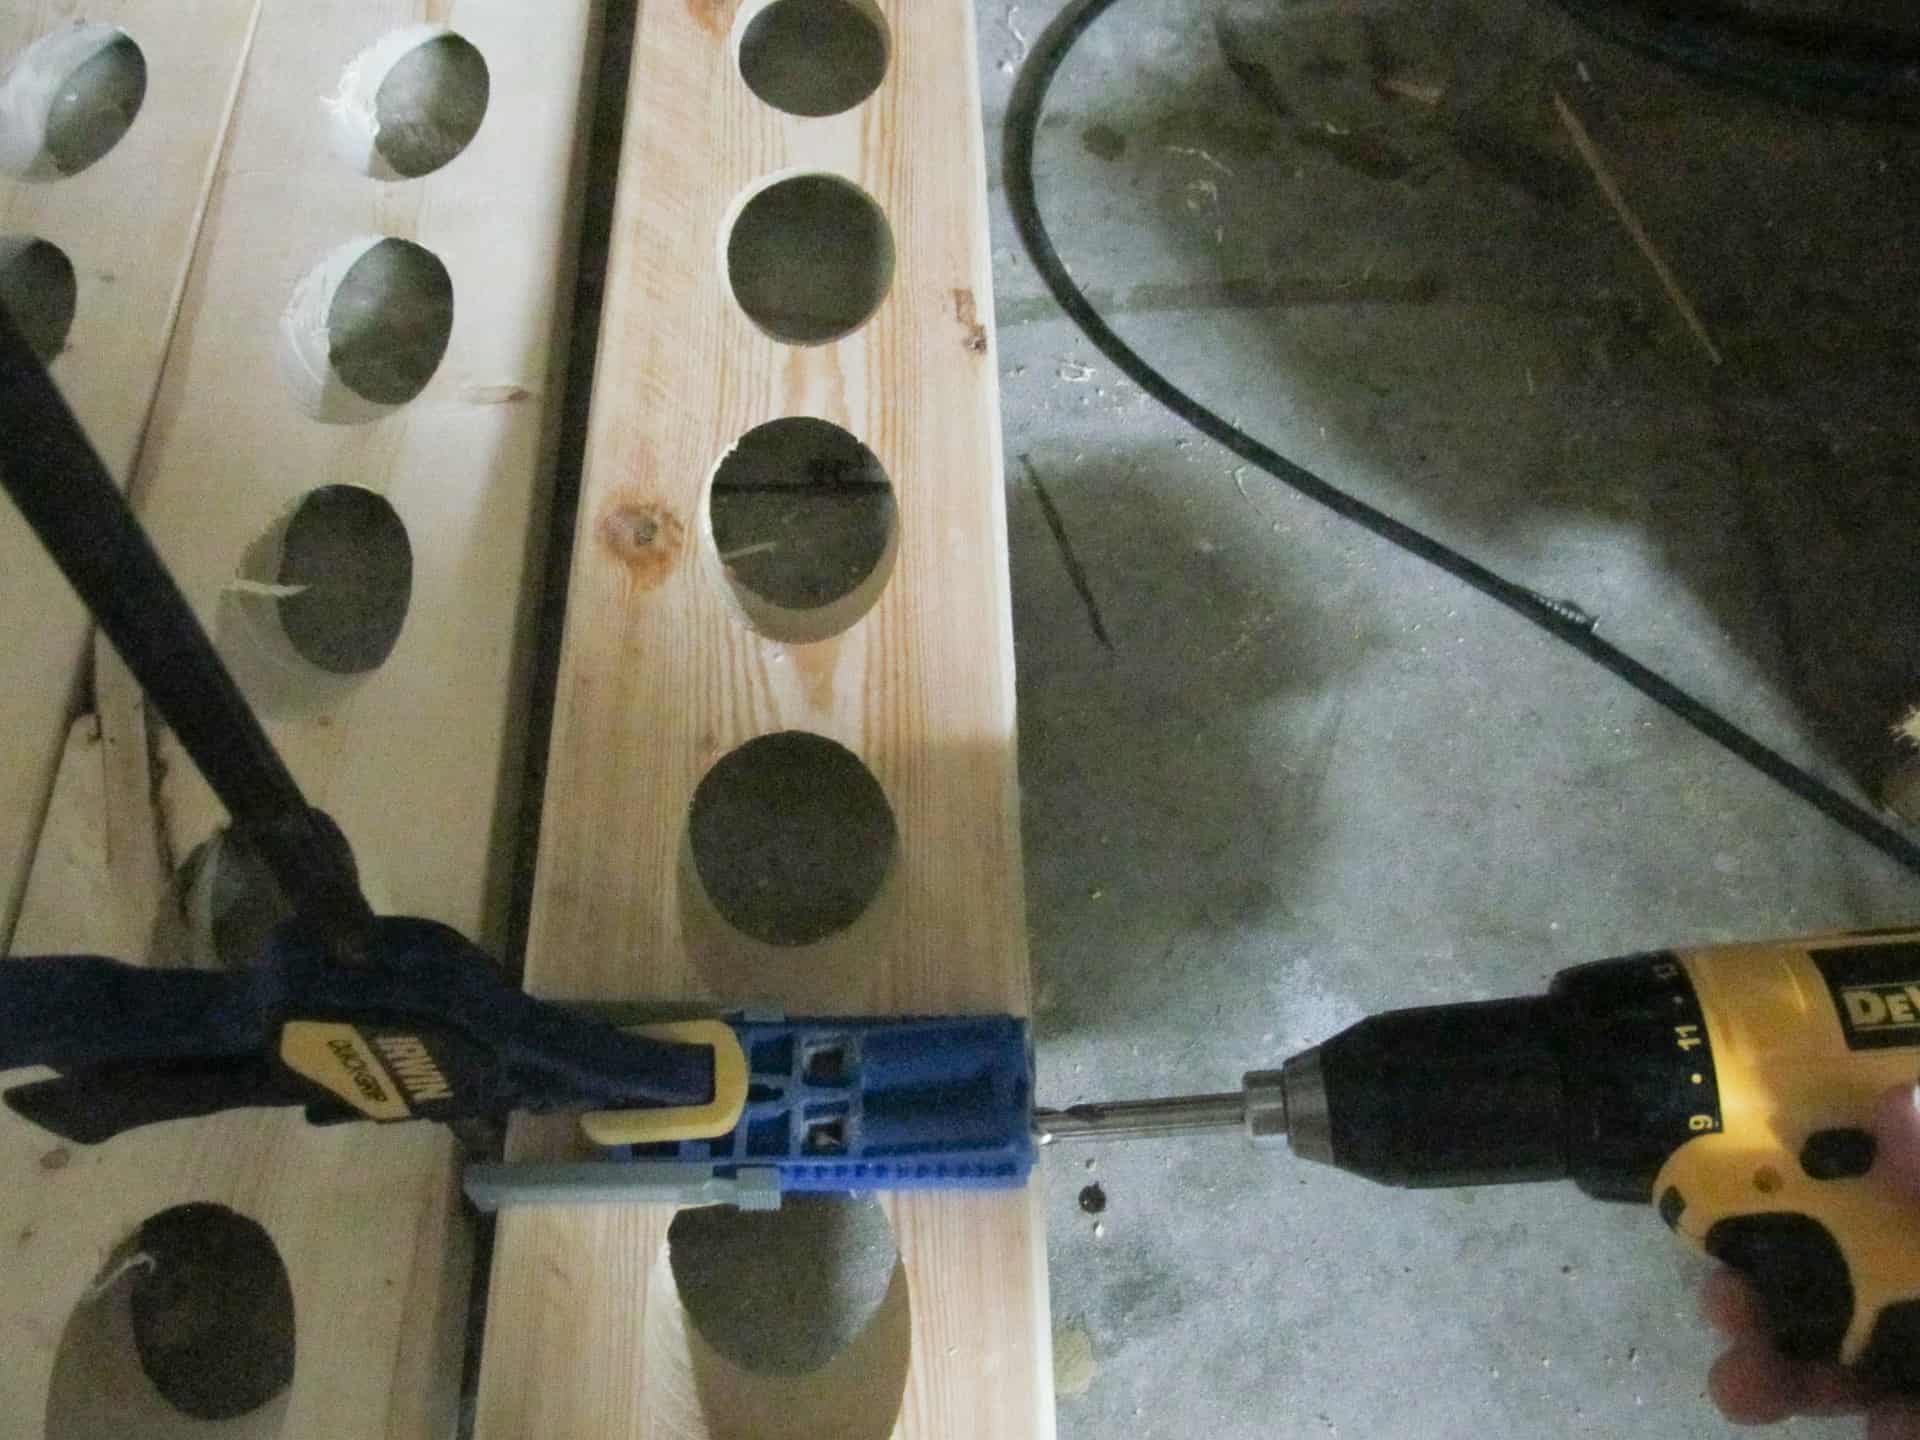
I drilled holes in between every two of the big holes on the board.
After all those pocket holes are drilled, you take your included screwdriver bit and drill the screws into the wood. You will use 2 1/2″ coarse Kreg screws for this…make sure you glue in between the boards, we used clamps to hold it together while screwing in the screws.
Pic below is of the front of the wine rack while it was being glued up – for some reason I didn’t take a picture of the back where you could see all the pocket holes! Ugh!

It’s starting to look like a riddling rack!!! Whoop Whoop!!! Now it’s onto the beautiful frame to make this look complete!
Excitement was bubbling over at this point for me because we had already spent so much time trying to figure out how to drill the holes that I wasn’t sure I would EVER get it done…don’t lose hope peeps…it can be done!😜
So the frame is just made of the 1x4s, and now that the boards are all planked together, you can measure to cut the 1/4s. Length wise they are still the 56″ that you cut them at but go ahead and measure because sometimes I end up cutting slightly shorter or longer than I intend to! How does that happen you ask?! I do not even know!! Lol!
Luckily, in this instance as long as they are all the exact same length it doesn’t really matter if they are all 56 1/4″ or 55 7/8″ just measure so you don’t cut too short or long on your 1x4s. These boards are beveled on the one I made, I am going to give instruction on beveling them, but if for some reason you don’t want to bevel or don’t have a saw that bevels you can easily just cut your long side boards to house your smaller top and bottom boards and not bevel!
I just loved the look of the beveled edges and hadn’t beveled yet so thought I would challenge myself…in the midst of trying to bevel it, I remember wondering why I have to be so stupid?! 😂 This is VERY common for me in the middle of a project but in the end, EVERY time I am happy I tried something new because I ALWAYS love it!!
When beveling, the edge of your bevel has to be flush with the edge of the board…that sounds like,”Huh?”

I took this picture at a strange angle, and at first, I really thought I had a busted-up corner that I hadn’t even noticed…lucky for me it was just a funky angle on the picture!!😅 But at least you can see here how the beveled edge needs to line up, so when you are measuring, the shortest part of your board has to be the length that your planked boards are!
Once you have cut and recut and recut once more… that’s the way I roll, I cut a million times to get it just right! Lol! It may not be the ‘correct’ way to do it…but it works for me so stop judging!!
After all those trips to the saw, I had a lovely frame that was oh so beautifully beveled!

So at this point I went ahead and sanded and stained the entire thing, starting with 80 grit and working up to only 120 grit because I did not want this thing looking all perfect…it is supposed to be old and used, worn and beautiful!
I hand sanded the holes with 120 and then 180 grit sandpaper, if you have an oscillating spindle sander, you can easily sand them with that but hand sanding worked just great for me! (I was soooo afraid I would mess my holes up, I couldn’t bring myself to even try the big bad oscillating sander…only one new tool at a time please and the stupid drill press had already done me in!😂)
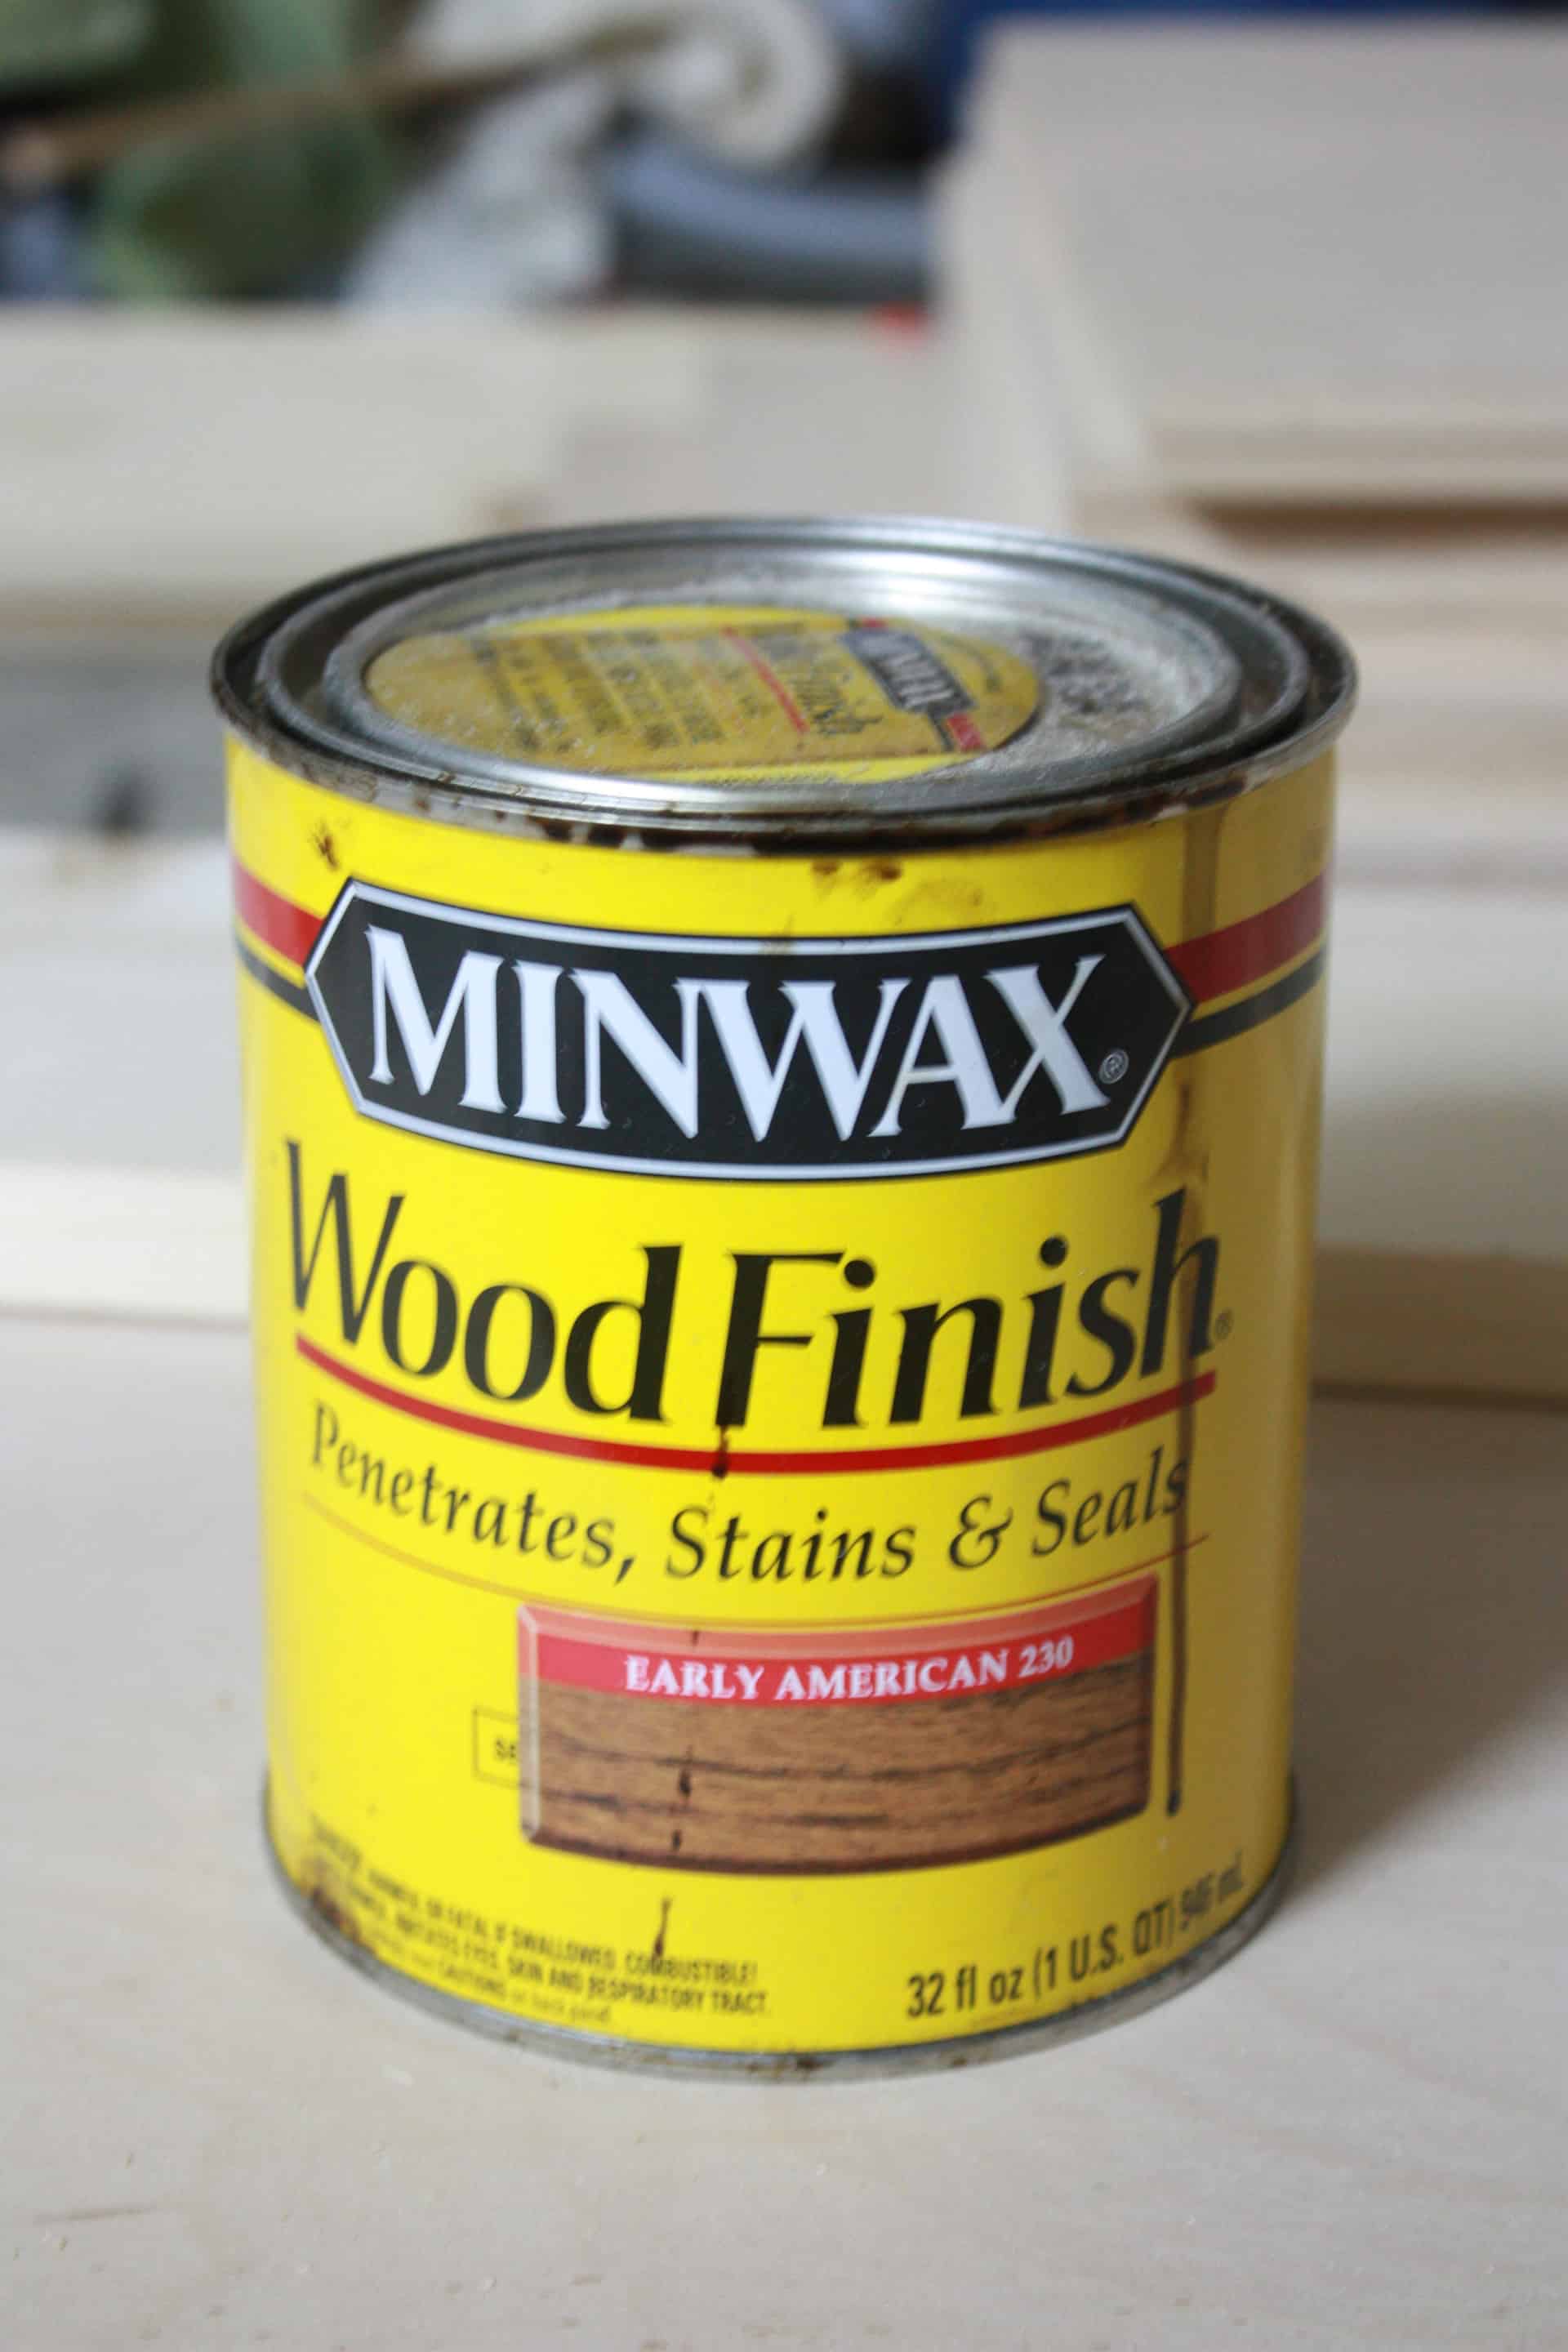
After all that sanding, I had to bathe…well I needed to but didn’t…lololol…I was on a roll and wanted to get this wine riddling rack done!! So, I stained this puppy using Minwax Early American!
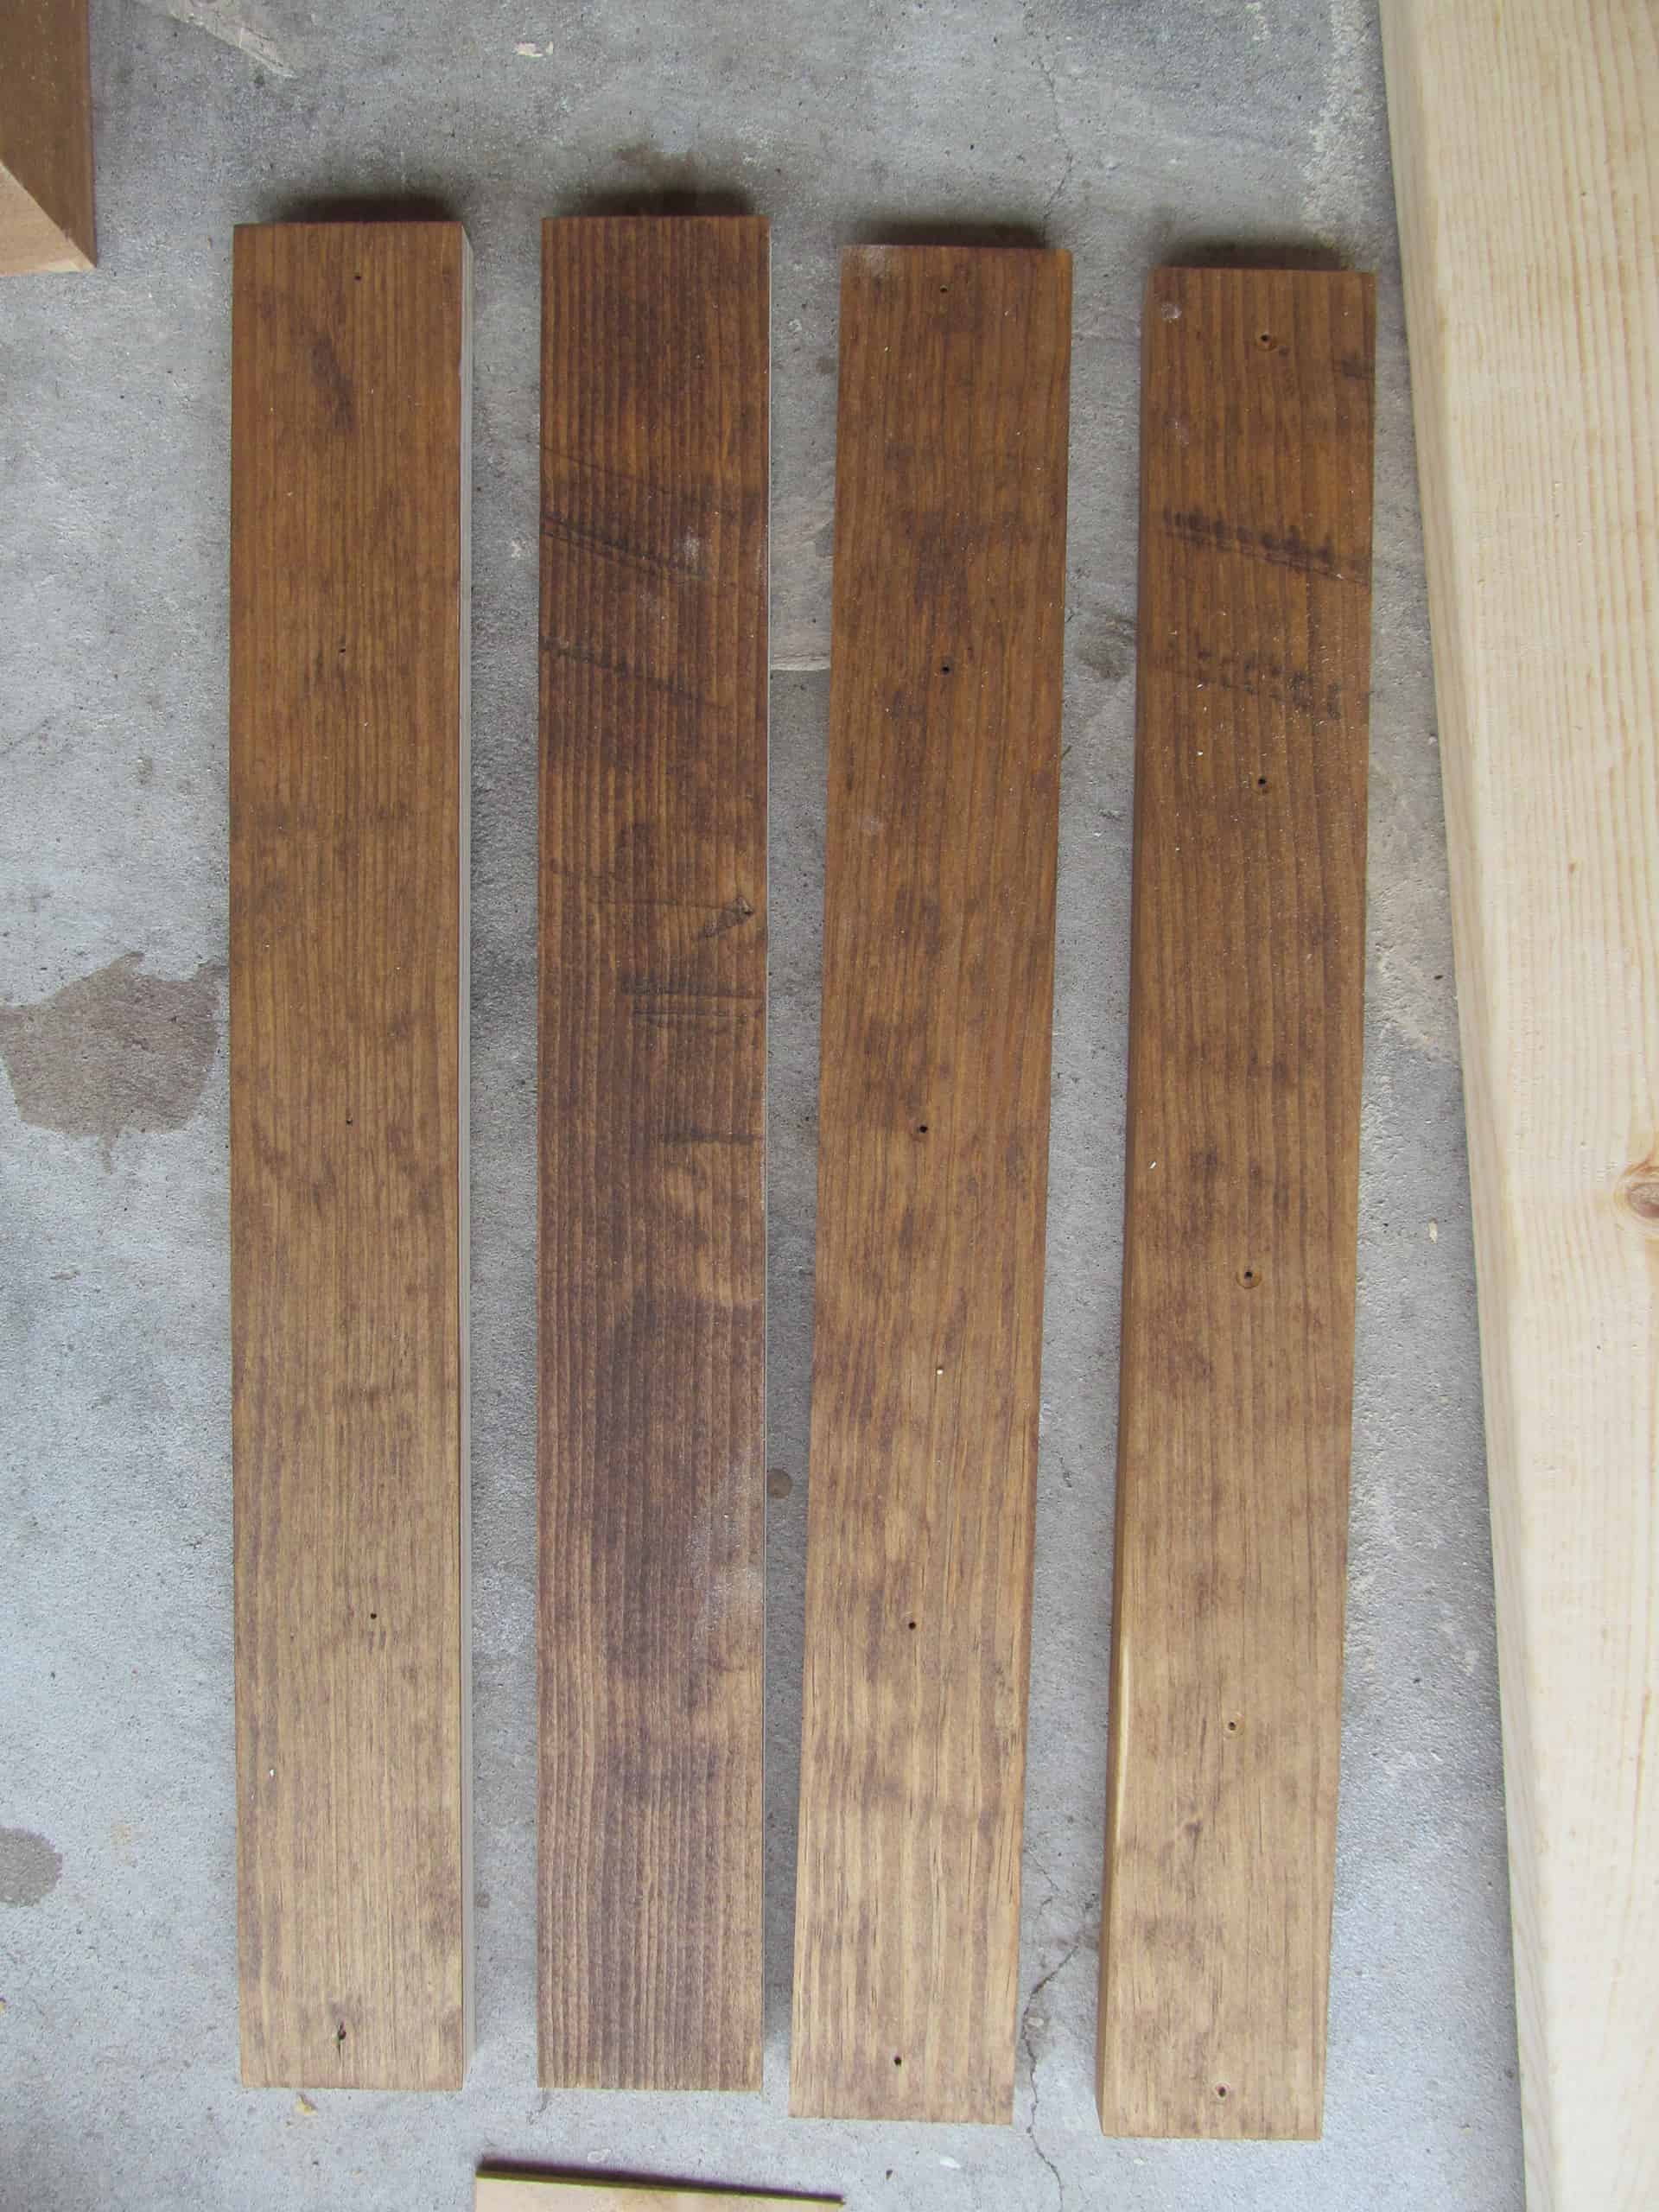
While that was drying I cut all my 1×3 boards that are to go on the backside of the rack to hold the bottle there, you need to cut eleven of them at 21″ long, or you can cut them to fit on the inside perfectly…since mine was all wet with the stain I didn’t worry about cutting them to fit perfectly, I just cut them to 21″…which this will face the wall anyway…no one will ever know!! Okay, actually I am giving this one away to ONE OF YOU…so you will know but it’s okay, just try and keep my secret, please!! 🤭
So after I had all of them cut, I went ahead and predrilled five holes along them…I held it near my wet project to get the closest area they needed to be, phew!! They were all drilled where they needed to be…so I just had to sand and stain them before screwing them onto the back.
Now, I would do that step before staining the piece if I were you, but it works either way…just hindsight tells me it may have been a smidgen easier to do it first!
Once it has all dried, you can flip it over and screw the 1x3s onto the back…now this part was a wee bit tricky and I had to have my hubby come to hold the boards on the back while I tried a wine bottle in several holes on each row.
The board has to be placed low enough to hold the bottle in securely but up high enough that the bottle fits through! It was not the most fun I have ever had in my life I will just say! Lmbo!! We stood it up and he was on the backside holding the board I would test the wine bottle and when we found the perfect level, he would hold it there and I would draw a line along the top of the board.
I was then able to easily screw them into place without worrying that it wouldn’t work! I placed the stained side down since that is the part that shows through the holes on the front.
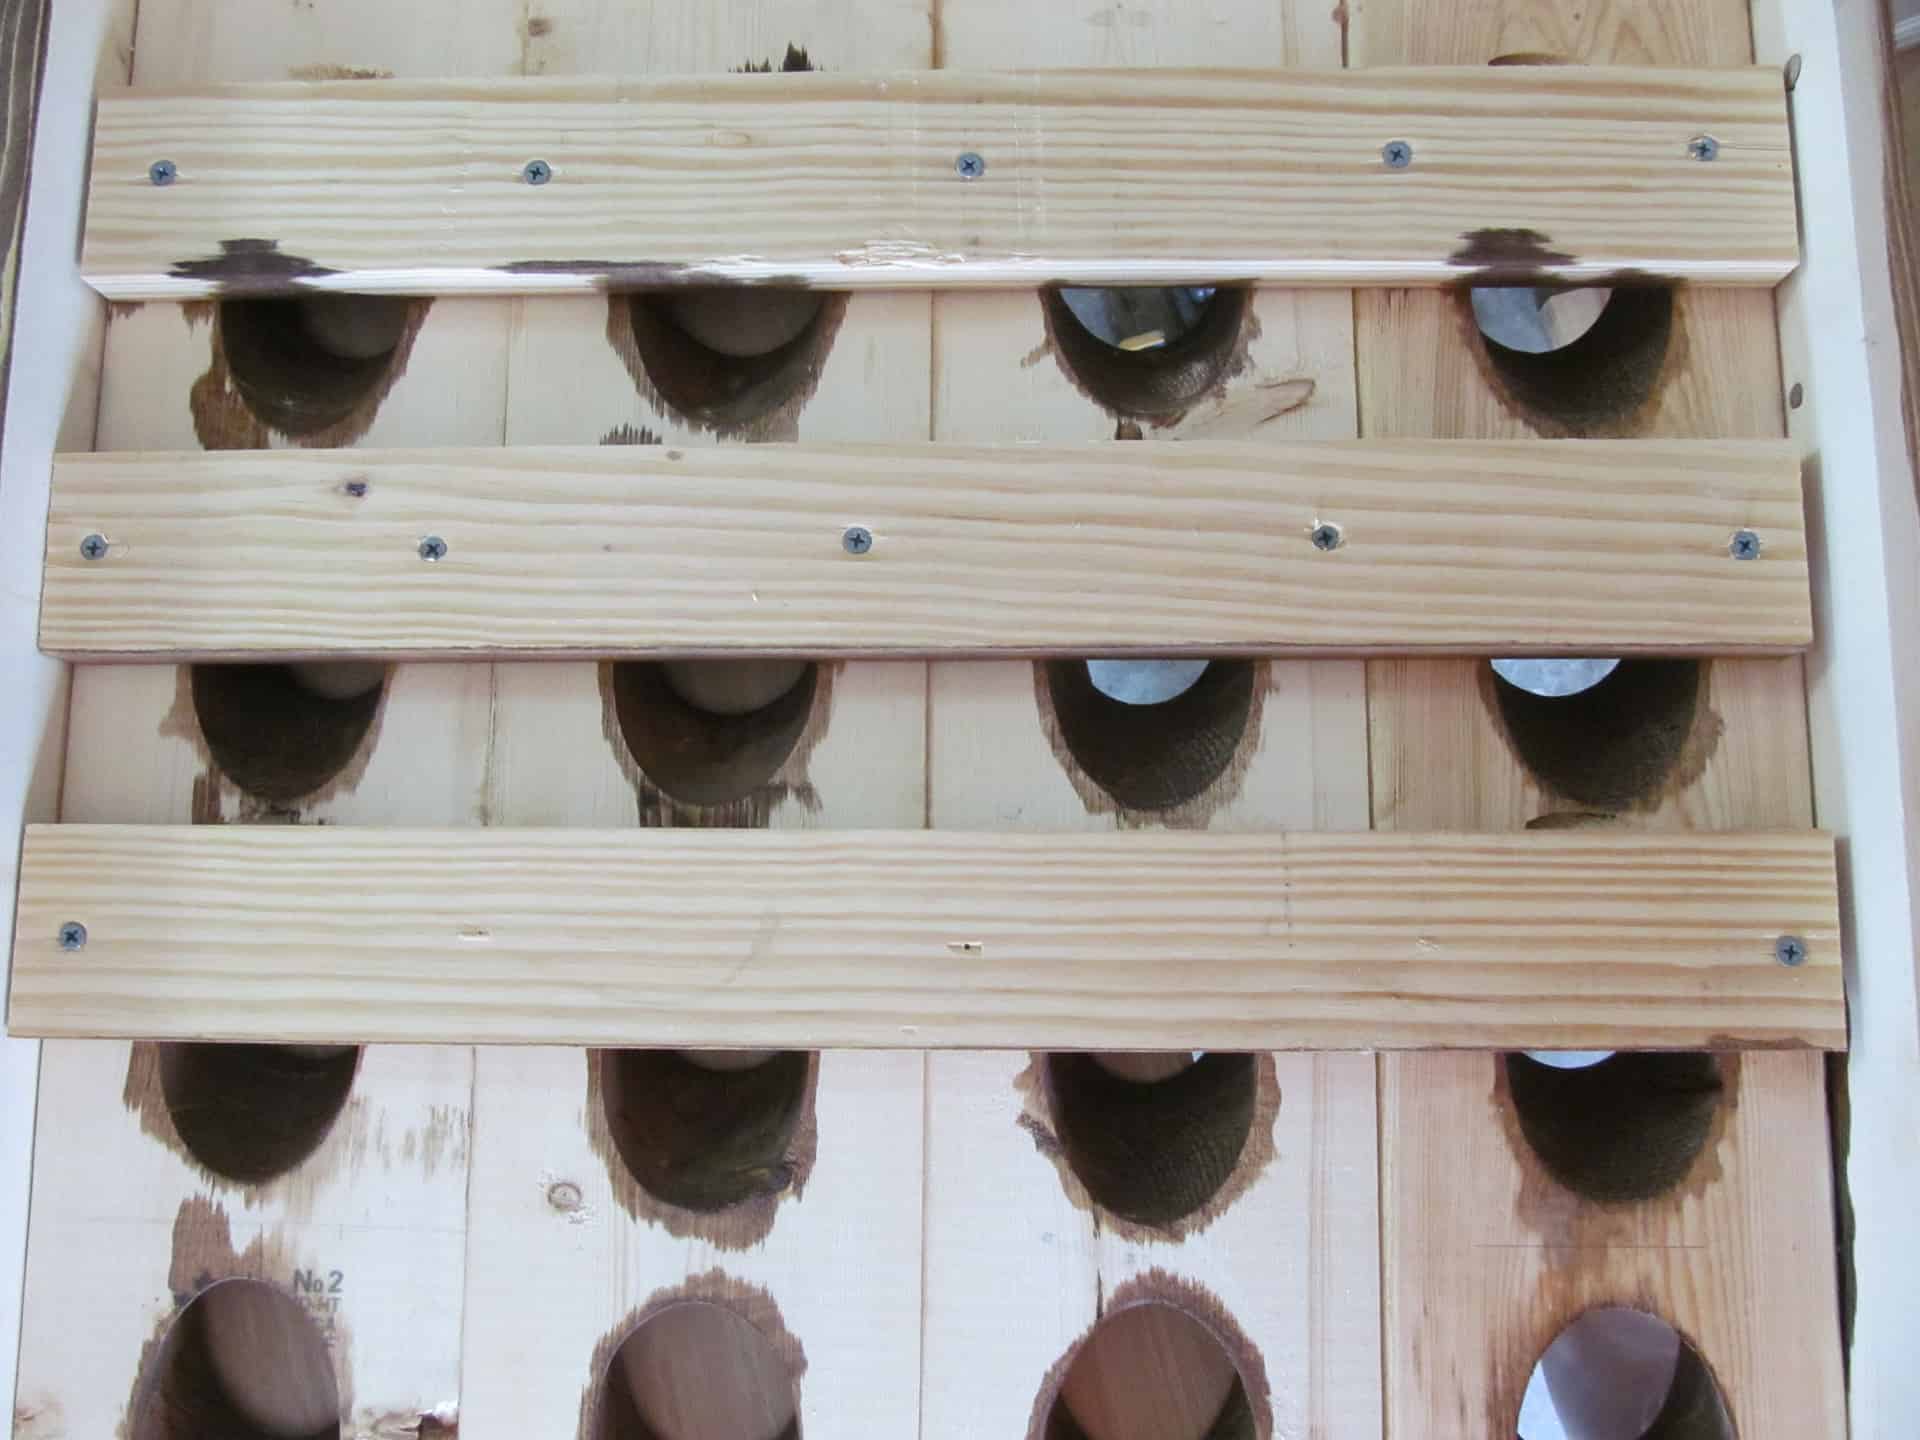
I used 1 1/4″ screws to secure the boards… and adding these eleven boards seemed to add 30 pounds…it didn’t really but man it was pretty darn heavy!! It is officially finished for now…this is a wall-hanging wine riddling rack though so it needs some fancy hanging hardware…mine has not come in just yet so I will have to update the post as soon as I receive it and get it attached to this piece! I am in LOVE with this wine rack I tell you!!
Update: I have used a french cleat to hang many heavy-duty pieces at this point and I would recommend using one here! I show how I made a french cleat in this DIY ring toss post! In order for the wine rack to sit flush on the wall, you will need to make the french cleat out of a 1x board, as long as your 1×4 frame has a round about 1/2″ overhang on the front! Make sure and use long enough screws to go all the way through the french cleat, the 1×3, and the 2×6, so a 2 3/4″ screw will work great without going through the front!
Now, one thing worth mentioning, even though this is a wine riddling rack, the Pottery Barn website states, is more for the display of empty bottles and can only hold 10 full bottles at any time! I don’t see why this would be unless their wall mount can only hold so many pounds and that is why they say that?! Be cautious but if you use a french cleat they can hold 100-200 pounds, and you can use two to be safe, but be very careful that you don’t overload it!

Hang that beautiful wine riddling rack on the wall and enjoy the beauty of this large piece of wall art that doubles as storage as well!
The giveaway has ended!

I would like to thank Kreg for making this giveaway happen and I would love for you to show them some love too!
Have a GREAT week everyone!!

Want to save this DIY Wine Riddling Rack for later? Pin It!


Beautiful build! What type of heavy duty hanging hardware did you end up using on this piece?
I’m thinking you could double the 1×6’s and still get the depth; you could also attach a french cleat or two to the back and screw the support into the studs instead of resting it on a buffet and then you should be able to fill it with wine. You’d want to be very, very careful with screw placement though, because it would be an expensive mistake to pull out drywall and trash 88 bottles of wine!
Yes Katy!! It is supposed to be wall hanging, I was giving this one away so I was not going through all the work to hang it on my wall…Lol!! Plus, I had to get this picture done way before I was sending it off and I hadn’t got the hanging hardware in yet…I need to update the post since I have already attached it and given it away!! Haha!! The 1×6 idea is worth a shot and we threw it around at the time…we just decided against it because we weren’t sure we would be able to get them lined up perfectly…so we went the long route to be safe!! Even wall mounted, I still wouldn’t fill the rack with full wine bottles…I based the plans off of a Pottery Barn version and they state in their description it can only hold 10 full bottles of wine…so I would be skeptical of ever placing more than that many full bottles on it!! If you build it I would love to see it…and good luck if you try to fill it with full bottles…I hope it holds up!!! Have a good one!!
Use 2- 1X6 trim, glue, and sand.
That was a thought we also threw around during the process, we just weren’t sure we would be able to get all the holes lined up perfectly…so we went the long way!! Lol!! If you build it with 1x6s I would LOVE to see it!! Maybe I will go out on a limb and try mine with 1x6s!! Good luck!!
Cool, I may try and use 1 x 6 instead and not have to do the chisel step.
Hey Jeff,
You can absolutely use a 1×6, and in my many moments of frustration I thought about switching to 1x6s, but we tried drilling one and it just didn’t give the depth that I wanted, but it sure was easy compared to the 2x6s! LOL!! So it is just up to your preference! If you build it, I would love to see it!! Good luck!!
I follow on instagram. …..love how you were able to figure this out!
Thanks for following! I am so glad we were able to figure it out as well…I have always wanted to build a riddling rack…and how exciting that I get to give it to one of you!! Best of luck!!
This is stunning! Thank you for sharing the plans. I follow you and Kreg on Instagram as @angevege.
Thank you Angela!! And thanks for following… Best of luck!!
What a great piece! Thanks for the tutorial!
Thank you Erin!! I love being able to share what I build or craft with everyone… and I’m even more excited that I get to give this one away!!
P.S. your chairs you spray painted were so AWESOME!! I had no idea you could even do that!!
Thank You! I was very excited about how they turned out and they’re still holding up perfectly! I love the giveaway!
It looks absolutely amazing, you are a talented builder 🙂
Thank you so much ma’am!! So glad to see your face on my blog!!! You are always so sweet!
IAnytime, I love following you and love all your builds..keep up the awesome work 🙂