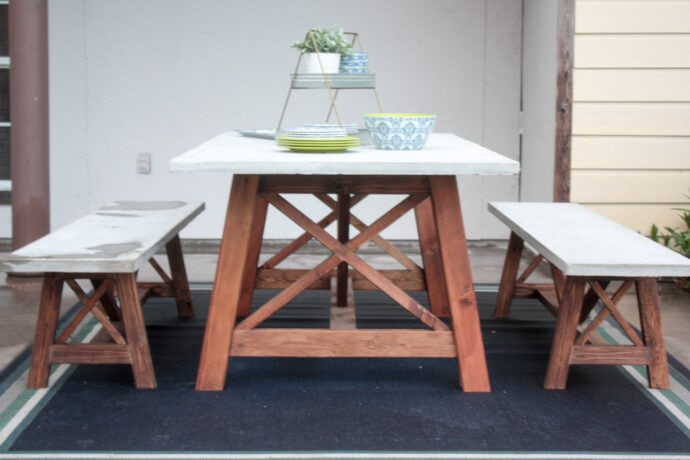
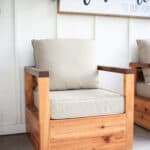
DIY Concrete Outdoor Bench
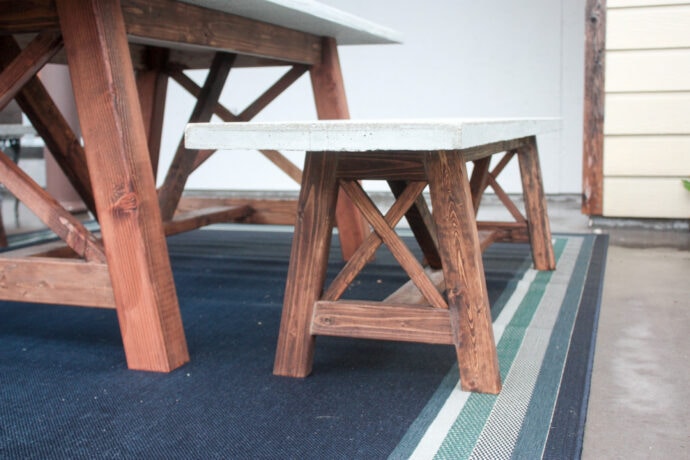
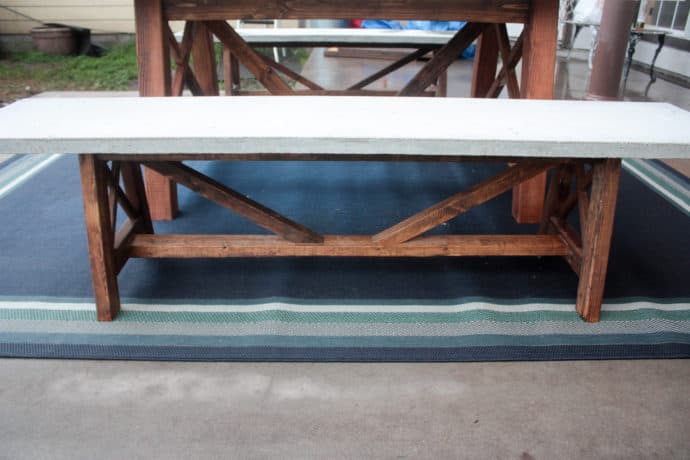
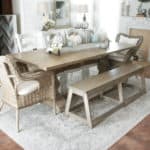
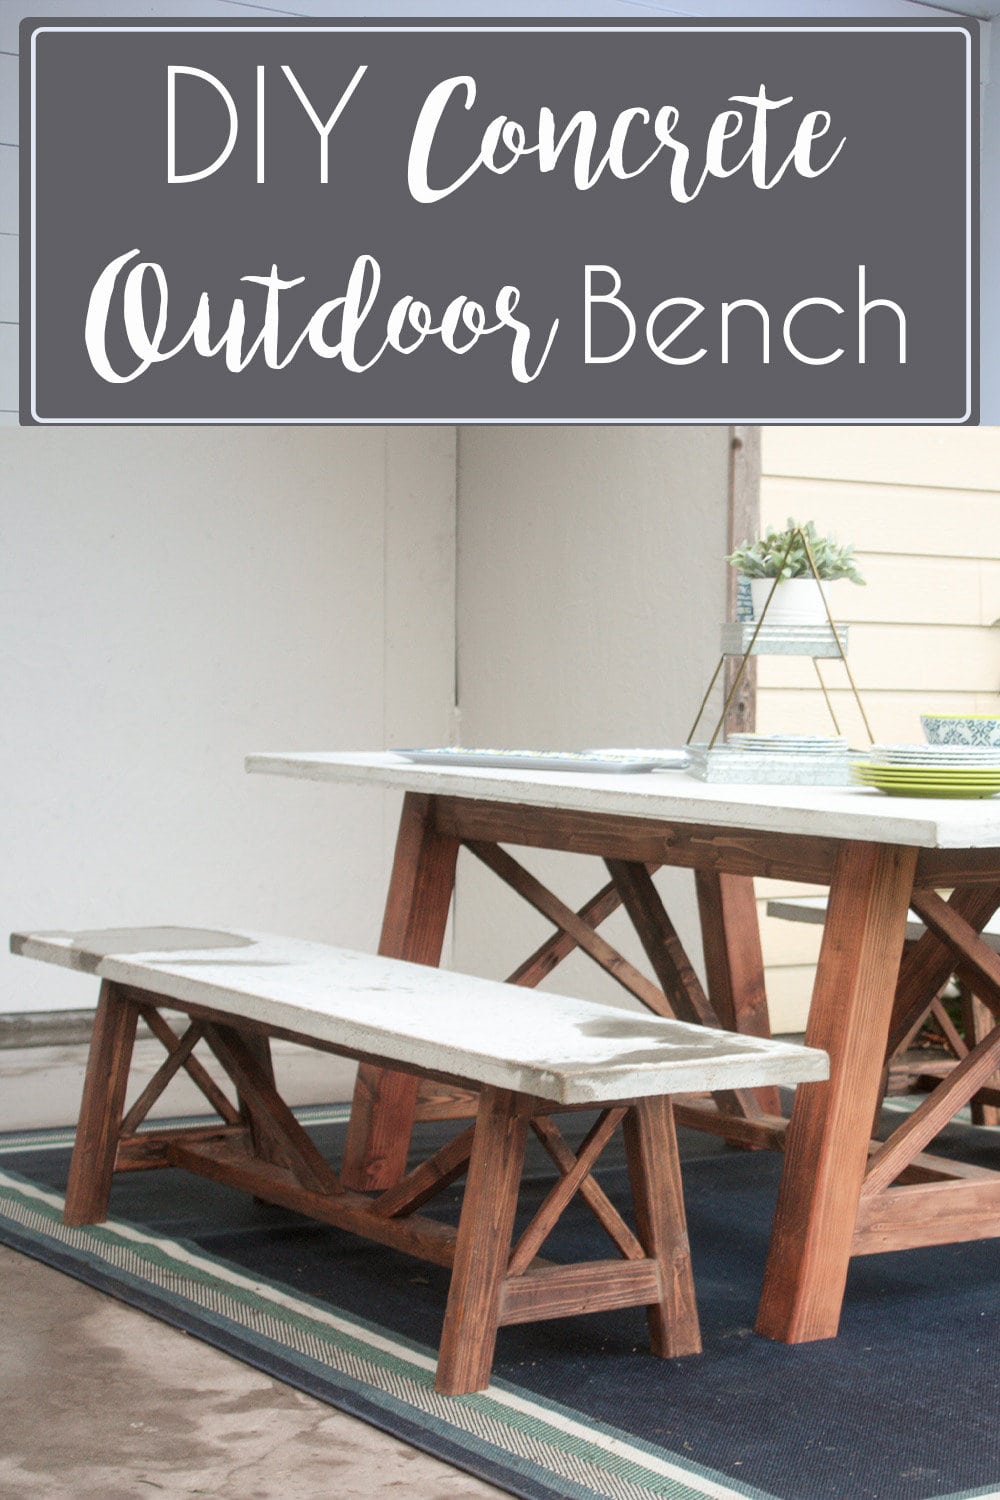
This gorgeous DIY concrete outdoor bench is the ideal match for the DIY concrete top dining table! Build the furniture to make your back porch or patio the outdoor space of your dreams for very little money but yet they are built of utmost quality and will last for many years to come!

Don’t mind all the puddled water everywhere, it has been raining nonstop and if I didn’t take pictures as soon as it stopped for 5 minutes, I wasn’t going to be able to take pictures! Lol!
I couldn’t be happier with this set that I built for the backyard and I cannot wait for the rain to end so I can get out there and have a meal with the family!!
So, things have been a wee bit crazy around here and I haven’t had much time to spend building and I was having some major building withdrawals!! Lol!! I had to homeschool my kiddos for the last two months of school and help take care of my grandma who had a major setback in her liver cancer.
She is doing slightly better now and the kiddos are out of school for the summer, so I’ve had a little spare time to run into the garage and build a few things, hopefully, I will have a couple more plans coming at you over the next month!! Yay!! Now that we have caught up, let’s quit wasting time and get busy building this concrete outdoor bench!!
Gathering Supplies for the DIY Concrete Outdoor Bench
You can download the printable plans for the bench by clicking here -> DIY Concrete Outdoor bench<- The plans for the table can be found at Kregtool.com
Materials for the Concrete Outdoor Bench
NOTE: Amazon links are affiliate links! Affiliate links are links that pay me a small commission at no extra cost to you should you make a purchase after clicking a link! I always appreciate you shopping at my links!
- 1 – 4×8 sheet of melamine
- 4 – bags of Quickrete 5000
- 1 roll 1/2″x36″x10′ hardware cloth
- 5 – 2x3x8
- 2 – 2x4x8
- 2 – 2x2x8
- 1 – 1x2x8
- silicone caulk
- miter saw
- Kreg jig – updated to the new Kreg Jig, it’s so cool now that you don’t have to set your board width!
- 2 1/2″ Kreg screws
- wood glue
- countersink drill bit
Cut List for the Concrete Outdoor Bench:
- 2 – 16″ x 72″ pieces of melamine
- 4 – 2 1/4″ x 16″ pieces of melamine
- 4 – 2 1/4″ x 73 1/2″ pieces of melamine
- 2 – 14″ x 70″ pieces of hardware cloth
- 8 – 2×3 @ 16 1/2″ mitered 10 degrees off square, ends parallel
- 4 – 2×3 @ 6 1/6″ (longest side end to end) mitered 10 degrees off square, ends not parallel
- 4 – 2×3 @ 9 13/16″ (strange measurement because I wanted it 3 1/4″ from the ground) measured longest end to longest end, mitered 10 degrees off square, ends not parallel
- 4 – 2×4 @ 46″
- 4 – 2×3 @ 46″
- 4 – 2×2 @ 20″ mitered at 60 degrees of square, ends parallel
- 4 – 1×2 @ 10 3/4″ mitered at 38 degrees off square, ends parallel
- 4 – 1×2 @ 6 15/64″ mitered at 38 degrees on one end and 13 degrees on the other end…MAKE SURE AND MEASURE YOUR SPACE!
- 4 – 1×2 @ 3 57/64″ mitered at 38 degrees off square on one end 13 degrees on the other…MAKE SURE AND MEASURE YOUR SPACE!
Building the DIY Concrete Outdoor Bench
Alright to get started, I made the mold for my concrete and poured it so that it could set while I built the benches! Then once the concrete had cured, my benches were ready to go!! I must state here that I would probably make the tops of the concrete outdoor benches slightly shorter than I did, simply because I don’t care for the look of the ends hanging over so far. Or you could make your bench bases slightly longer and solve the problem that way as well!! Or, if you like the look of how they are, by all means, don’t change a thing!!
Making the Concrete Molds of the Concrete Outdoor Bench
To make the concrete mold, I ripped a sheet of melamine down into two pieces of 16″ x 72″ (if you build the table, you can reuse the tabletop mold and create two new sections inside of the mold instead of buying more…but my mold was ruined in a severe storm we had) and then we ripped the leftovers down for the sides! I ripped the sides at 2 1/4″ wide and 16″ long for the short sides, and 73 1/2″ for the long sides!
Screw this frame together with 1 1/4″ drywall screws every 6-8″ and silicone around the entire inside, anywhere there is a seam!

Once that dries, the mold is ready for concrete!! I mixed my concrete by hand, it is not the most fun when doing it all by yourself, it’s much more fun to have a helper! Just mix it according to the instructions on the bag, and pour it into the mold…or dump it…or scoop it…whichever way you want to do it!! LoL!! Make sure and really jiggle the concrete, I don’t think that’s the actual term for it but it’s what it seems like I’m doing, so I am going to call it like it is!!
I tested out this method…I didn’t vibrate the bench tops to see if it made any sort of difference! Well, the results were kinda interesting!! The concrete dining table top was vibrated for an hour by two people and had quite a few air bubbles, but we didn’t work the concrete as much as I had on my vanity top (see it here – DIY Concrete Vanity Top) which had virtually no air bubbles and was vibrated for an hour by one person! So, I thought let me try working the concrete really well and seeing if that makes any difference, and boy did it ever!!
Let me make a chart to help you see my experiment!! Lol!!

So, what I gathered from my own experiment is that I will spend a ton of time working the concrete into the mold vs spending a ton of time vibrating the mold!! You can do as you wish though!! LoL!! Now I was rushing to pour this concrete because I had a trip planned to Ikea as soon as I finished pouring the concrete…so that was it, the only picture I took!! Haha!! I was just too excited and had a three-hour drive to get there, so I’m sorry but I really wanted to go!!
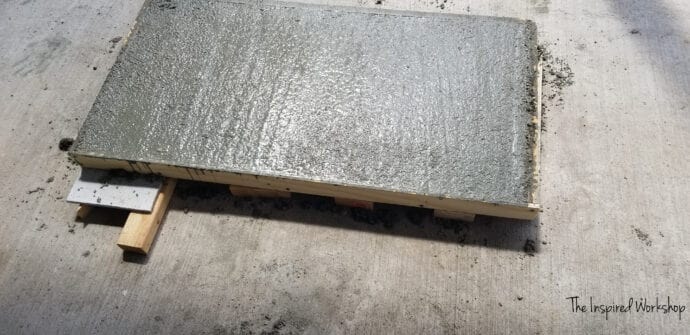
Where were we? That’s right, pouring and WORKING the concrete for our concrete outdoor bench! After filling the mold about halfway, make sure and place your hardware cloth inside the form, you will cut the hardware cloth 2″ smaller than your mold making it 14″ x 70″ so that you don’t have to worry about it touching the sides! Continue pouring your concrete until the mold is full, screed the concrete until smooth, cover and let set for at least 48 hours!!!
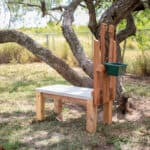
This picture is from my milk stand for goats that I built recently, but it shows how the form will look when filled with wet concrete and screeded! Make sure and cover this with a tarp or other heavy plastic so it doesn’t dry too fast!
While that is setting, you can start building the bases of the concrete outdoor benches!
Building the Base of the Concrete Outdoor Bench
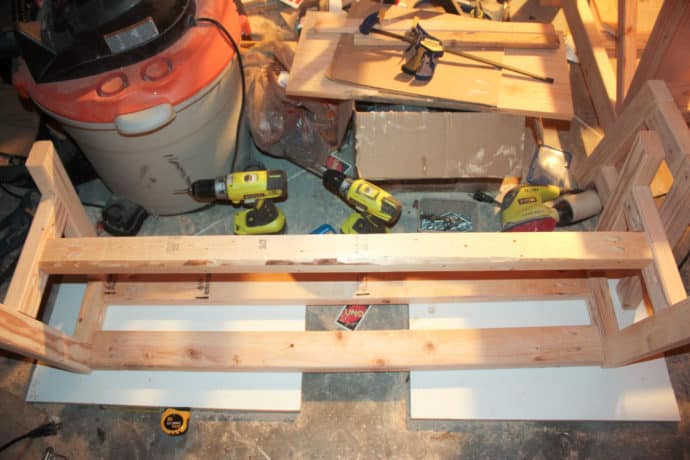
Okay! First take two legs, a 2×3 @ 6 1/6″, and a 2×3 @ 9 13/16″. Drill pocket holes on the two pieces inside the legs as in the picture below! Drill 1 1/2″ pocket holes, and attach with plenty of wood glue and 2 1/2″ outdoor pocket hole screws! If you have not used a Kreg Jig before to drill pocket holes see this post!


Repeat the above step three more times and you will have all of your bench legs, and then we can put them together! Using the two 2×4 @ 46″ boards as top stretchers, drill the same pocket holes (1 1/2″) and attach them the same way (wood glue and 2 1/2″ screws) as in the last step!

You will be attaching the first 2×3 @ 46″ same pocket holes and all as above, attach in between the 2x4s you placed in the last step! I don’t have a picture of this step because on the first design this wasn’t included and then I decided that I probably needed a little extra support since the top was going to weigh around 130 pounds…and have people sit on it!! So this step was at the end of my project!! Lol!! But you can do yourself a favor and add it now!!
Then attach the other 2×3 @ 46″ as the bottom stretcher. I used a 1 x 2 scrap piece of wood to set it down 3/4″ before attaching! Attach the same as above!

Try not to be distracted by the MESS in all my photos!!
Next, come the braces (2×2 @ 20″)…again, this wasn’t in my original plan, so they missed a real picture!! Lol!

And, my actual boards were 20″ but Sketchup said it should have been 20 1/6″ …not sure who is wrong here!!
To attach the braces to the stretcher I counter sunk screws from the top 2×3 and the bottom 2×3!
Here is a view of the counter sunk holes on the top 2×3, it’s a little blurry!

Last is the decorative X on the base of the concrete outdoor bench! Make sure and always measure your own project, don’t go off the measurements of someone else’s!! Trust me on this one, I am not perfect and therefore my woodworking is not perfect…so I always measure, measure, measure!! I did the solid part of the X first and then did the smaller split pieces! I also ripped my 1×2 down to 1″ instead of 1 1/2″ on the table saw…it just looked like a better fit!

Again, I clearly was rushing and didn’t take pics of the rest of the X! So finish the X with the two pieces and look at the printable plans if you have any questions!! Then the woodworking part is complete!!
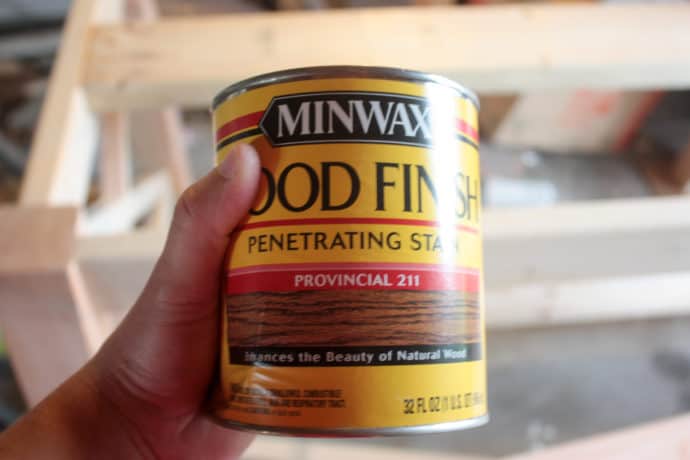
Now, I sanded and stained mine! I used provincial by Minwax!
Make sure and thoroughly seal the benches after the stain has dried! My favorite sealer (not for use on white painted furniture as it yellows it badly) for outdoor projects is this Hellsman Spar Urethane!
Now go remove the screws from your concrete molds and flip the bench tops over and check out your handy work!! There is something so rewarding with working with concrete…I don’t know what it is, but I feel like big shit when I get done making something out of concrete!!
There are several ways you can go about attaching the concrete to the bench, you can use liquid nails if you want it permanently attached to the bench, or you can use concrete screws, they go straight up through the bottom of the any of the top stretchers and into the concrete! You can then remove the screws if you ever needed to remove the top!
Last, if you have a ton of air bubbles, you can use portland cement and fill them in! I opted not to do this step on the benches, though I did do it on the tabletop! It’s up to you! Now you just need to pat yourself on the back for a job well done!! This beast of a bench is all for your enjoyment!!
I know I will get asked what I used to seal the concrete, but I actually didn’t seal it. I will see how the concrete outdoor bench tops hold up since I didn’t, but there really isn’t anything to get on the benches! There are no trees around and the water will always dry out!
Make sure and grab the free plans for the table over at Kregtool.com!
Have a wonderful week!!

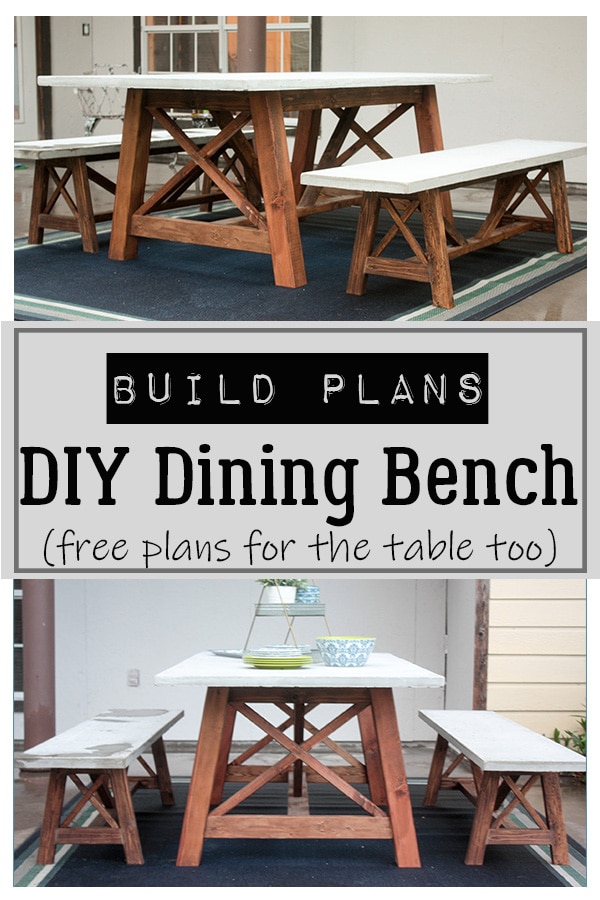
Want to save this DIY Concrete Outdoor Bench for later? Pin it!


Hello, Thanks for the wonderful plans and for sharing your insight as you built it for potential future modifications. I was wondering, are they top-heavy at all? I have kids and just don’t want one tipping a bench onto another. Also, are they cumbersome to move?
Thanks,
Nina
Hey Nina!
Thank you so much for the sweet words, I enjoy sharing my projects with you all so your comment made my day!
I have been using the table and the benches for about 5 years now, and I can say they have never even remotely budged without us moving them! Lol! They have survived 2 hurricanes, a tornado, and now my goats that have been in my backyard for a year and a half! They jump up and down all over the table and benches all day long, the goats weigh about 75-100 pounds and they don’t even budge them, they come running fast as heck chasing each other and jump and slide on them with no movement whatsoever! And yeah, I know it’s gross that they jump all over them and lay on them…so the table and benches now belong to them and they will be moved out to their pasture when we get the fence finished… and I will be building us new ones! LOL!! Those darn goats have no respect! Haha! And I think that helps answer your second question, yes they are pretty cumbersome to move…the table more than the benches of course!
Hope that helps! Have a good one!!
Beautiful work! Pardon my dim-wittedness, but what are the braces attached to at the top? They look as if they would sit between the rails with nothing to attach to.
I’m glad to hear that your grandma is doing better. I really like how the table turned out. I have a concrete project in mind, but I’m a little nervous about starting it because I’ve never worked with that medium before. 🙂