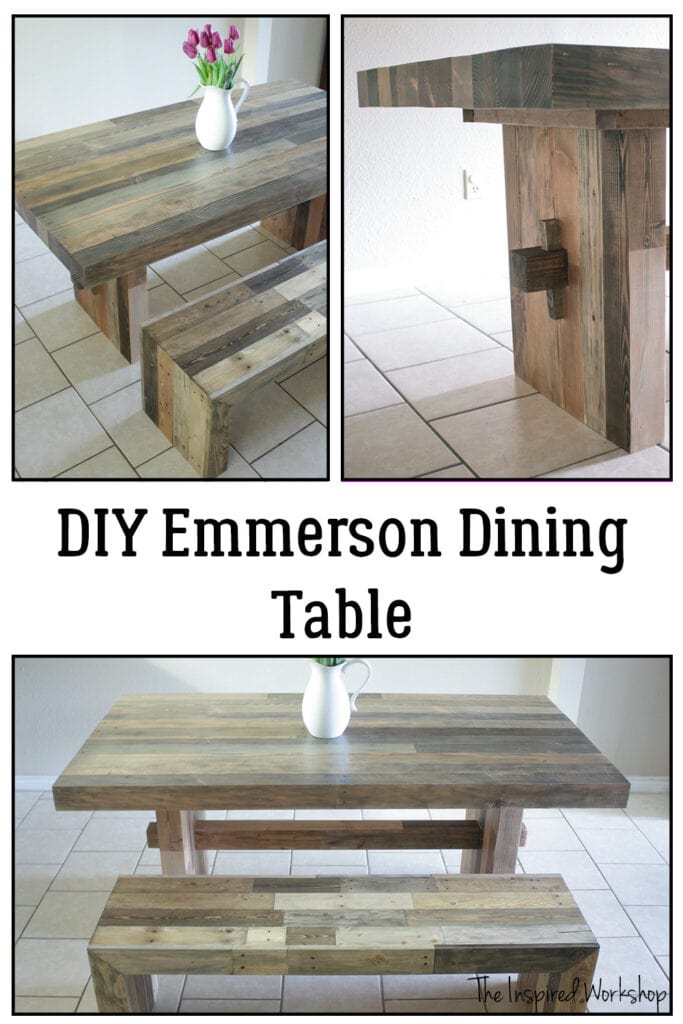
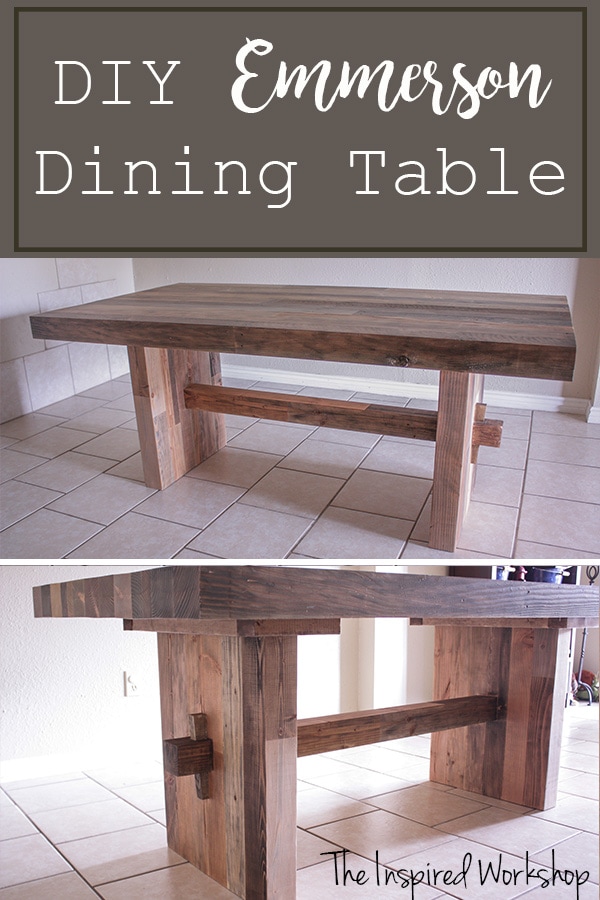
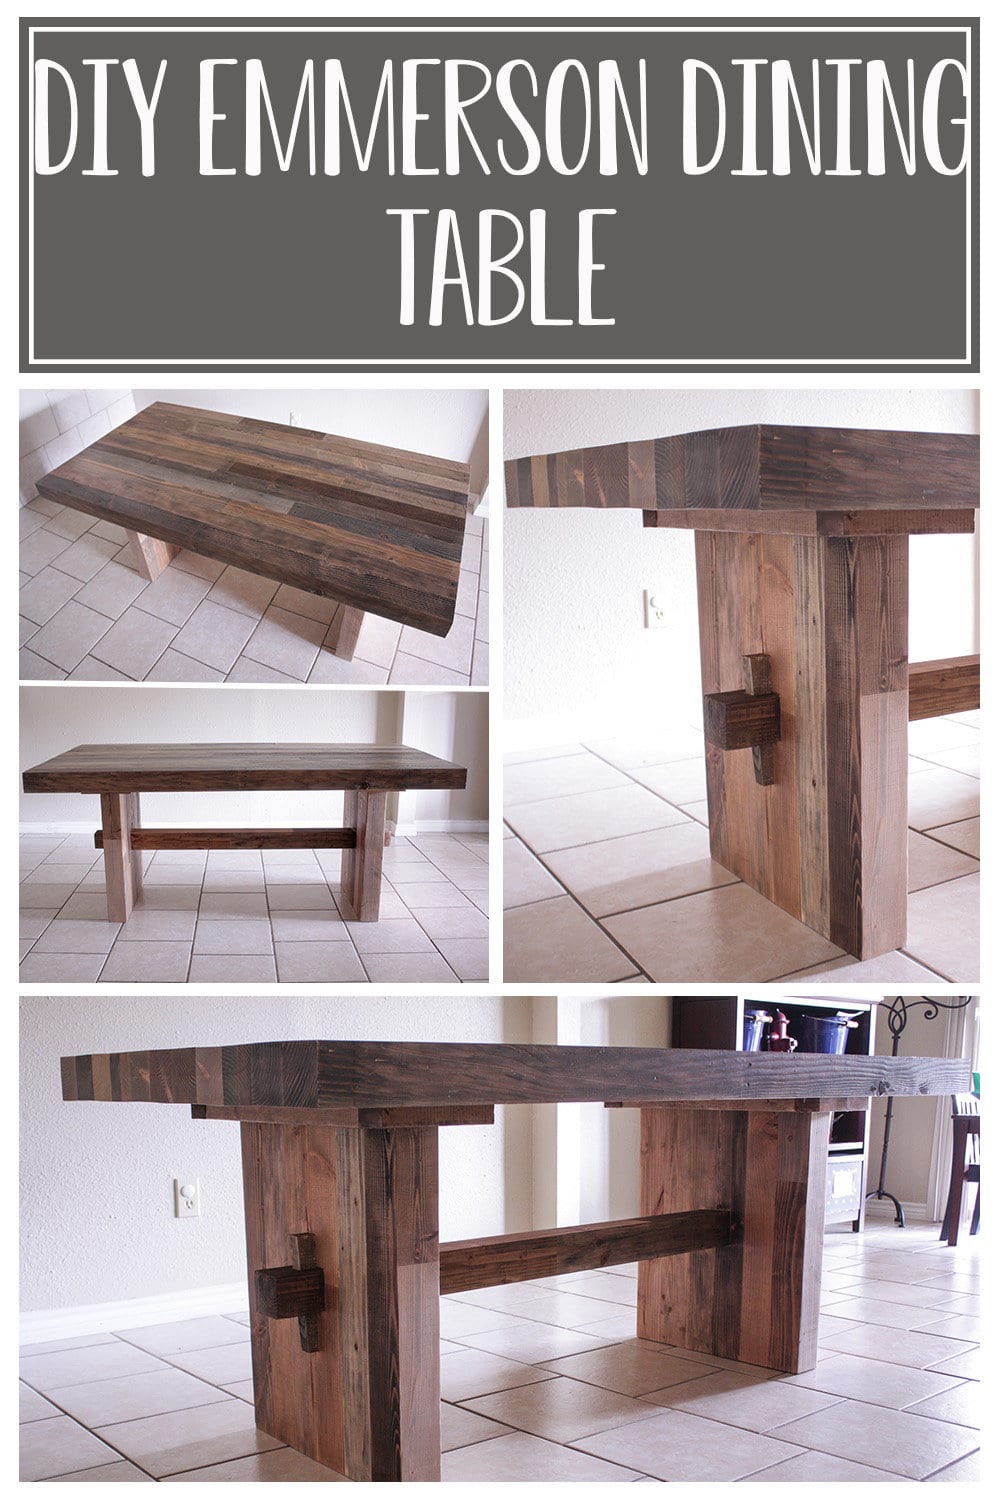
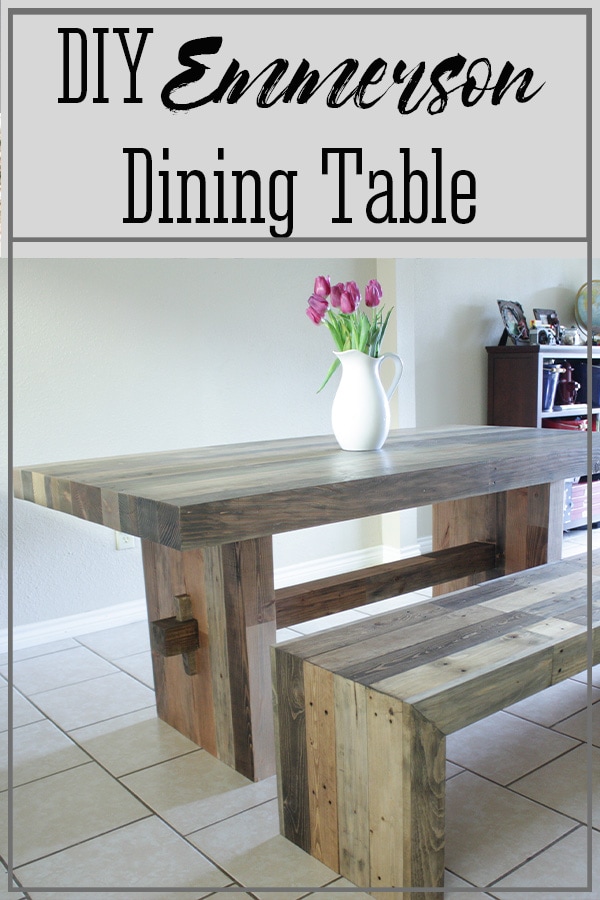
DIY Dining Table – West Elm Emmerson
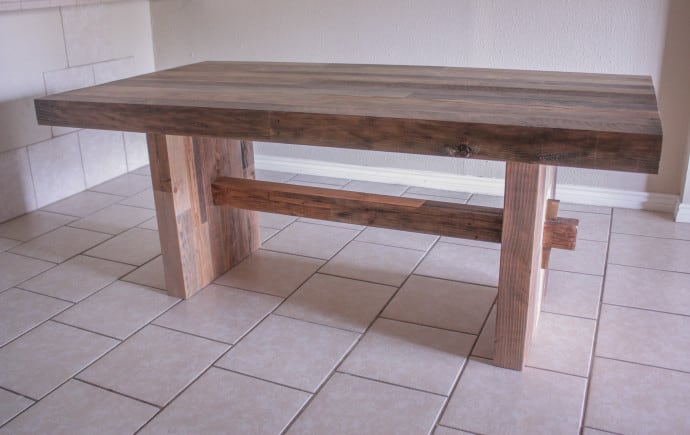
This DIY dining table is the do-it-yourself version of the West Elm Emmerson dining table! Build yourself a beautiful dining table that is solid wood and made to look just like pallet wood. Learn how to make a wedge through tenon for the table base, too!
If you follow me on Instagram, then you know that way back in JULY, I posted my new DIY dining table, right after getting it built! I was BEYOND excited to have built a Knockoff West Elm Emmerson Dining Table, my Dad and I spent two days getting it built, it was just perfect, we hand planed it, and sanded it to a buttery finish…it was time for me to distress and stain it…but I left it sitting in his shop…all this time!!
Why do you ask? Well, honestly, because I wanted it to look JUST like my inspiration piece, the West Elm Emmerson Dining Table, but I was so afraid I was not going to be able to pull off the ‘old pallet wood’ look that I wanted for the DIY dining table, so instead of testing stains for a few days and knocking it out that same week…I let it sit, and sit, and sit some more!! Sometimes I make myself so angry!😅
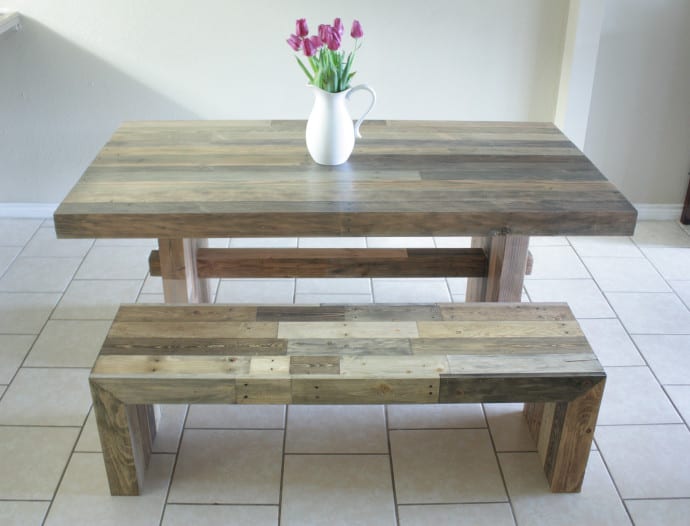
But, I am THRILLED that I FINALLY finished my DIY dining table!! Now I have a blank slate here in the dining room and I can’t wait to bring so many more DIY projects to this room! Luckily, you can’t see the absolute mess behind me that I created making this room a blank slate! Let’s just get another look at this table, shall we!!
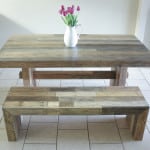
Also, I built a matching bench as well! Get the plans for it here, DIY Emmerson Dining Bench!
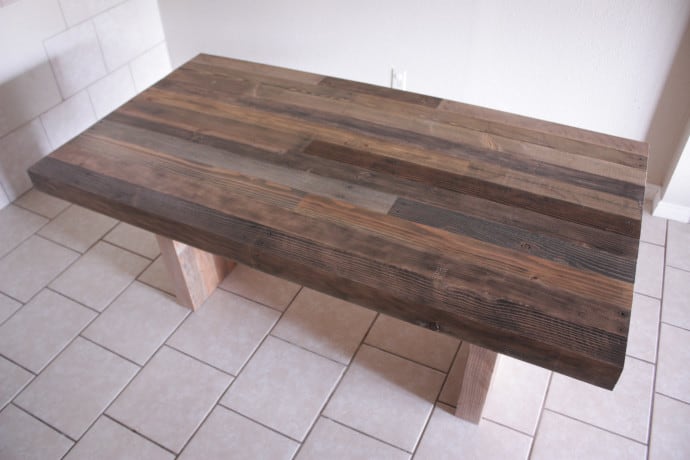
I am not sure why in the pictures the legs look so light and the top looks so dark, in real life they are pretty well matched!

The best part about this DIY dining table is that I got to spend some wonderful time with my Dad…and I only spent $120 bucks on it!! (updated lumber costs would place this table around $300 in 2022)
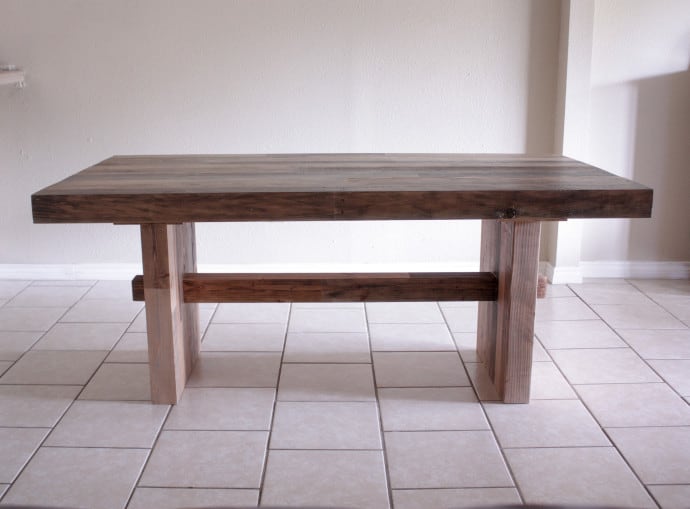
This Emmerson DIY dining table is MASSIVE and solid…you cannot find a table of this magnitude for such a small price tag! West Elm charges $1200-1600, and their version is pallet wood over a frame…it is not a solid slab like they make it look…I actually learned that AFTER making my Emmerson dining table (you know, when it takes you six months to get something finished, you can learn a lot in that time…Lol)!
Although pallet wood is free, my husband used to work in a food distribution warehouse where they used to spray pesticides on their pallets all the time, and since I don’t use pesticides in my home, I definitely don’t want to eat off of them!! I did opt to make the bench the simpler way though, using 1x4s over a frame to be like pallet wood!
Let’s get to the building of this DIY dining table already!
Gathering Supplies for the DIY Dining Table
FYI: I built my table 70″ long, if you want a longer table, you will need to adjust your material list because making a 70″ table uses almost every last inch of wood you buy! The overall measurements for this table are ~70″ L x 38″ W x 29.5″ H.
This DIY Emmerson dining table is slightly lower than the average table which is 30″ H and since it is a solid slab, it leaves less than normal leg clearance…with that said my husband who is 6′ 4″ fits perfectly fine under it, and he doesn’t even look like Buddy the Elf sitting at an Elves’ table, so it’s all good!! The width is also slightly more narrow than an average table, but for my space, which is narrow it works perfectly, but if this doesn’t work for you, just add a board or two more! That’s why I love to DIY!
Materials for the Emmerson Dining Table:
Note: Amazon links are affiliate links! Affiliate links are links that pay me a small commission (at no extra cost to you) should you make a purchase after clicking a link. I always appreciate it when you shop at my links as it helps me keep bringing you free plans!
- 12 – 4x4x8
- 2 – 2x3x8 (these only come in 8 ft lengths and I can only find these as select Lowe’s, but you can always just use 1- 2x4x10 instead)
- scrap pieces to make the key (a tapered wedge that holds the stretcher tight)
- table saw
- wood glue
- planer (optional) – if you do not plane the wood you may need to join the boards with a Kreg Jig HD
 or biscuit joiner…I had even thought of using dowel rods all the way through, but if the wood is planned before joining, wood glue is all you need!!
 - large clamps
- chisel
- hand plane (or handheld electric plane)
- belt sander – I would have used a large orbital sander instead if I would have known how easy it is to use, I feel a belt sander is hard to keep from gouging!
- circular saw
- Bora Clamp – you can use a straight board here as well if you don’t have a Bora clamp or an Accucut by Kreg there are many ways to get that straight cut
Cut List for the DIY Dining Table:
- 11 – 4×4 @ 70″
- 1 – 4×4 @ 56.5″
- 12 – 4×4 @ 26″
- 4 – 2×3 @ ~8.5″ (make sure to measure)
- 4 – 2×3 @ ~21″ (make sure to measure)
- scrap pieces about 8 inches long…I think mine started as a scrap maple 1×3 which actually measured 1×3
Building the DIY Emmerson Dining Table
After listening to my Pops telling me that it should be illegal to build furniture out of pine…LOL..we got busy and had this table completed in two afternoons! This build was pretty easy…minus the joints to hold the base sturdy were a little more in-depth…but I will offer my simpler version of that when I go over how we built the base!
Building the Tabletop of the DIY Dining Table
To start off building the Emmerson dining table, we cut our boards to 70″ and planned them down to where they would glue up nicely because even though I wanted a ‘reclaimed wood’ look, I still wanted to start with a nice even tabletop!!
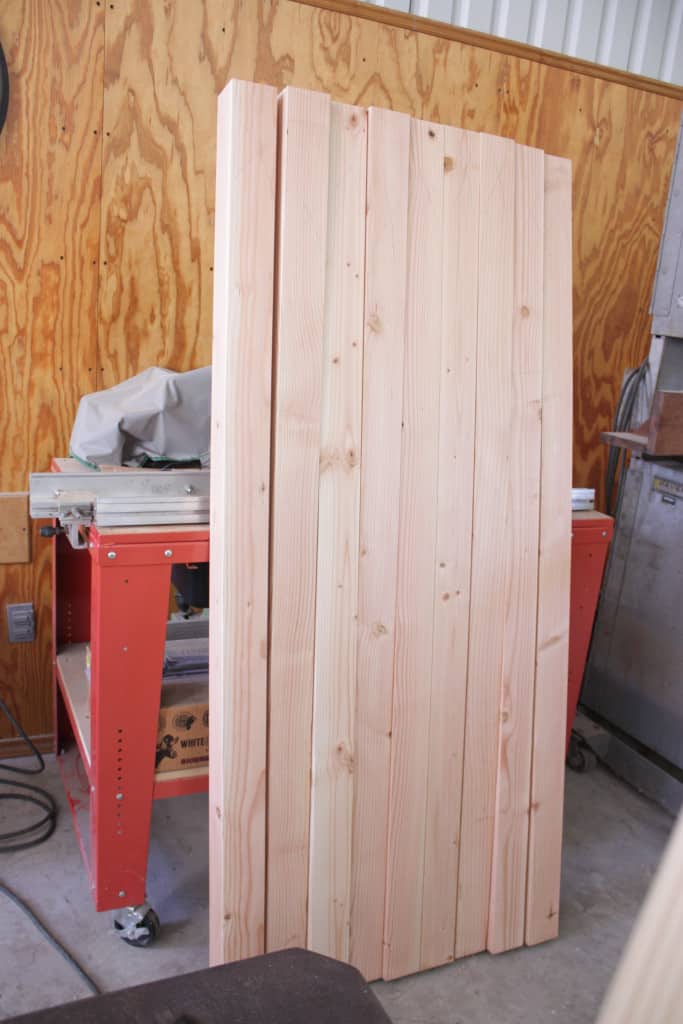
Now, don’t get any crazy ideas…just because I was able to state that step in less than 50 words, does not mean it took less than half a day!! Lol!!
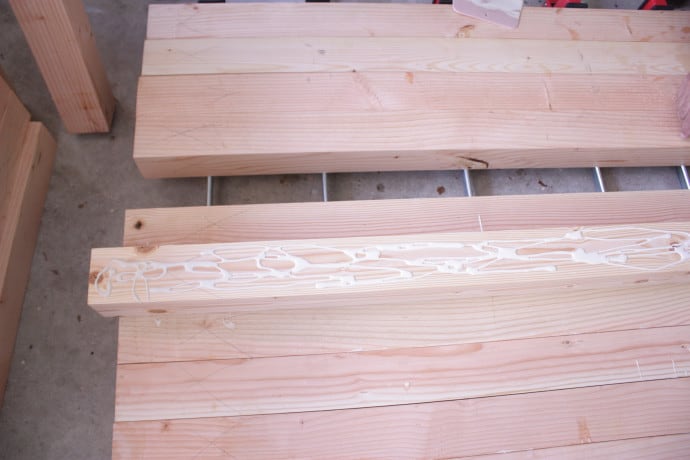
Using large clamps, we laid the boards down flat and generously glued both sides of the boards that would be touching each other.
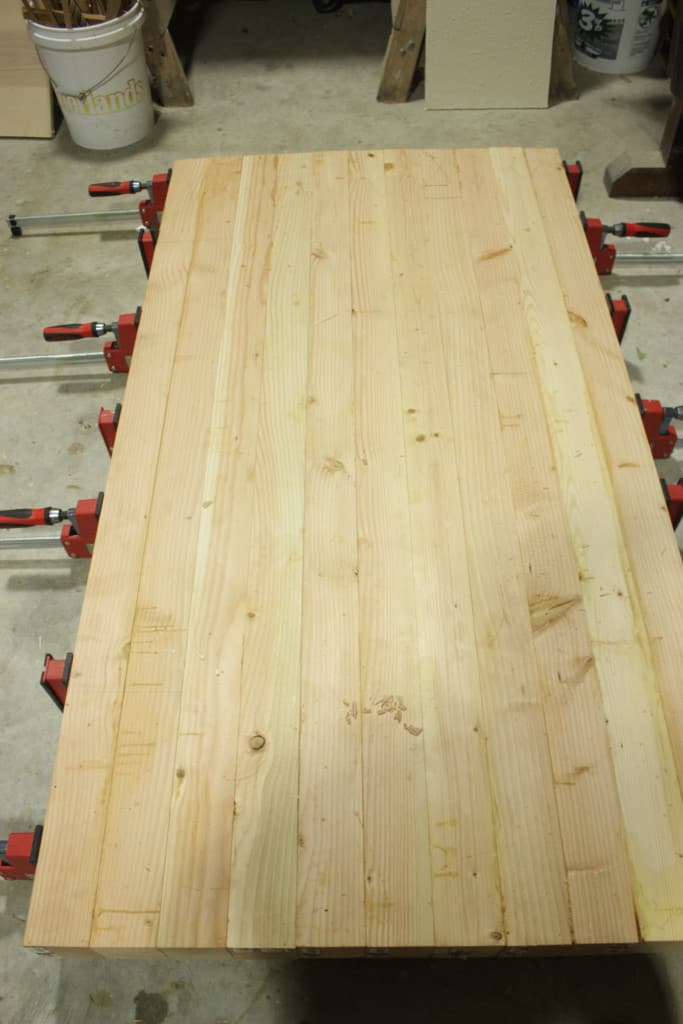
After getting the glue on all boards, we tightened the clamps, this tends to make the boards want to bow up in the middle, we used 2x4s across the top to make sure they weren’t bowed but we should have clamped them down somehow because we did end up with a slight bow in the center…which we were able to take out when we planed the top!
Also, I have been told that if we would have alternated the clamps on the top and bottom instead of just on the bottom, it would have kept the tabletop from bowing up in the middle!
Building the Base of the Emmerson Dining Table
Next, we decided what size we wanted the base to be so we could cut the stretcher down to size! We settled on 49 1/8″ for the base (I think we actually settled on 49″ and our imperfections gave us the 1/8″ but however it went, the base is 49 1/8″) the total length of the stretcher being cut at 56.5″.
Just a note…if I were doing this over again I would cut the stretcher slightly shorter, the base is a perfect size, I just don’t like the stretcher hanging out quite as far as it does…just my picky opinion!😅
The INSIDE measurements of the base are 42 1/2″ so we used the dado blade and start slimming the ends down 7″ on each side!
We just moved the board over all the way down one side and rolled it over and did the other side and kept repeating this until we had both ends all the way slimmed down like this!
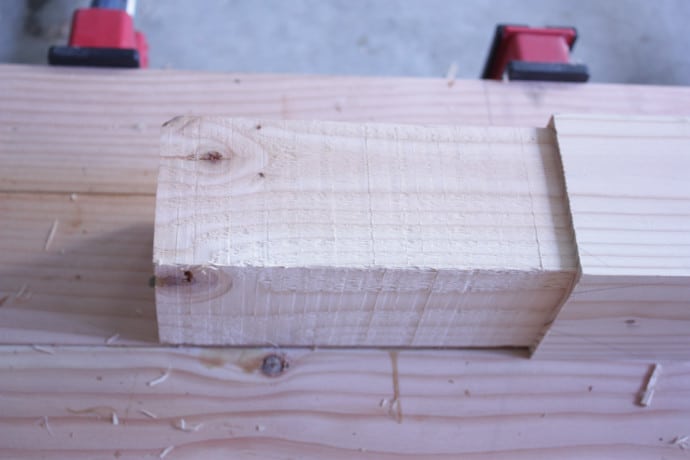
We took off a 1/4″ on each side of the stretcher of the DIY dining table…hindsight I probably would have only gone 1/8″ but again that is just for asthetic reasons, it works perfectly at the 1/4″!
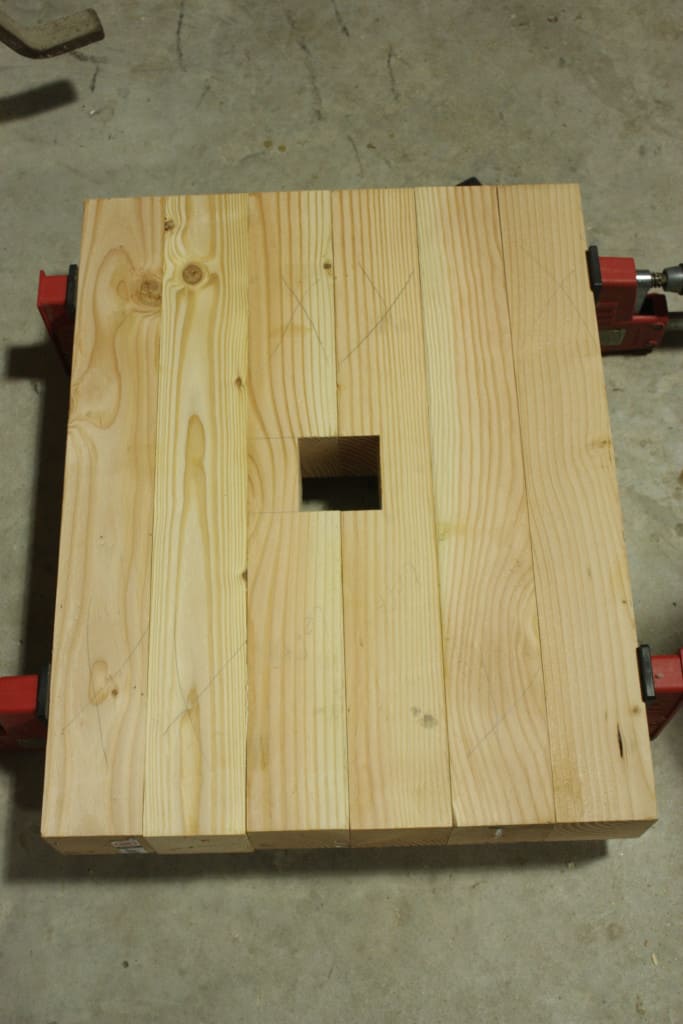
Now that the stretcher was ready to go, we could glue up the sides. The hole for the stretcher was cut before we glued them up! After slimming the stretcher down, it measured 3″ x 3″ so, on each middle board of our legs, we made a bunch of 1 1/2″ deep cuts on the table saw with a regular blade until it looked like so!
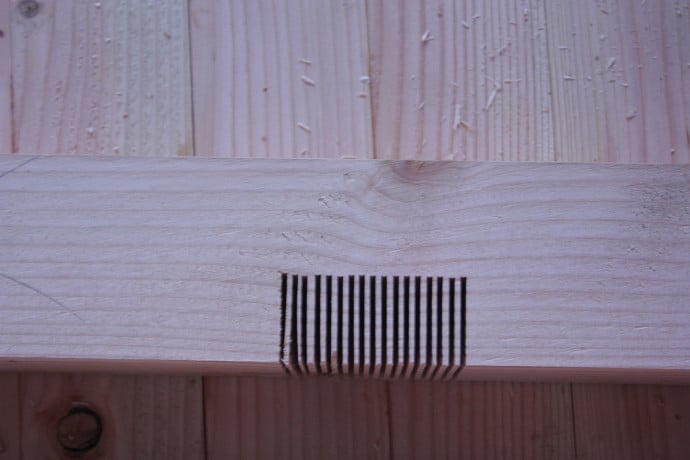
We then just took a chisel and cleaned out this area. I had no idea using a chisel could be that fun!! Lol! It really was!!
Next, we checked to make sure that when clamped together the stretcher still fit, and it did, so we glued those puppies right up!
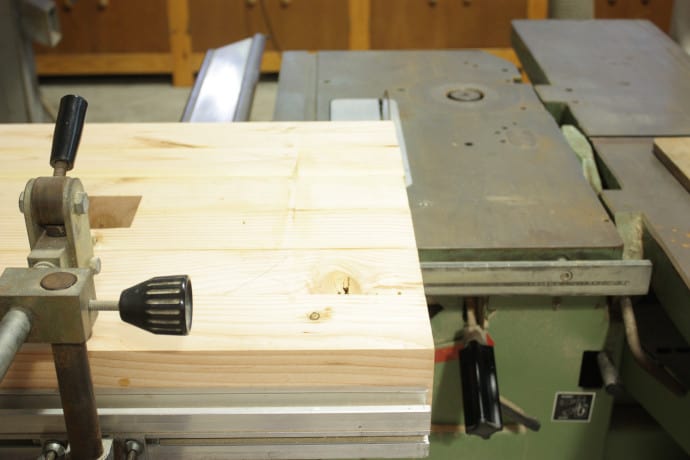
After letting the glue dry overnight on the legs, we were able to trim them down ever so slightly to even up the ends on the table saw…we ran it through one way and had to flip it over and run it through again… too bad the tabletop was a little too large to trim this way!!
Making the Wedge Tenons for the DIY Dining Table
Now we had some tedious work to perform on the stretcher…if it was not for my Dad insisting that we do this the ‘right’ way, I would have just taken the 4×4 and cut it at 42 1/2″ and used a Kreg Jig HD![]() (this particular Kreg Jig is made for larger wood such as a 4×4) to connect it the legs of the table, and then place two small slices of the 4×4 on the outside of the legs to look like the way we made the table but without so much complication!
(this particular Kreg Jig is made for larger wood such as a 4×4) to connect it the legs of the table, and then place two small slices of the 4×4 on the outside of the legs to look like the way we made the table but without so much complication!
But, since my Dad and I were spending some quality time together 😉 I went ahead and let him have his way, and we did it the ‘correct’ or as I say, complicated way!! LOL!!
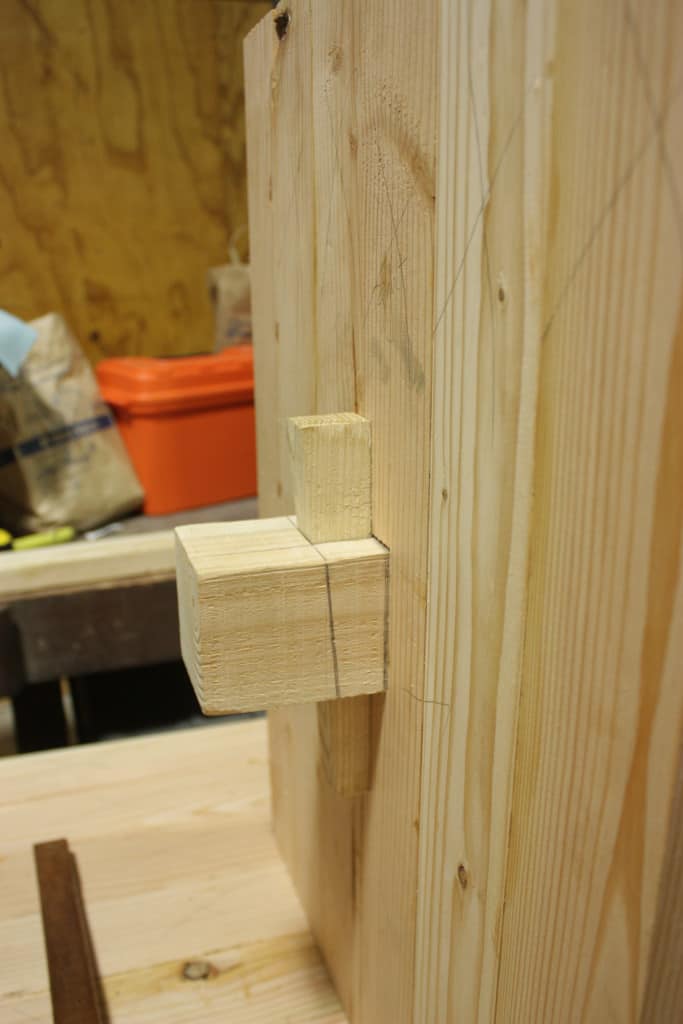
First, we took some scrap wood and cut the two keys or wedges. They are roughly 8″ long, they have to, of course, be angled to wedge just right into the hole, there were no specifics to our exact angle or anything, we just cut them at an angle that looked good! Here’s what the key looked like.
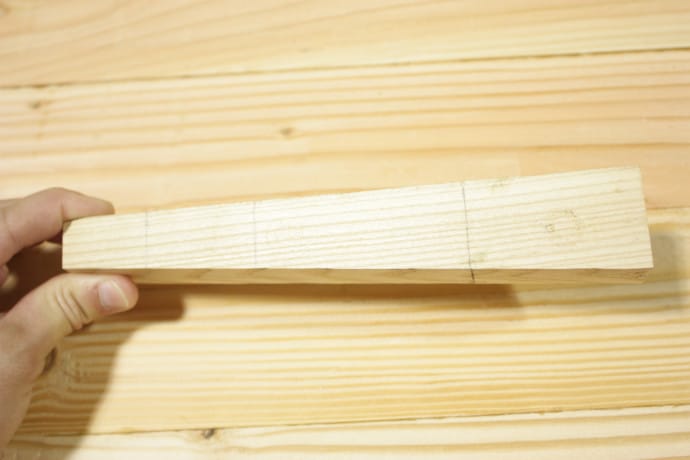
We drew the lines to show where the two ends would be showing past the stretcher, the two to the right of the photo are the actual ones we used, the lines are important because when you mark on your stretcher in the next step, you will need to line these up with the edge of the stretcher!
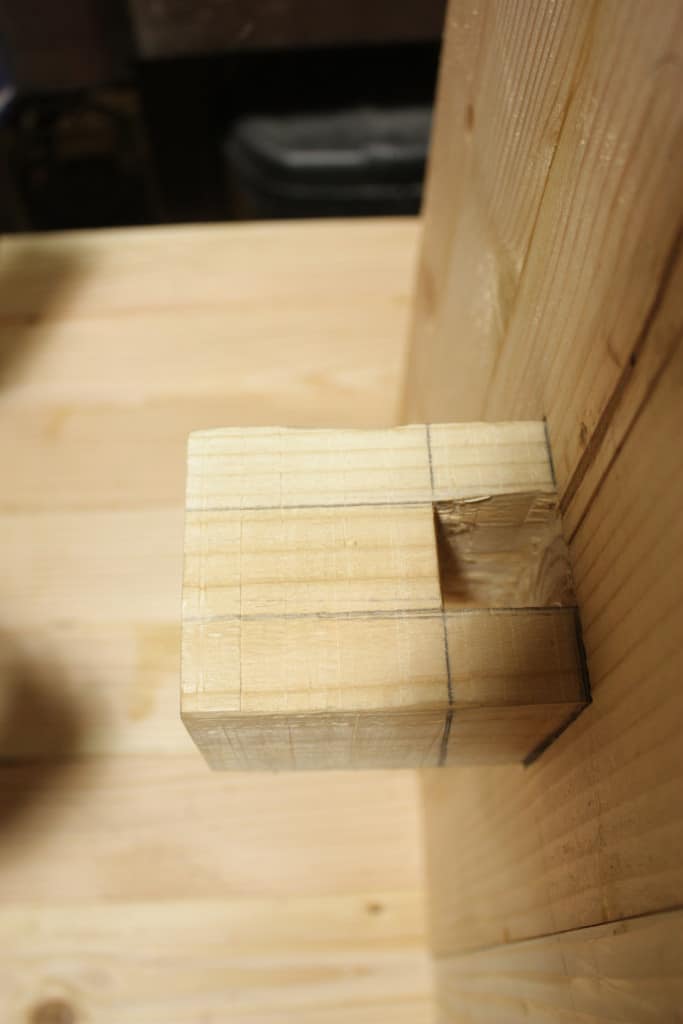
Next, we had to create a hole in the stretcher that this could be wedged into! We placed the stretcher into the legs and marked them where it came out of the legs.
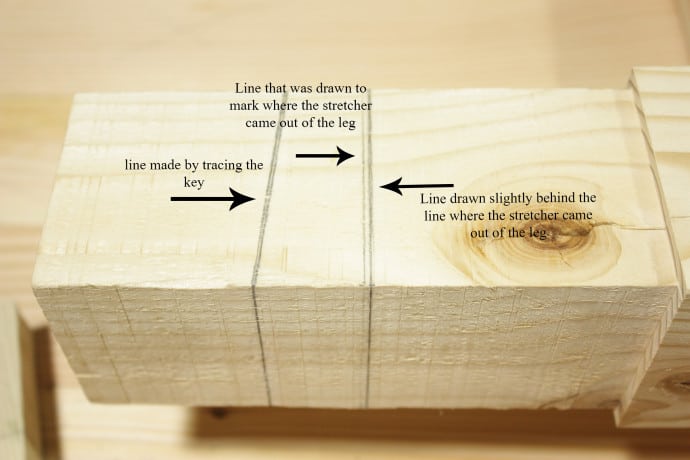
This picture above is of the side of the stretcher…the top of the stretcher is what you see at the bottom of the photo…anyway, of course, I don’t have a photo of one of the most important steps that sound really confusing…even though it isn’t!!
So, you need to lay your key on the stretcher with the straight part to the dark line(to the far right) and also line up the lines that were drawn on the key, then trace the angle of the key which makes the angled line you see in the photo! I used this photo and drew the key on top of the picture to show you!
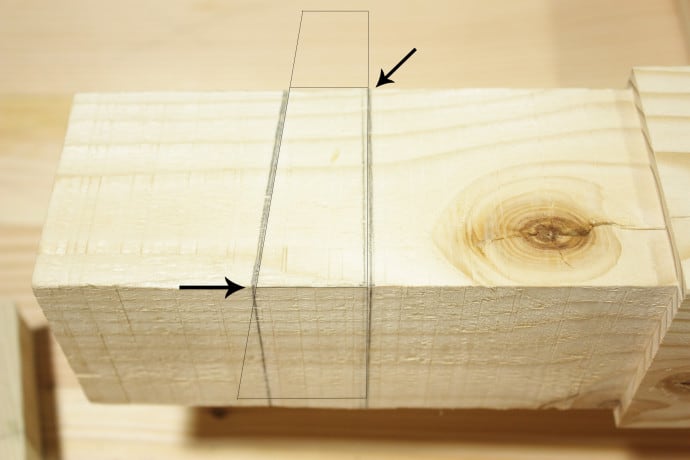
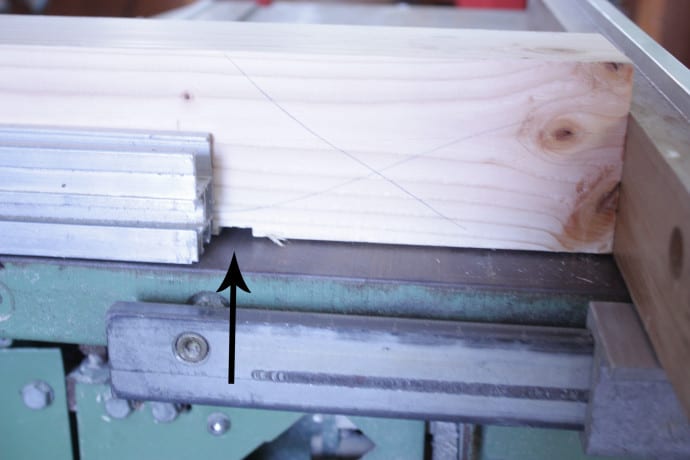
The arrows are showing how to line the key up with the lines we drew earlier on the actual key! Now on the top of the stretcher, a line needs to be drawn connecting the sides with each other…drawn in between the two arrows below!
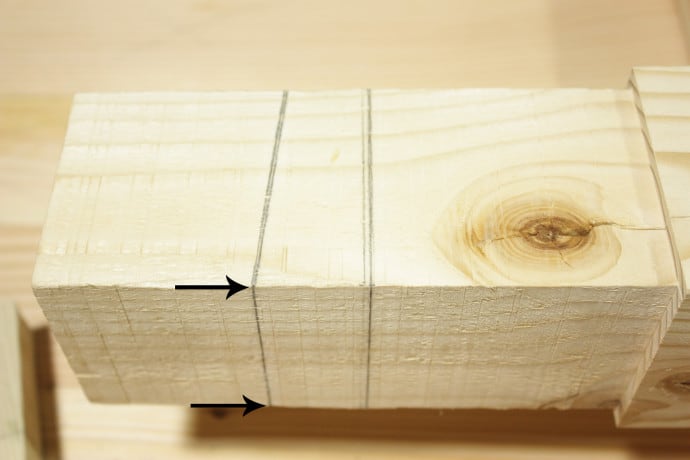
The same thing needs to be done across the bottom as well, it will be much more narrow between the bottom lines of course! I hope that all made sense!!
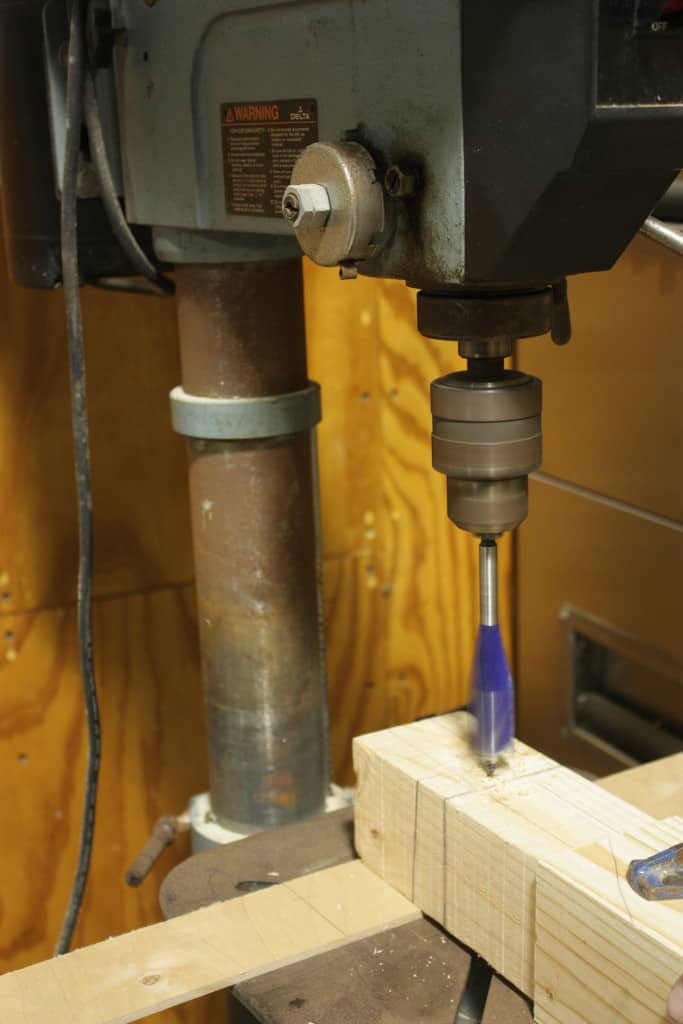
Now let’s get a hole drilled so we can get this baby tackled already! Ha! So, you drill a hole from the bottom, we used a 1″ drill bit on the drill press to make sure it was straight, but if I would have been in my own garage, I would have just used the drill. So, after listening to my Dad tell me over and over that he didn’t like using the cheap drill bit we had, I talked him into using it anyway and what do you know…it worked just fine!! Like I knew it would!! Lol!
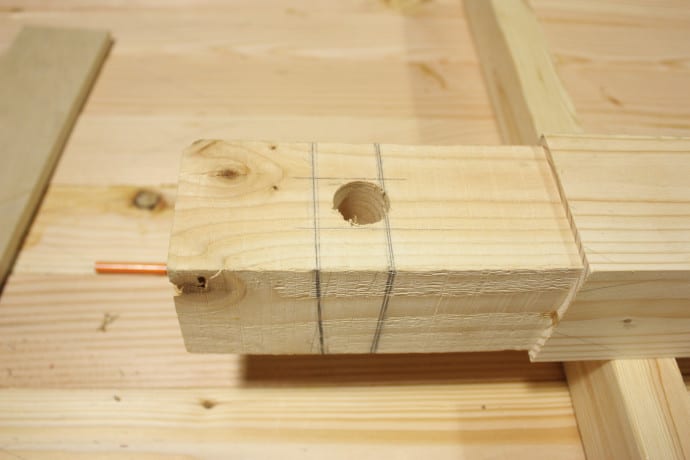
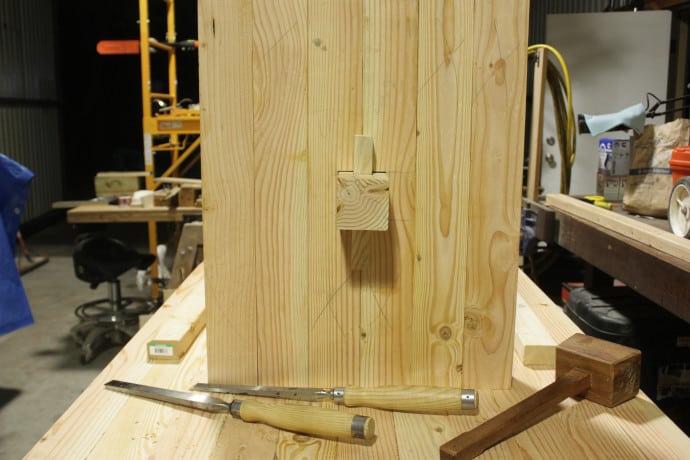
Now chiseling out the rest of the hole, my Dad obviously didn’t trust me with his fancy chisels because he took over and did this step…I’m not complaining because there is no telling how it may have turned out with me hammering those ginormous things!! LOL!! Before chiseling the hole we laid the key long ways down the front of the stretcher to get the line you see in the pic below…this was to ensure we didn’t chisel larger than the width of our key… finished chiseled hole looks like this…
Now you can hammer those suckers in there!! Ooh!! That was a magical moment and full of excitement!! I felt as though we were done! Even though that wasn’t the case!! Haha!!
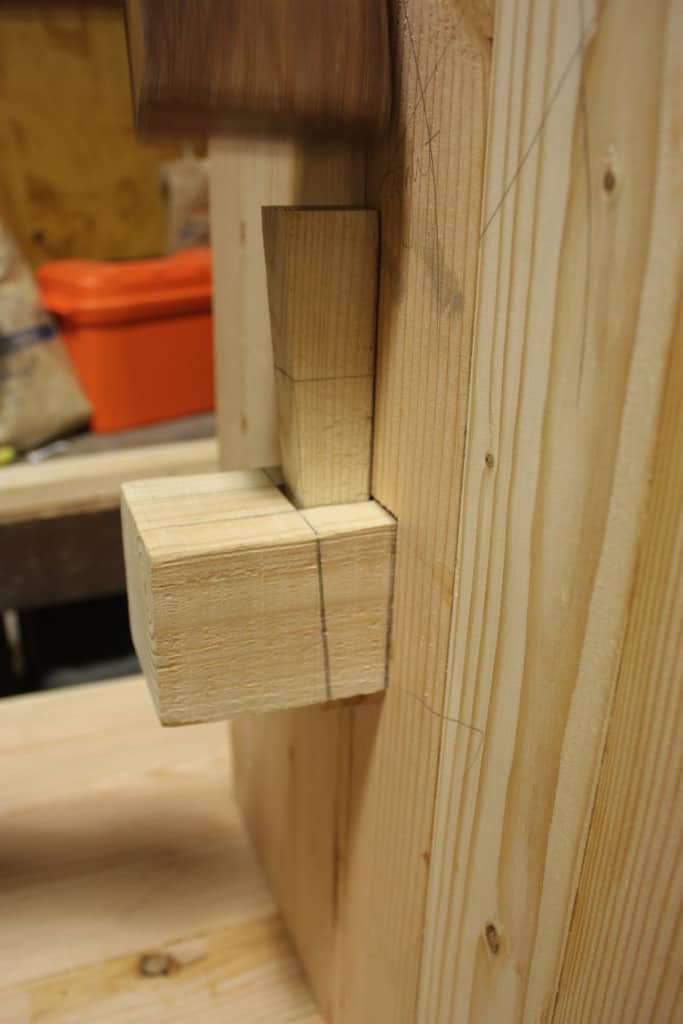
Woohoo!! Look at how awesome that looks!! Well, another nit-picky thing of mine would be that the key should be a little shorter! But oh well now!!
Well, don’t get too excited just yet…there is more…but don’t get discouraged because it’s not too much more!! Do you see my mixed emotions at this point in this project? Lol!!
Finishing the DIY Dining Table Top
Alright, so the base is made and it’s time to finish the top! We hand planed the top and it was some kind of workout but it was a lot of fun as well! I just need to hand plane a table every day and I will stay in tip-top shape! Lol! My Dad and I took turns planing and when one person felt like they were going to pass out in the 103 degree heat, we would hand it over to the other…if he wouldn’t have been there to share in the work it still would not be done more than likely!!!
So once the top was all nice and level, we belt sanded it, and oh how ecstatic I was to see the tabletop smooth as butter…and, of course, I didn’t get any pictures during this process! And this is where I stopped and left the project sitting in my Dad’s shop for 6 months…okay maybe 5, and then one day I decided that I was being ridiculous and I went and picked it up to bring it home and finish it once and for all!!
After bringing it home, I then had to bite the bullet and trim the edges of the tabletop to be nice and even…the tabletop being 3.5″ thick, didn’t really leave me a simple saw option that could cut through it in one swipe, so I chose to use my circular saw and flip the table over and cross my fingers that the two swipes matched up!! I had opposition from everyone telling me it wasn’t going to work, but somehow it worked perfectly!
I set my Bora Clamp to make sure I was getting a straight cut, I love this clamp in times when my Kreg Rip-Cut![]() won’t work, and placed painter’s tape along the edge to avoid splintering as much as I could. I really needed it to not splinter because, in all my heehawing around trying to figure out how I was going to cut the edges, I got antsy and stained the top of the table before cutting!! Lol!
won’t work, and placed painter’s tape along the edge to avoid splintering as much as I could. I really needed it to not splinter because, in all my heehawing around trying to figure out how I was going to cut the edges, I got antsy and stained the top of the table before cutting!! Lol!
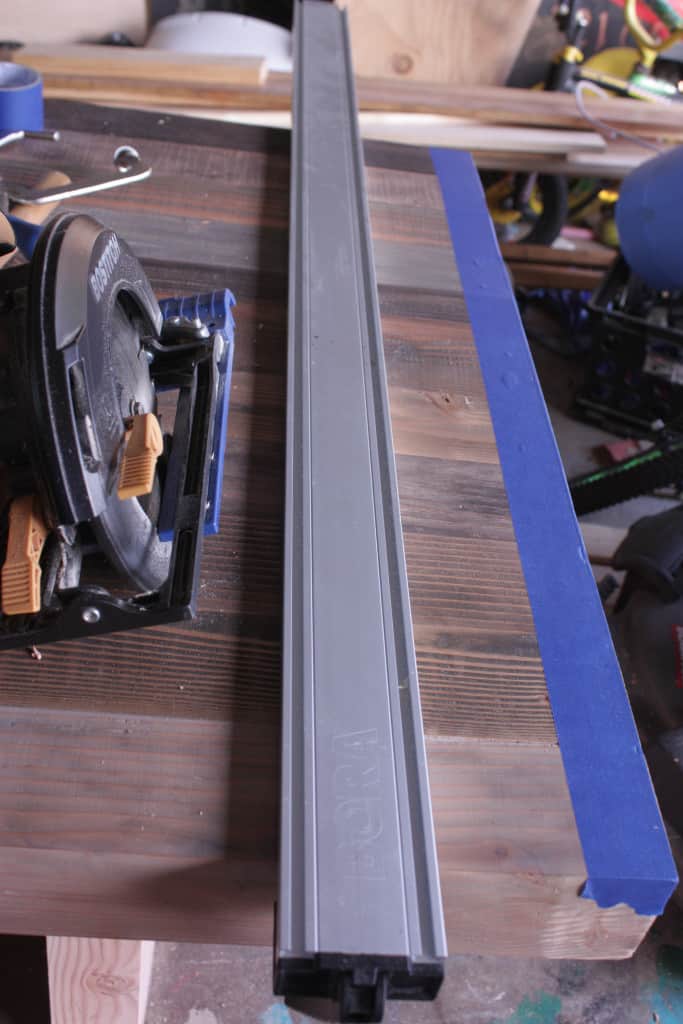
Lucky me…there was not really any splintering!! Then I just repeated this same step after flipping the table over!
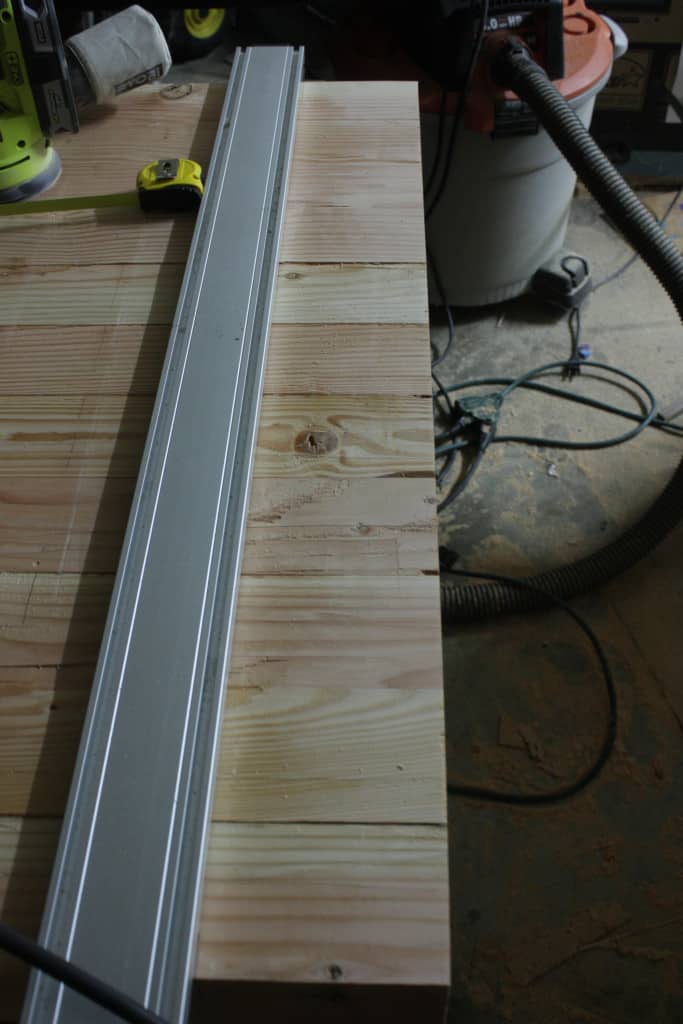
And then I wanted to PARTY after both ends of the DIY dining table turned out great!! Oh and after I took the picture above, I did place painter’s tape along the edge! Phew! That was a task that was haunting me for a while, and afterward, of course, I was like, “Why, did I wait so long to do that?”
Now, I just needed to figure out a way to secure the base to the table…I decided after sitting on one side of the table without having anything secured and it didn’t budge, that I was okay with it only having minimal attachment!
Attaching the Table Top to the Table Base
After examining West Elm’s version of the table once again, I saw that there were boards encompassing the top of the leg, I figured this would be perfect to keep the tabletop from sliding around but yet I would not actually have to attach the top to the base! So I took 2×3 boards and framed them around the leg of the table, screwing them into the tabletop! I used my countersink drill bit and 2 1/2″ Kreg screws to attach!
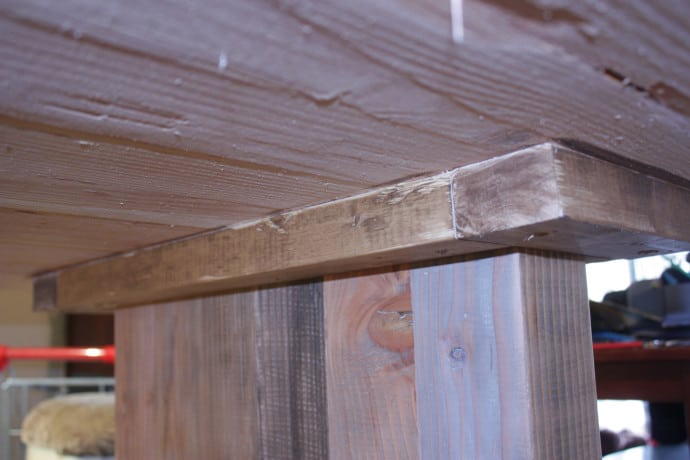
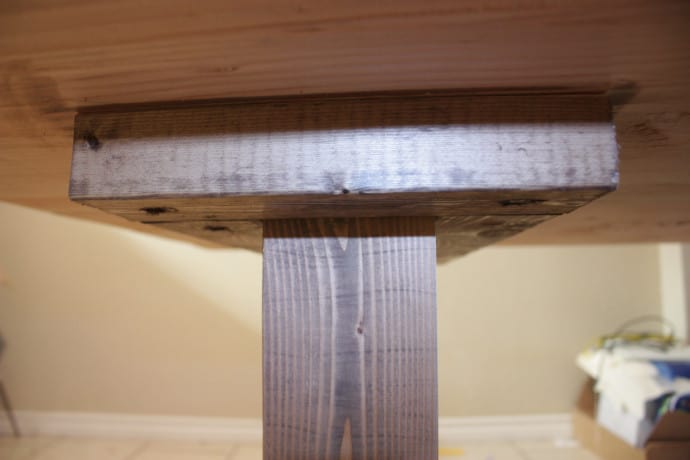
You can always shoot screws through the 2x3s and into the legs to make sure it is secured!
At this point, all that was left to do was stain the rest of the table base!! If you are interested in the way I distressed the table, and the staining process here is the Faux Pallet Wood tutorial!

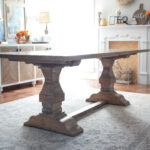
If you love this Emmerson DIY dining table, you probably love the rest of the Emmerson collection at West Elm and are interested in the buffet that matches the table you can see the plans for it at Ana-white.com!

Thank you so much for checking out my post! I’m off to build and shop for more items for this room! If you have any questions or comments feel free to ask away below! I hope you all have a HAPPY NEW YEAR! Thank you all for following along on my DIY journey!!
Happy Building!

Want to save this Emmerson DIY dining table for later? PIN it!
Any concern over the table dipping in the center over time since there is no center support across the width of the table top? I’m using your plan for my new table.
Hey Jon!! I have been using the table now for almost a year and haven’t seen any changes what so ever to the table top!! 😉 The only reason I am not concerned about the middle dipping is because it is a pretty short table, and so there isn’t over 48″ inside the legs, and the table top being constructed of 4x4s means there shouldn’t be a need for extra support, unless you were going over six feet and that’s really still playing it safe! If you are concerned, you could always place some extra supports under the table top where they wouldn’t be seen, it sure wouldn’t hurt anything!! I hope all goes great with your build and would LOVE to see it when you get it done!! Thanks!!
Thanks. Makes sense. Whew, my first efforts resulted in a not-so-flat or square top. I have to redo that part. 8 ft long 4x4s are so massive! Hard to mill them on a entry level equipment!
Awesomely beautiful table! And excellent tutorial!!!!
Thank you so much Sadie Mae!!! I appreciate your sweet comment, I’m not sure how I missed it!!! Made my day!! 😉
Hey Cara! Great Job!!! I have been wanting to make my own dining table for quite a while. Ive given it lots of thought and settled on the Emmerson stlye. So Stoked that you posted your table and directions!! 🙂 Thank you for posting! Question, I want to make my table 80″ long and 40″ wide – would you mind helping me with correct measurements on the cut list? Thank you so much!! 🙂
Hey, i am currently doing furniture making in Australia. I just finished my certificate in cabinet making a year ago. So, as a girl doing woodwork, i was super excited to find your blog!
Just a hint for the clamping, i don’t know if you know this. A good way to stop cupping/bowing in wood when gluing and clamping is to put half the clamps on the bottom and half the clamps (in between the ones on the bottom) over the top.
We do this at work all the time, and it works brilliantly!
Love what you do!!! Keep up the awesome work 😀 you are brilliant!
Hey there Ashleigh!! Thank you so much, I am so excited you found my blog as well!! And congrats on your cabinet making certificate, that’s really awesome!! I laughed to myself as I read your hint on clamping, just today on Instagram I was reading someones tip to another person and that was it…to make sure and clamp top and bottom! I thought, wow, I have never heard that…I need to try it, and then logged into my blog and look what great advice was waiting for me!! LoL!! Thank you so much for taking the time to leave me a wonderful tip, I surely appreciate it!! Hope you have a great evening!!