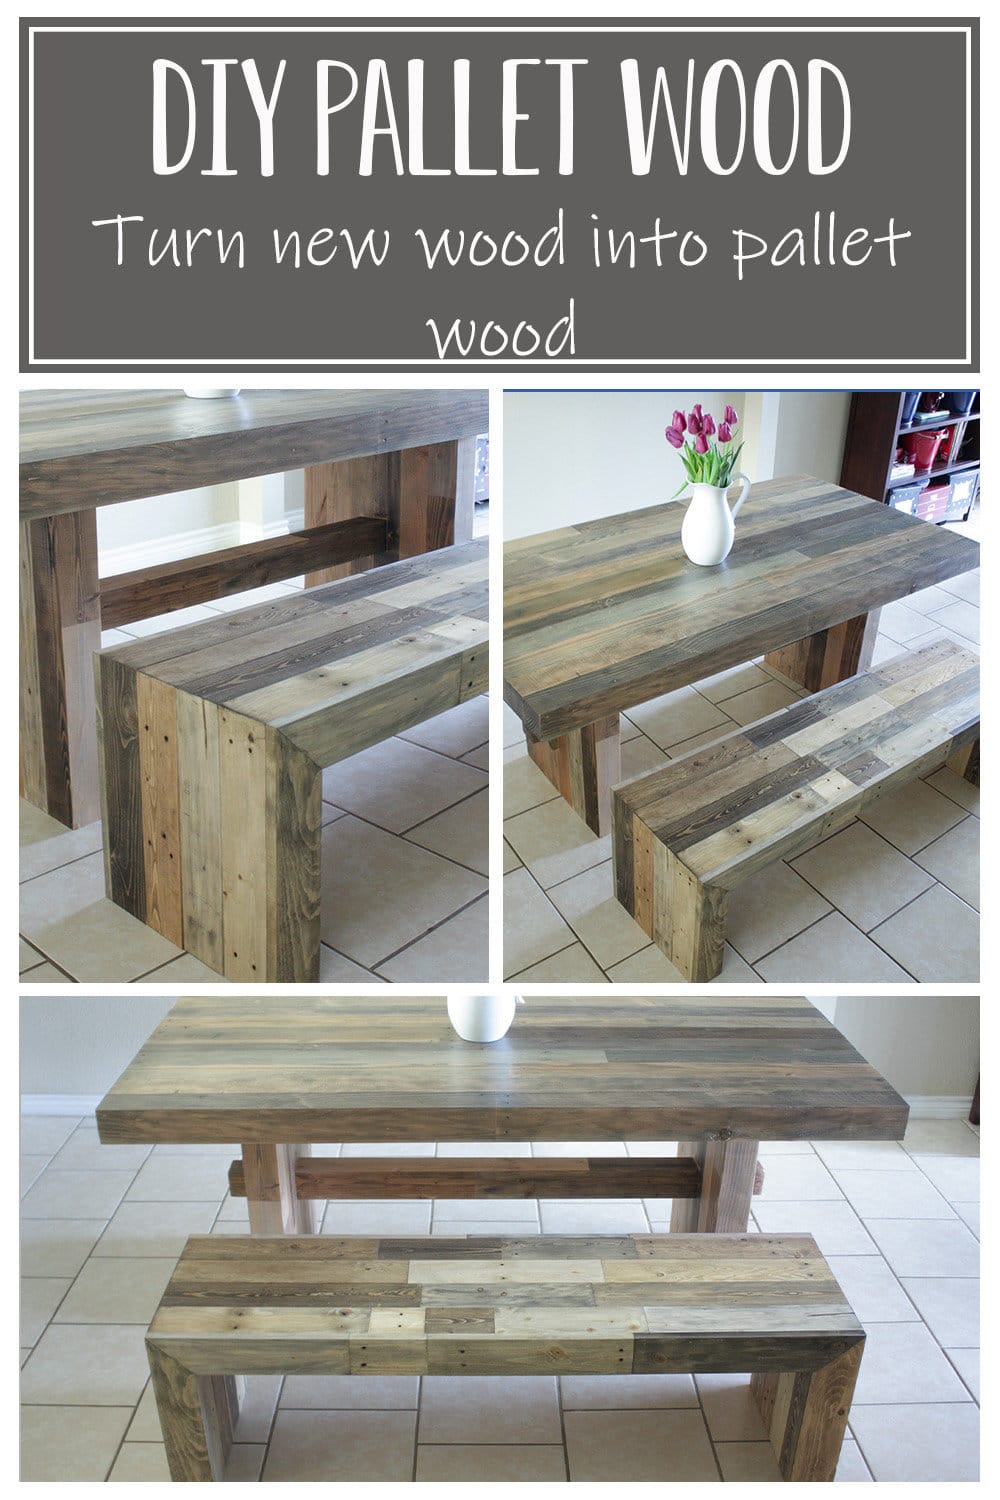
DIY Pallet Wood
Pallet wood is really popular to make furniture and home decor out of! Sometimes though, you may not have pallet wood readily available or you don’t want to have to go through the extensive task of disassembling the pallets to get the wood, but you still want the unique look of pallet wood furniture! Well, you can make your very own DIY pallet wood!
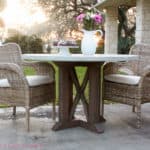
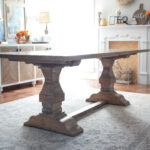
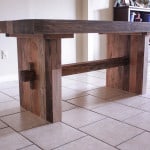
Isn’t this tabletop amazing? It is made from off-the-shelf 4×4 lumber! Want to build this table that I made DIY pallet wood for? Got you covered with the step-by-step plans for the DIY dining table as well!
The pine that I used on this table was a little pink looking…which made me have to go a little darker than I originally wanted because when I tried to leave it a light color it took on a pink hue! I have been told the pictures do not do it justice!!

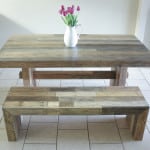
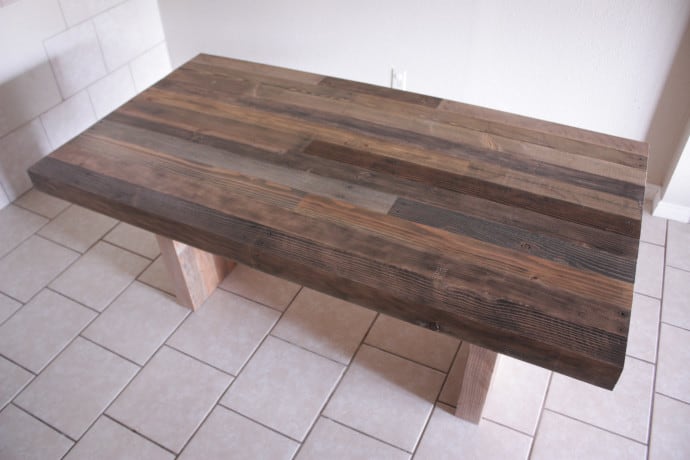
Here’s the table once I finished the Emmerson DIY dinging bench to match it!
A few things I would change though would be to do more ‘pieces’ on each board of the table to match the bench! I was afraid I was not going to like the three pieces on each board but I now think the more, the better! I was able to make many of the changes on the bench and that may just tempt me into rebuilding the table with 1x4s over a frame…but I’ll just try to enjoy all the time and hard work I put into this one a little longer!! Lol!
Gathering Supplies to Make DIY Pallet Wood
Making DIY pallet wood is a really simple process and luckily because pallets come in so many colors, sizes, and condition, you can use most stain and destruction items you already have on hand! This is an inexpensive way to use up that scrap wood pile and use supplies like stain you have leftover from other projects to keep costs minimal!
Materials Needed for DIY Pallet Wood:
NOTE: Amazon links below are affiliate links! Affiliate links are links that generate a small commission at no extra cost to you, should you make a purchase after clicking one! I always appreciate you shopping at my links as it helps me keep awesome free content coming your way! Side note: you do not have to make a purchase of the item you click on, any purchase of any item made after clicking a link counts!
- drill
- angle grinder
- wire brush drill attachment
- sanding disk for angle grinder
- metal punch
- 1/4″ drill bit
- Painter’s Tape
- stain colors of your choice – I would recommend at least 5 colors
Making the DIY Pallet Wood
To get started, I wanted to distress the table but in order to make it look like pallet wood, I felt each board needed different distressing. I tried various techniques and found some I LOVED and others that I may not try again! I used wire brushes in my drill, a punch to make lines, and a sanding disk for the grinder! I also drilled holes in certain areas with a drill bit to look like old nail holes in my DIY pallet wood but I am still going to try hammering in some large nails to see the difference but I haven’t done it yet, I will update when I do!

The wire brush made excellent marks in the wood and used in various directions created subtle differences in the distressing, but the stain couldn’t penetrate some areas of this method because the lines were so thin. I ended up really liking how some of the raw wood shows through where the stain didn’t penetrate!
Making DIY Pallet Wood for the Dining Table
I didn’t take any pictures of the distressing while I was first doing it, I will mention the stain colors on the boards as I show you pictures, even though of course, they were raw wood when I did the distressing!
Here is the wire brush used just side to side on the board! (Stain color: Ebony…every so lightly rubbed slowly, almost like how you use a black crayon when you don’t have a gray! Haha!)

Here is the wire brushed kind of swished at a curved angle. (Stain color: Jacobean)
Here is the wire brush running with the grain of the wood. (Stain color: Banister Beige with Ebony ever so slightly rubbed on top)

Next I tried the punch, I used a square and just drew lines across the board all the way down. I really liked this methos a lot in making my DIY pallet wood, but in some areas I had the same problem as with the wire brush, the stain couldn’t penetrate all the way down. So depending whether you are okay with that or not will determine if you would like it this way!
I also went over the lines with the sanding disk to make the deeper lines not so obvious!
(Stain color: Sunbleached with Golden Oak over it and then a little light swiping of Ebony)

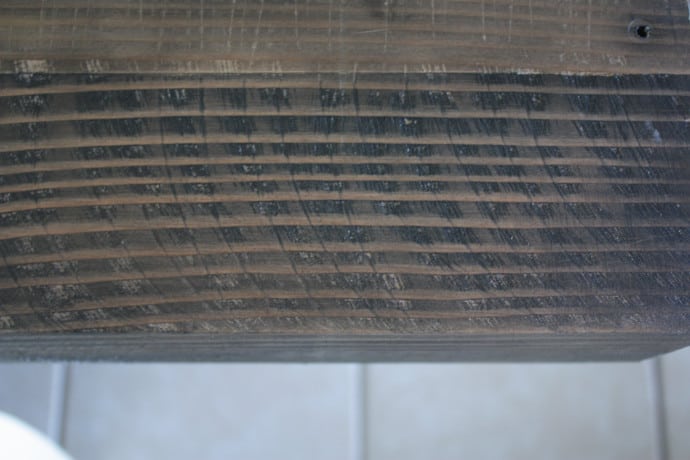
Last, and my favorite method, was the sanding pad for the grinder! I love the light lines it put in the boards, just enough to darken the stain in some areas but not deep enough that the stain couldn’t penetrate! I didn’t actually use the angle grinder, I just held the disk in my hands, on it’s end, and scraped it across the boards.
It was faster than the punch because you were basically getting three lines every time you would make a drag across the board, and I didn’t use a square I just tried to keep them as straight as I could! (Stain color: Blend of Golden Oak mixed with very little Ebony)

So, once I got distressing to a place that I was happy with, I was able to start the staining process! Woohoo!!
I gathered all my stains, I used a mixture of Varathane, Minwax, and I even used one from Sherwin Williams! I wasn’t all that crazy about the color I bought from them, but I really liked that they actually mix the stains for you in house, so you can actually adjust the color. For instance, the Banister Beige I bought from them was a little too yellow, so I can have them add more black and decrease the marigold next time to make it just right! I am very excited to see where this may take me!! Lol!!
To name the stains, from top to bottom, left to right, Early American, Weathered Oak, Special Walnut, Golden Oak, Sunbleached, Ebony, Banister Beige, and Jacobean! I wish I could show you every board and tell you exactly what I used but if you have a particular board just ask below and I will do my best!

After gathering all my stains, I had to grab three rolls of painter’s tape, yeah three!😳 I could not believe the amount of tape, and it felt like I was being so wasteful, but I had to do what I had to do!! Also, I must add that this is in no way a sponsored post but I did like 3m painter’s tape far greater than the Duck Tape brand painter’s tape! The small amount of bleed I got in two places was when I was using the Duck Tape brand. Just in case you wanted to know!!
And the last, heavy-duty piece of equipment I used when staining this table was old t-shirt pieces as my stain rags! Lol!
So of course, as you probably guessed, I had to tape off the boards as to how I wanted to stain them. This would have been much easier to just stain the boards individually before gluing them all together but once we glued the table top together there was so much glue on the wood, and we still had hand planing to do and belt sanding after putting it together so the staining pretty much HAD to be done after building!
So, I just started on one side and worked my way around without any rhyme or reason. I would dip my t shirt in a stain and rub it on a scrap board to get most of the liquid off of it so as to not get any bleeding! I would just rub and rub to get the desired color! Since I was rubbing the stain in, it was pretty much dry within a few minutes of staining each piece, so you could quickly move on from board to board!
I didn’t take the table base apart to stain it either, I just did the best I could to work around the stretcher, although it probably would have saved me a ton of time to just take it apart!! Lol!

Try not to look at the disastrous mess around the table!


I mixed colors at times and really just tried random things and figured if I was wanting to get the look of pallet wood I would need the wood to look old, used, and beat up as pallet wood is and so I really didn’t need to be cautious! When I finally convinced myself of this I really enjoyed the staining instead of dreading it!! I am pretty happy with the results if I do say so myself!!


I made sure to seal the table really well, I used Rust-oleum Poly in Matte! I love this stuff because number one, it is matte, there is only very minimal sheen to the table. And two because pallet wood isn’t glossy ya know, so my DIY pallet wood can’t be glossy!! And then the other great thing is that it is water based so it is not smelly and my boys actually helped me put three coats on this bad boy!
Oh and one other thing I love is that it dries really fast!! You can’t beat this stuff!!

I love when look down the table and catch a little glare!

So that was that!! Table was complete and ready to be used!!
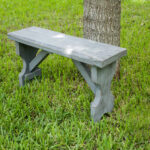
DIY Pallet Wood for Dining Bench
Since I finished the bench that matches the table, I wanted to share the way I made the DIY pallet wood for the bench as well!

I did things different on the dining bench by that it was 1x4s laid over a frame as I mentioned earlier in this post! The main difference in creating the DIY pallet wood is that they were able to be stained individually which seemed to save time.
The 1x4s were not planed and sanded a ton to make them a perfectly smooth tabletop so they didn’t have to be distressed either, they were pretty rough straight off the shelf!

So on the bench I was able to drill “nail holes” and stain them as I added them to the bench and that was pretty much it! LOL! I think the bench look more like pallet wood, but at the same time, the bench is not as smooth as I would want the tabletop to be! There are pros and cons to everything I swear!🤣
Another thing with the bench is that it is all white wood instead of the pink of the 4x4s, so they stain completely different, and of course I like the more true colors of the bench as opposed to the tabletop but they turned out pretty great together and it’s only the nit-picky things that I am pointing out!
If you are looking for other pallet wood projects, check out how Ana White made her DIY pallet wood in this DIY Emmerson Buffet that matches this set as well! Now you can have a dining room filled with faux pallet wood and all DIY furniture!😉
If you have any questions or comments, feel free to leave them down below!! Happy Building!!

Want to save this DIY pallet wood tutorial for later? PIN it!