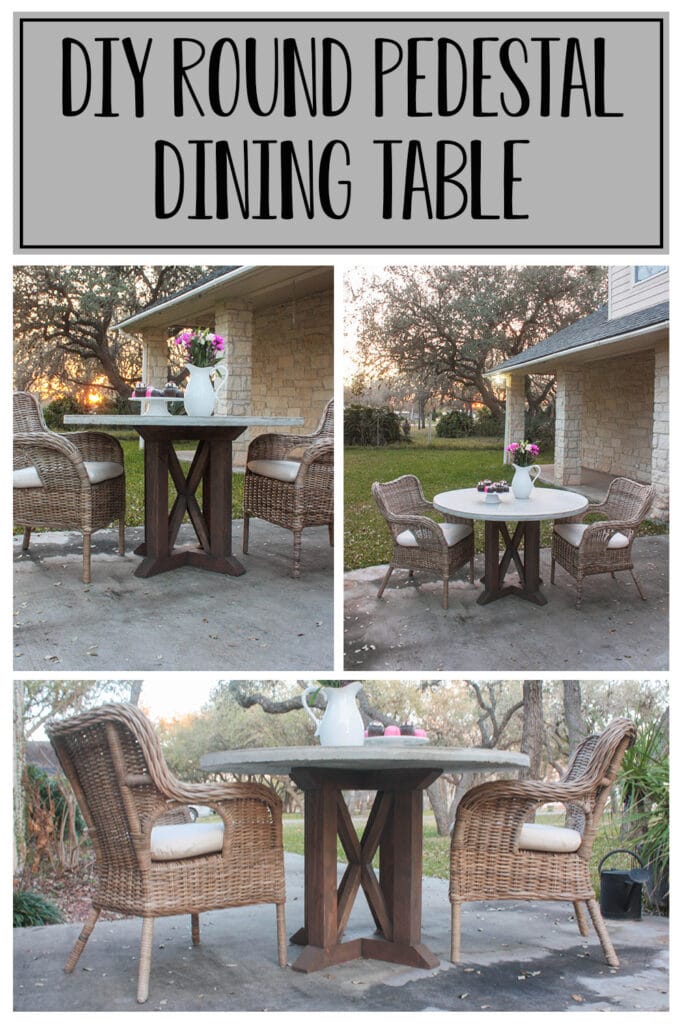
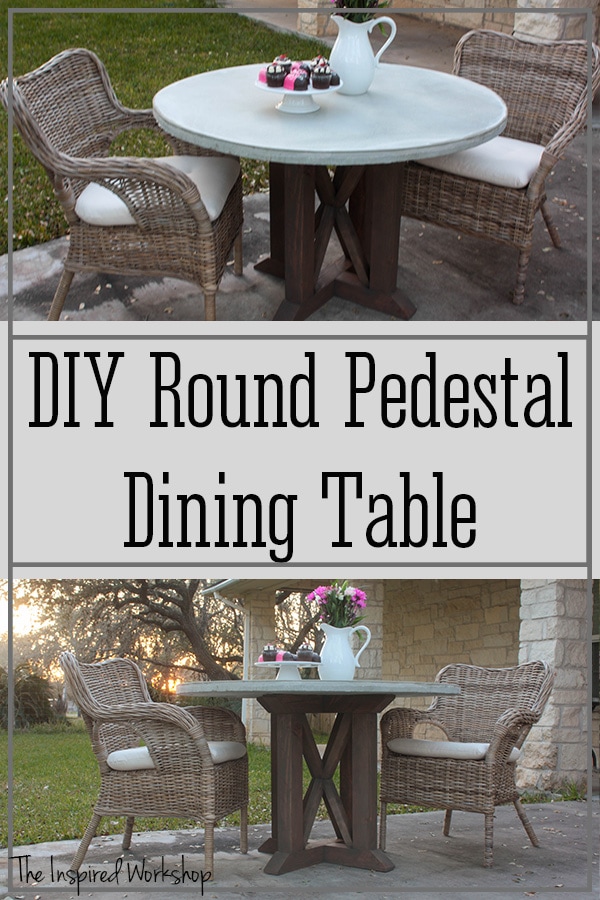
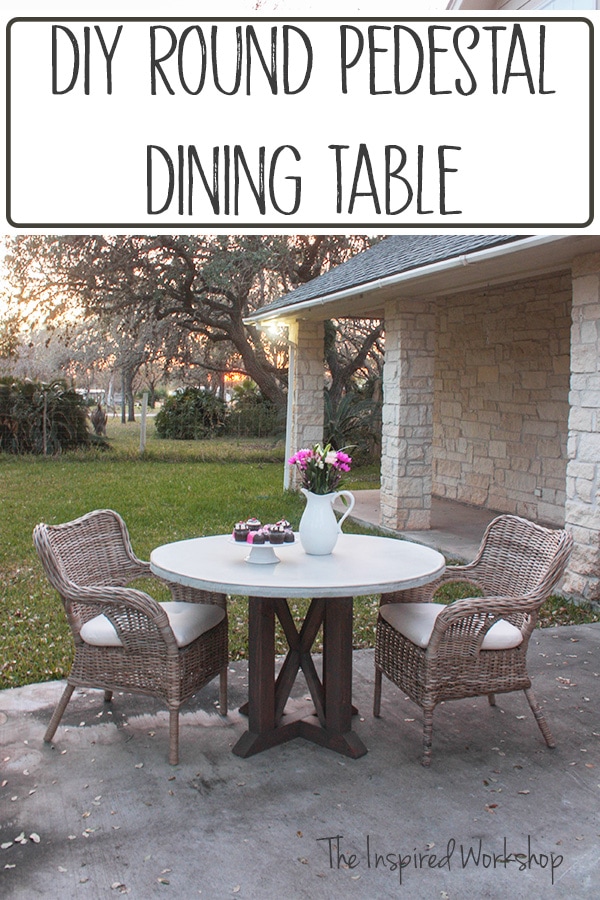
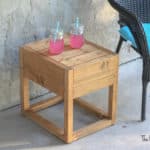
DIY Wood Pedestal Table Base
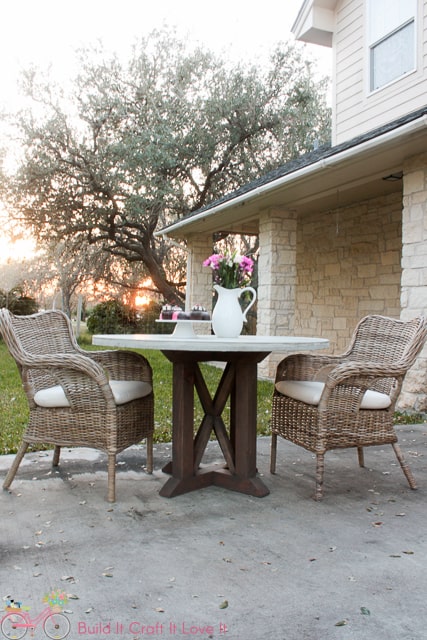
When you have a small space sometimes a round table fits better than a rectangular table, and sometimes you just like the look of a round table better than a square! This gorgeous DIY wood pedestal table base with X accents is the perfect addition to any porch or patio where there is limited space or the need for a small round table!
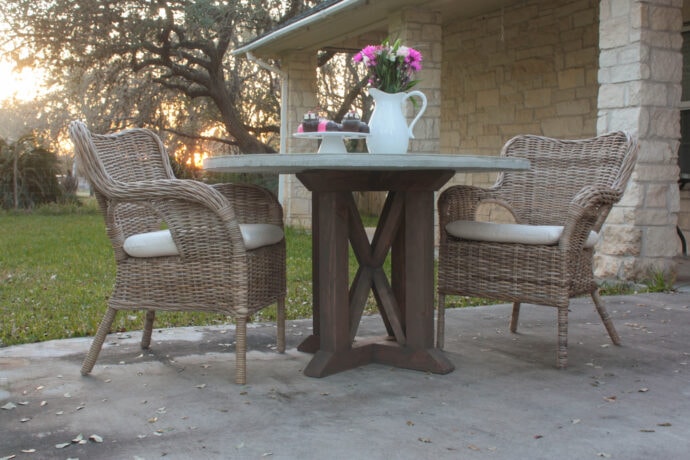
Isn’t this pedestal table base absolutely the best DIY project you have seen? Okay, okay, I may be biased since I love it, and I built it! Lol! But you have to admit, it is pretty nice?!
Anyway, as a way to challenge ourselves as woodworkers and bloggers, Sandra, who owns the blog Sawdustgirl.com has created a mentor group and is pushing us to try new woodworking techniques each month and giving us all the help and encouragement we need along the way! I couldn’t be happier that Sandra has taken us under her wing and offered to mentor us on anything and everything remodeling, woodworking, blogging, and more!
Sandra challenged us to use a wood joinery technique that was new to us! I chose the half-lap joint because I had this table in the back of my mind for months but knew to support the concrete top that I wanted to give it, I was probably going to need something a little bit sturdier than just pocket holes! Although I did still use them on the more decorative parts to keep them in place! Lol!
So if you want all the information on how I cut my half-lap joints, make sure and check it out on Sawdustgirl.com
BTW, If you would like to visit the blogs of the other bloggers that are in my mentor group here are their links…trust me, you won’t regret heading over and checking their blogs out…well, your project list may grow tremendously, but hey, it’s worth it!! 😉
Timisha – Toolbox Divas
Mindi – My Love 2 Create
Shara – Woodshop Diaries
Alright, now where was I? Oh yeah, telling you all about this little round pedestal dining table!🤩
I am slightly smitten with her!!😍
Alright, alright, I bet you are thinking, “Would you stop talking and show me how to build one?” I read your mind, right?😜
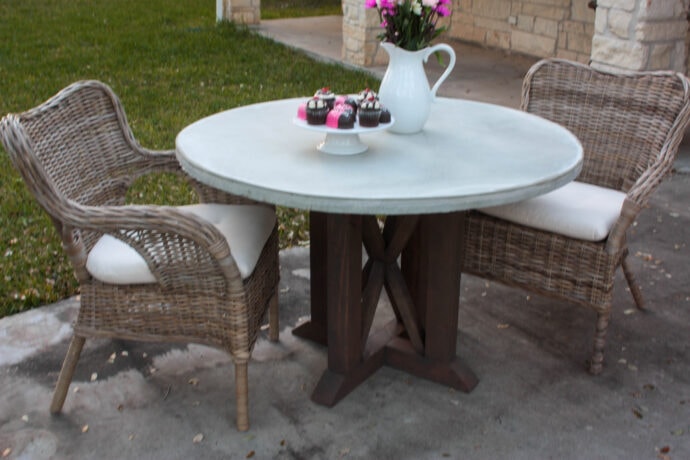
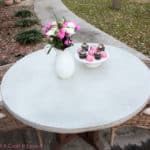
Well, here you go! I am going to break up the wood pedestal table base building from the concrete top, so if you aren’t interested in building the base or want the concrete top, here’s the link to the Round Concrete Tabletop Tutorial!
Free printable plans for the wood pedestal table base can be downloaded soon and will be found right here!
Gathering Supplies to Build the Round Pedestal Dining Table Base
This pedestal base cost around 45 bucks for the wood, and then another 45 bucks for the concrete, so all in all 90-100 bucks to build a beautiful round outdoor dining table that will make any backyard or patio look amazing! Plus, have you checked prices on outdoor furniture lately, it’s all pretty darn ridiculous!
Materials for the wood pedestal table base:
NOTE: Amazon links below are affiliate links! Affiliate links are links that generate a small commission should you make a purchase after clicking one, at no extra cost to you! The small commission helps me keep this little ole blog alive with new content and free plans! So I thank you in advance for shopping my links!😉
- 3 – 4x4x8
- 2 – 2x2x8
- drill
- miter saw
- table saw – if you want to rip the 4x4s down to 3×3
- 4″ screws
- countersink drill bit
- kreg jig
- wood glue
Cut List for the Wood Pedestal Table Base:
- 4 – 4×4 @ 27 1/2″ I ripped mine down to 3″x3″ instead of 3.5″x3.5″ (I used scrap pieces of 4×4 that I had, they were all already 27 1/2″ you can make these a little longer if you prefer, you have plenty of board for it)
- 4 – 4×4 @ 22 1/2″
- 2 – 2×2 @ 26 5/8″ (make sure and measure this for yourself, do not cut before putting the 4x4s together)!
- 4 – 2×2 @ your measurement – they were all ever so slightly different (make sure and measure this for yourself, do not cut before putting the 4x4s together)!
Building the Wood Pedestal Table Base
Alright, getting started on this wood pedestal table base, as I mentioned earlier, Sandra wanted us to step out of our comfort zones to try something new…you know how good I am at that?! Not good at all really!! Lol!! So I wanted to try a half-lap joint because I knew it would be the only way to support the concrete top by having the wood cross in the middle. I have an extensive post on cutting the half-lap joints on Sandra’s site and I suggest you take a look at that post if you haven’t ever cut half-lap joints! I’ll wait for you to check it out and come back!
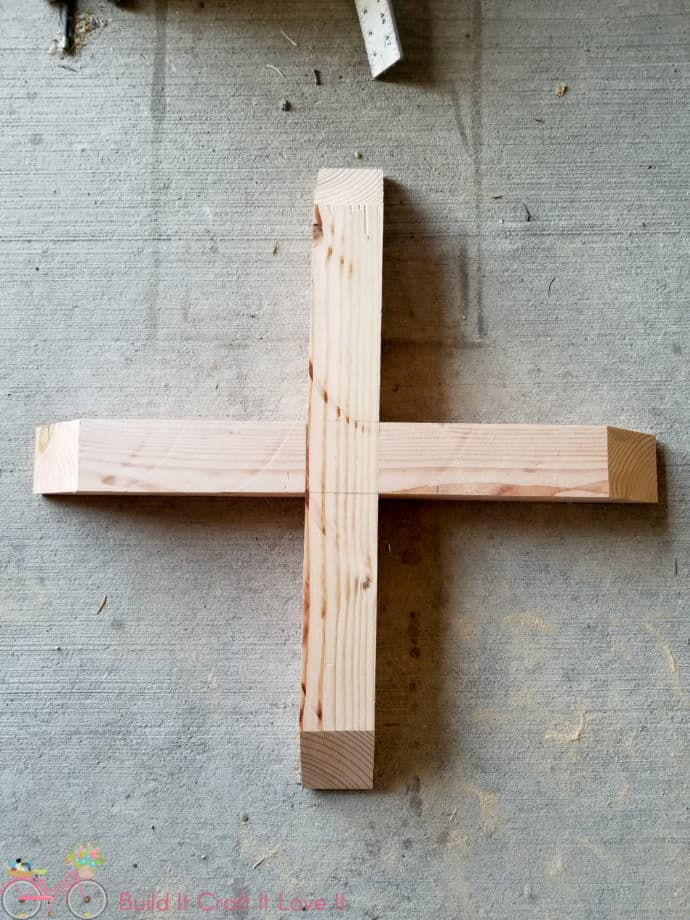
Okay, so now that you know how to cut a half-lap joint and where we used them, you will have two pieces that look like this!

And when you put them together they should look a little something like this!

I wanted to have angled ends so I cut them at 30 degrees off square I believe! Leaving a 1/2″ at the bottom uncut.

Make sure that when you make the angled cuts you cut the opposite sides, one goes upside down on the other, remember! Use ample wood glue to make this one strong joint!

Copy this same process again to make another X just like it! Then you will have a top and bottom to your table base!
Using the 4x4s @ 22 1/2″ I placed two in between the top and bottom of the table base, using 3 3/4″ screws and my handy dandy countersink bit to make sure the screws were not sticking up at all! I sat the legs back a 1/2″ from where the angled ended on the top and bottom.

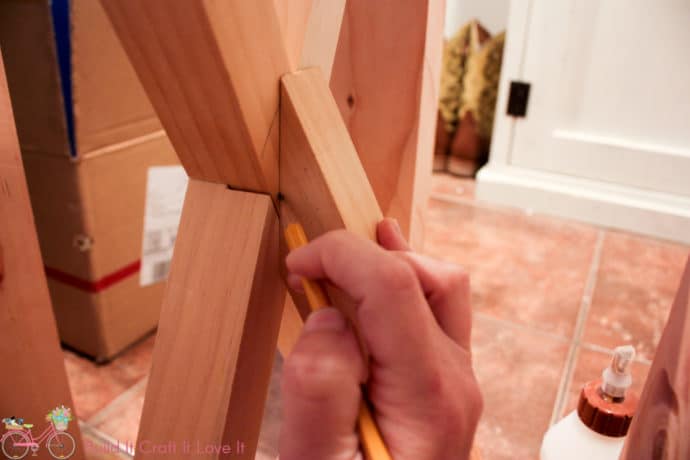
I only screwed in two boards at first to make it easier when cutting the first X. So once I had the legs in I measured for the Xs…make sure and measure your own piece as a slight 1/8″ off on where you placed your leg can make a difference in the size you need to cut your X!

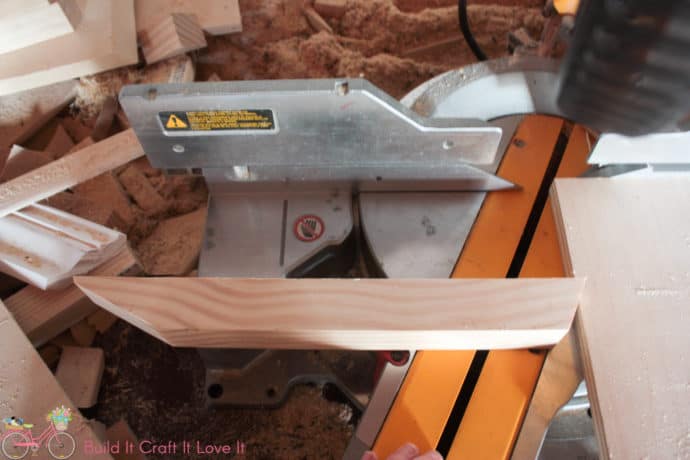
I forgot to take a picture while I was cutting the boards for the Xs on the wood pedestal table base…basically, I just did the whole, set the board up against the opening and trace the angles onto the boards, take it outside and find the angle using the miter saw! LoL! It works pretty well actually! I lost my paper with all the angles, and I actually built the base back in November…I’m pretty certain the angles were cut at 30 degrees off square but make sure and check it the same way I mentioned above!
This first X was half-lapped in the post I did for Sandra as well, so make sure and take another peek at that post if you need help!

Not bad for my very first angled half-lap joint, I’ll surely take it! I glued this in without any screws because I just couldn’t get any tool in this working space…so if you have a way…please share it with me!! LoL!!
Next, I added the other two legs and screwed them in, so I could cut my other X, this one did not get a fancy half lap though, I could not even wrap my head around how to make them all fit! So I pieced them together!

The four smallest pieces, of course, took me the longest to cut! 😬 Getting the angles right was not the easiest task! But I managed and now I can hopefully save you a few minutes by not having to figure them out! They are cut on one end at 28 degrees off square and the other end is cut at 62 degrees off square.
You will probably notice that your saw doesn’t cut 62 degrees off square, but it easily can but simply clamping a board up against the fence as I did in the pics below and turning your miter saw to 28 degrees off square!

Now, you have to meet the two pieces on each side and trim their angles a little! I just marked the middle of my other X to know where to trim it, it is cut at the same angle 62 degrees off square!

They will all look like this!
To attach all these pieces I used lots of wood glue of course, and one pocket hole on each end of the pieces (the ones touching the top and bottom, not the ones in the center!) I just clamped all the ones in the center with ample wood glue!

I gave the round pedestal dining table base a nice sanding (to get rid of all those burn marks, lol) and finished it in Briarsmoke by Varathane! I Love the color of Briarsmoke, it has a true gray-brown to it in real life, I know the pics look like it’s really brown, but it is much more gray than it looks, I promise!

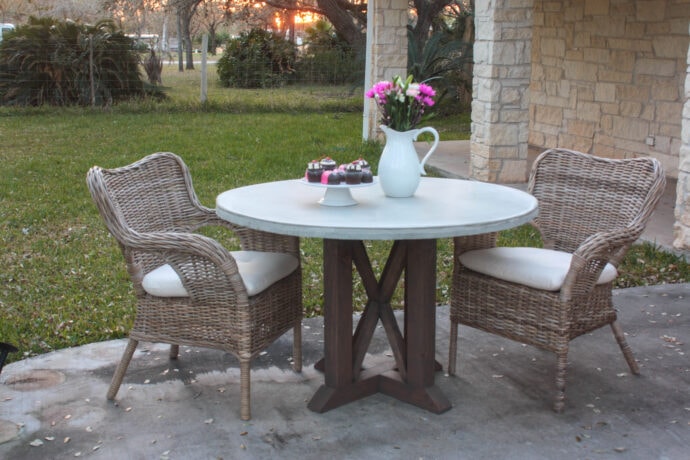
Didn’t this DIY wood pedestal table base turn out so beautiful?!
Don’t mind me, I’ll just be sitting here waiting on summer so I can have picnics on the front porch with my kiddos!! Lol!!
Get the instructions for the DIY round concrete top! And, If you are interested in other concrete projects I have done, here are a few you may want to check out!
Concrete Countertops for Kitchen
Apparently, I enjoy working with concrete! Lol! I didn’t even realize I had so many concrete projects, I even made some concrete Christmas trees, and concrete gnome stocking holders! Someone come to take the gray powder away from this girl!😏
I would love to see it if you build this wood pedestal table base! Hope you have a wonderful Wednesday!!
Happy Building!

Want to save this Wood Pedestal Table Base for later? Pin It!


Your table turned out awesome and I’m smitten too. I’ve missed about 10 goals so far this year too, so were — Twinsies! LOL I’m always so proud of you when you conquer a new challenge. Way to go your latest WIN!
Aww! Thank you so much Sandra! And if I’m gonna be twinsies with someone, I’ll happily be twinsies with you!! Lol!! I appreciate all the help and support that you are so graciously giving to all of us!! You’re the best!! 😉